The Many Moods of Cameras
This post is going to be a little bit different than some of the previous ones. This time I want to take a quick look at gear. If you’re in the market for a camera it can be overwhelming. While I can’t tell you what camera you should or shouldn't buy, I thought that it might be kind of fun to give a little insight into how I choose what camera I'm going to use based on how I'm feeling or what I'm photographing.
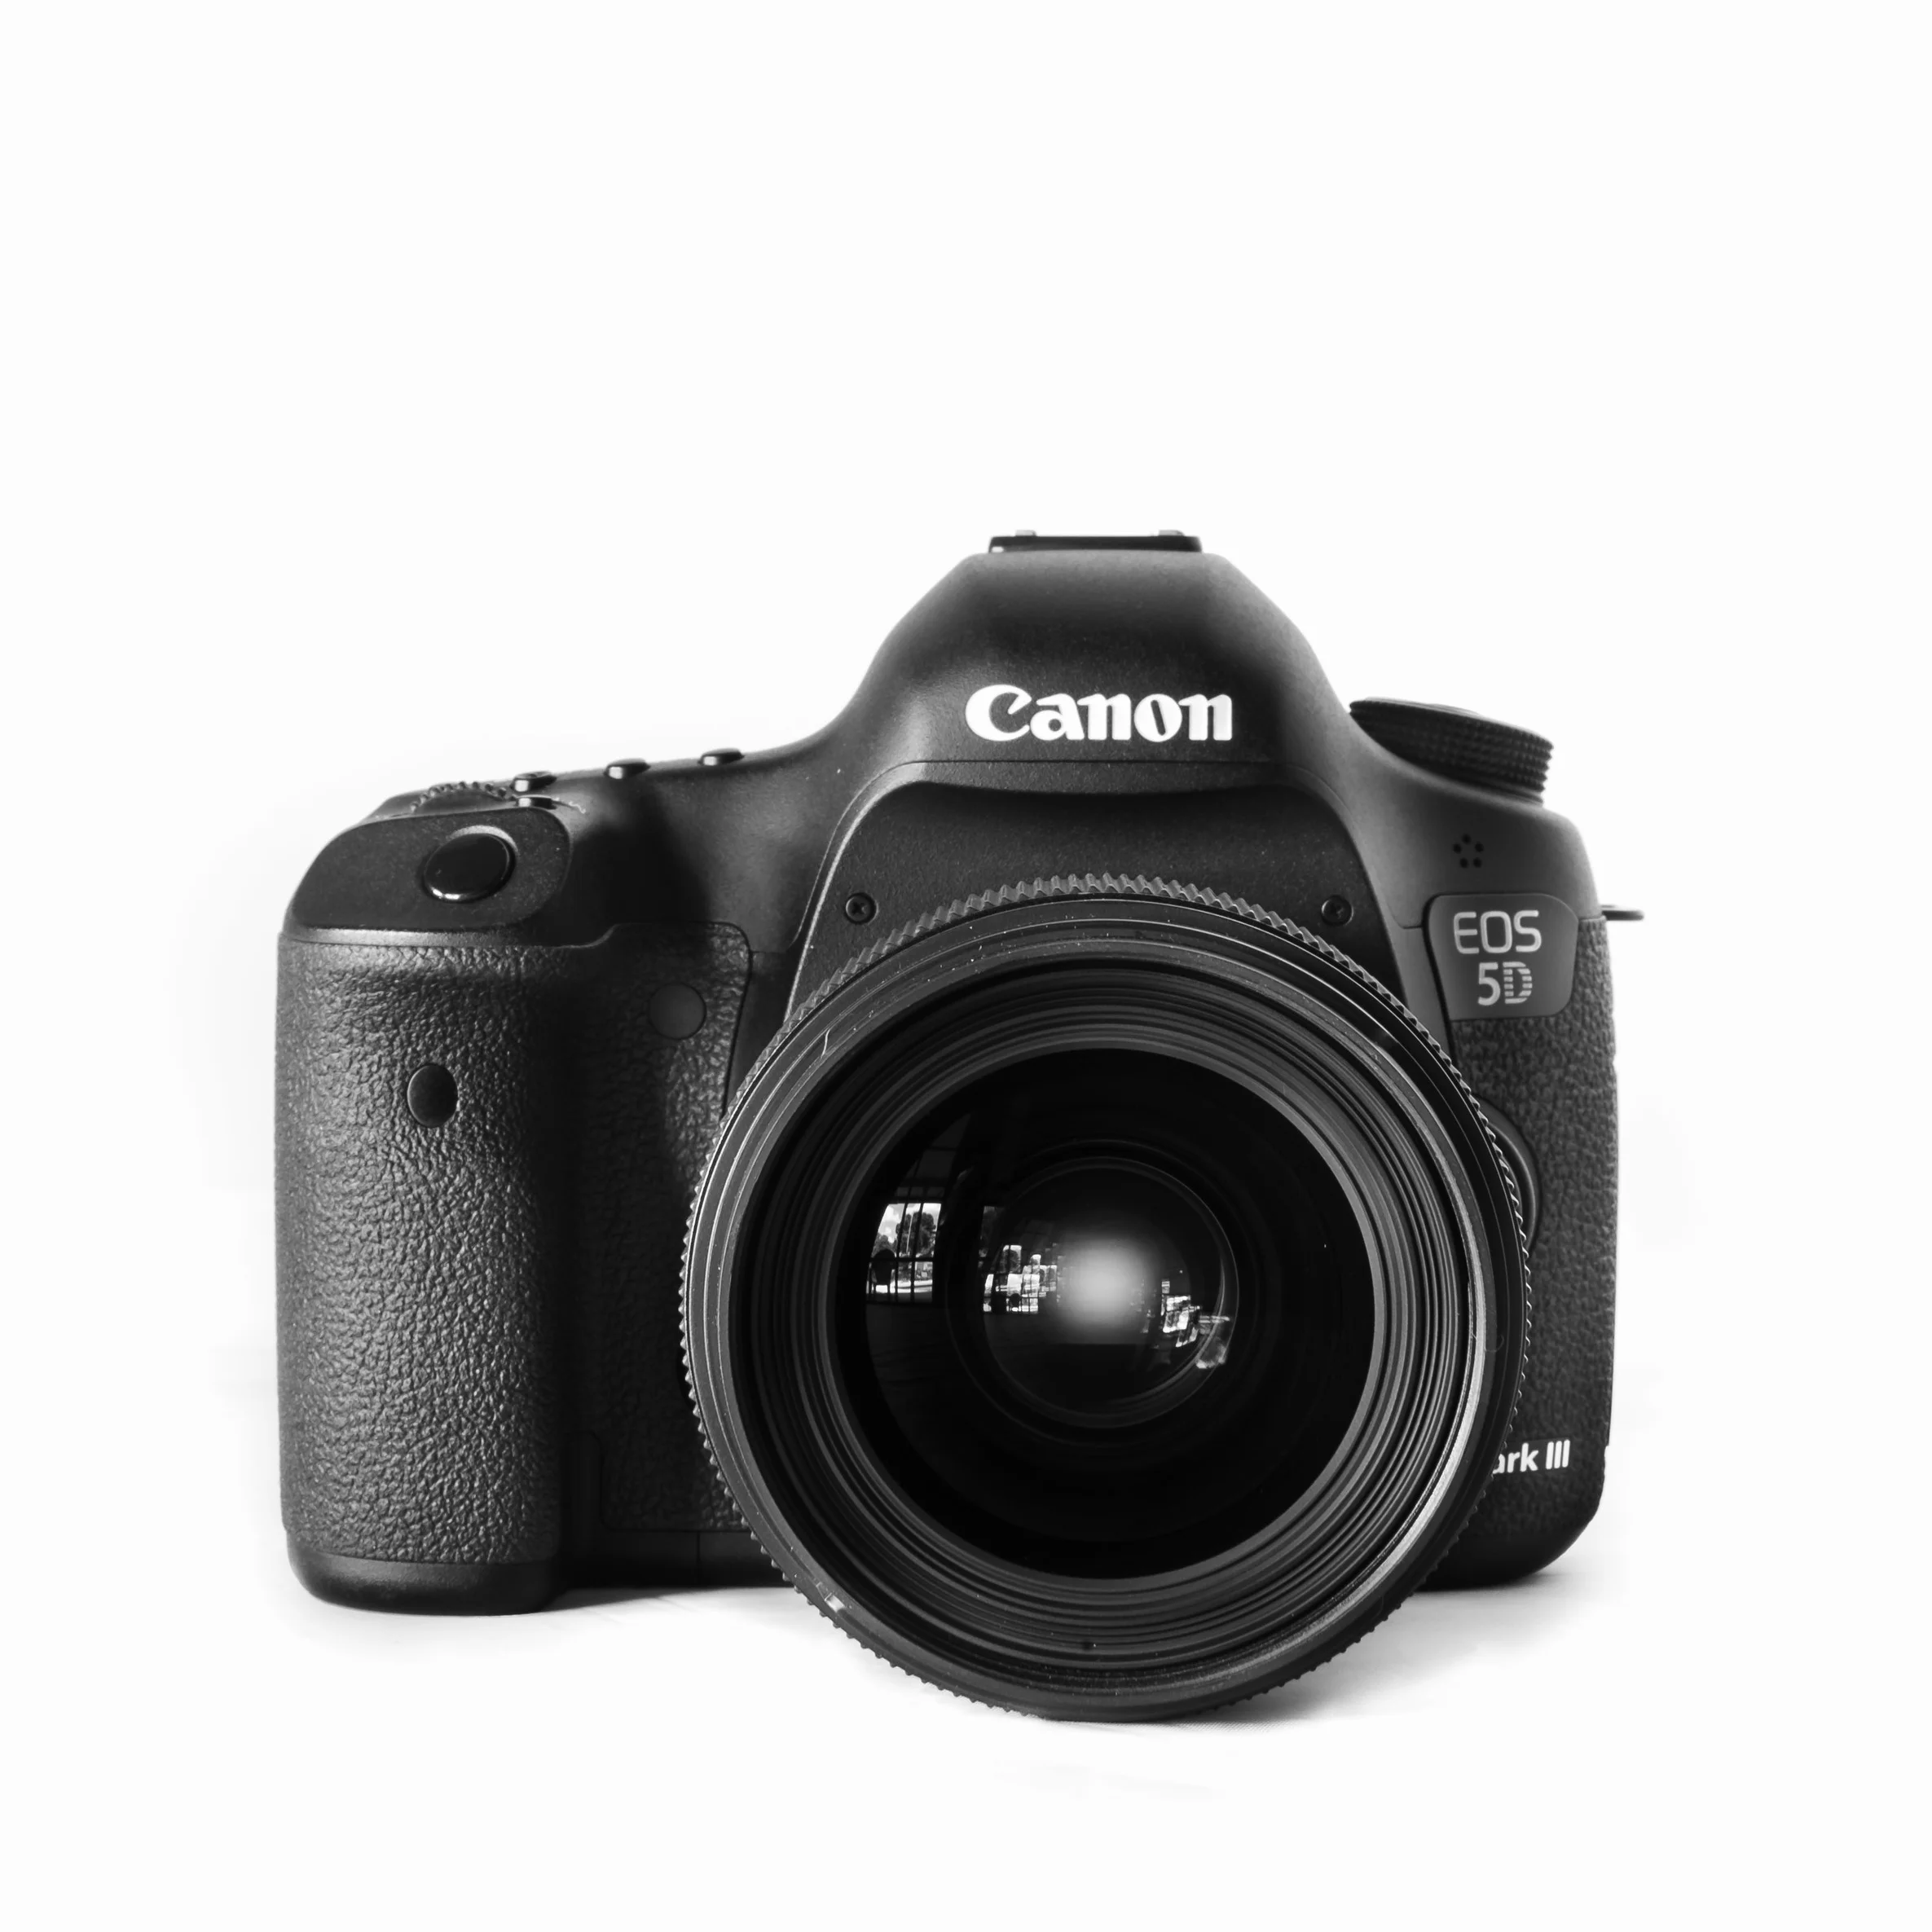
Canon 5d Mark III
Let’s start with the big gun. Most of my professional work is done with a Canon 5d Mark III. This camera is a tank. That’s one thing that I love about it. It has been everywhere with me over the last few years, and it is no worse for wear. The low-light capabilities are great which means I never struggle when the availability of light is less than optimal. I remember the first night with the camera I went to shoot a concert that a buddy of mine was drumming in. Wearily, I bumped the ISO to 12,800 and started snapping away. A quick look at the LCD screen solidified that I had made the right choice. The autofocus is superb. I’ve even used it to track downhill skateboarders during a race in Colorado. What I'm getting at is that this camera is flawless to me. I've never run into a single issue with it since I've been using it. That's why when I’m in the mood for something that will not let me down, and I need to put in a serious amount of work this is my go-to camera.
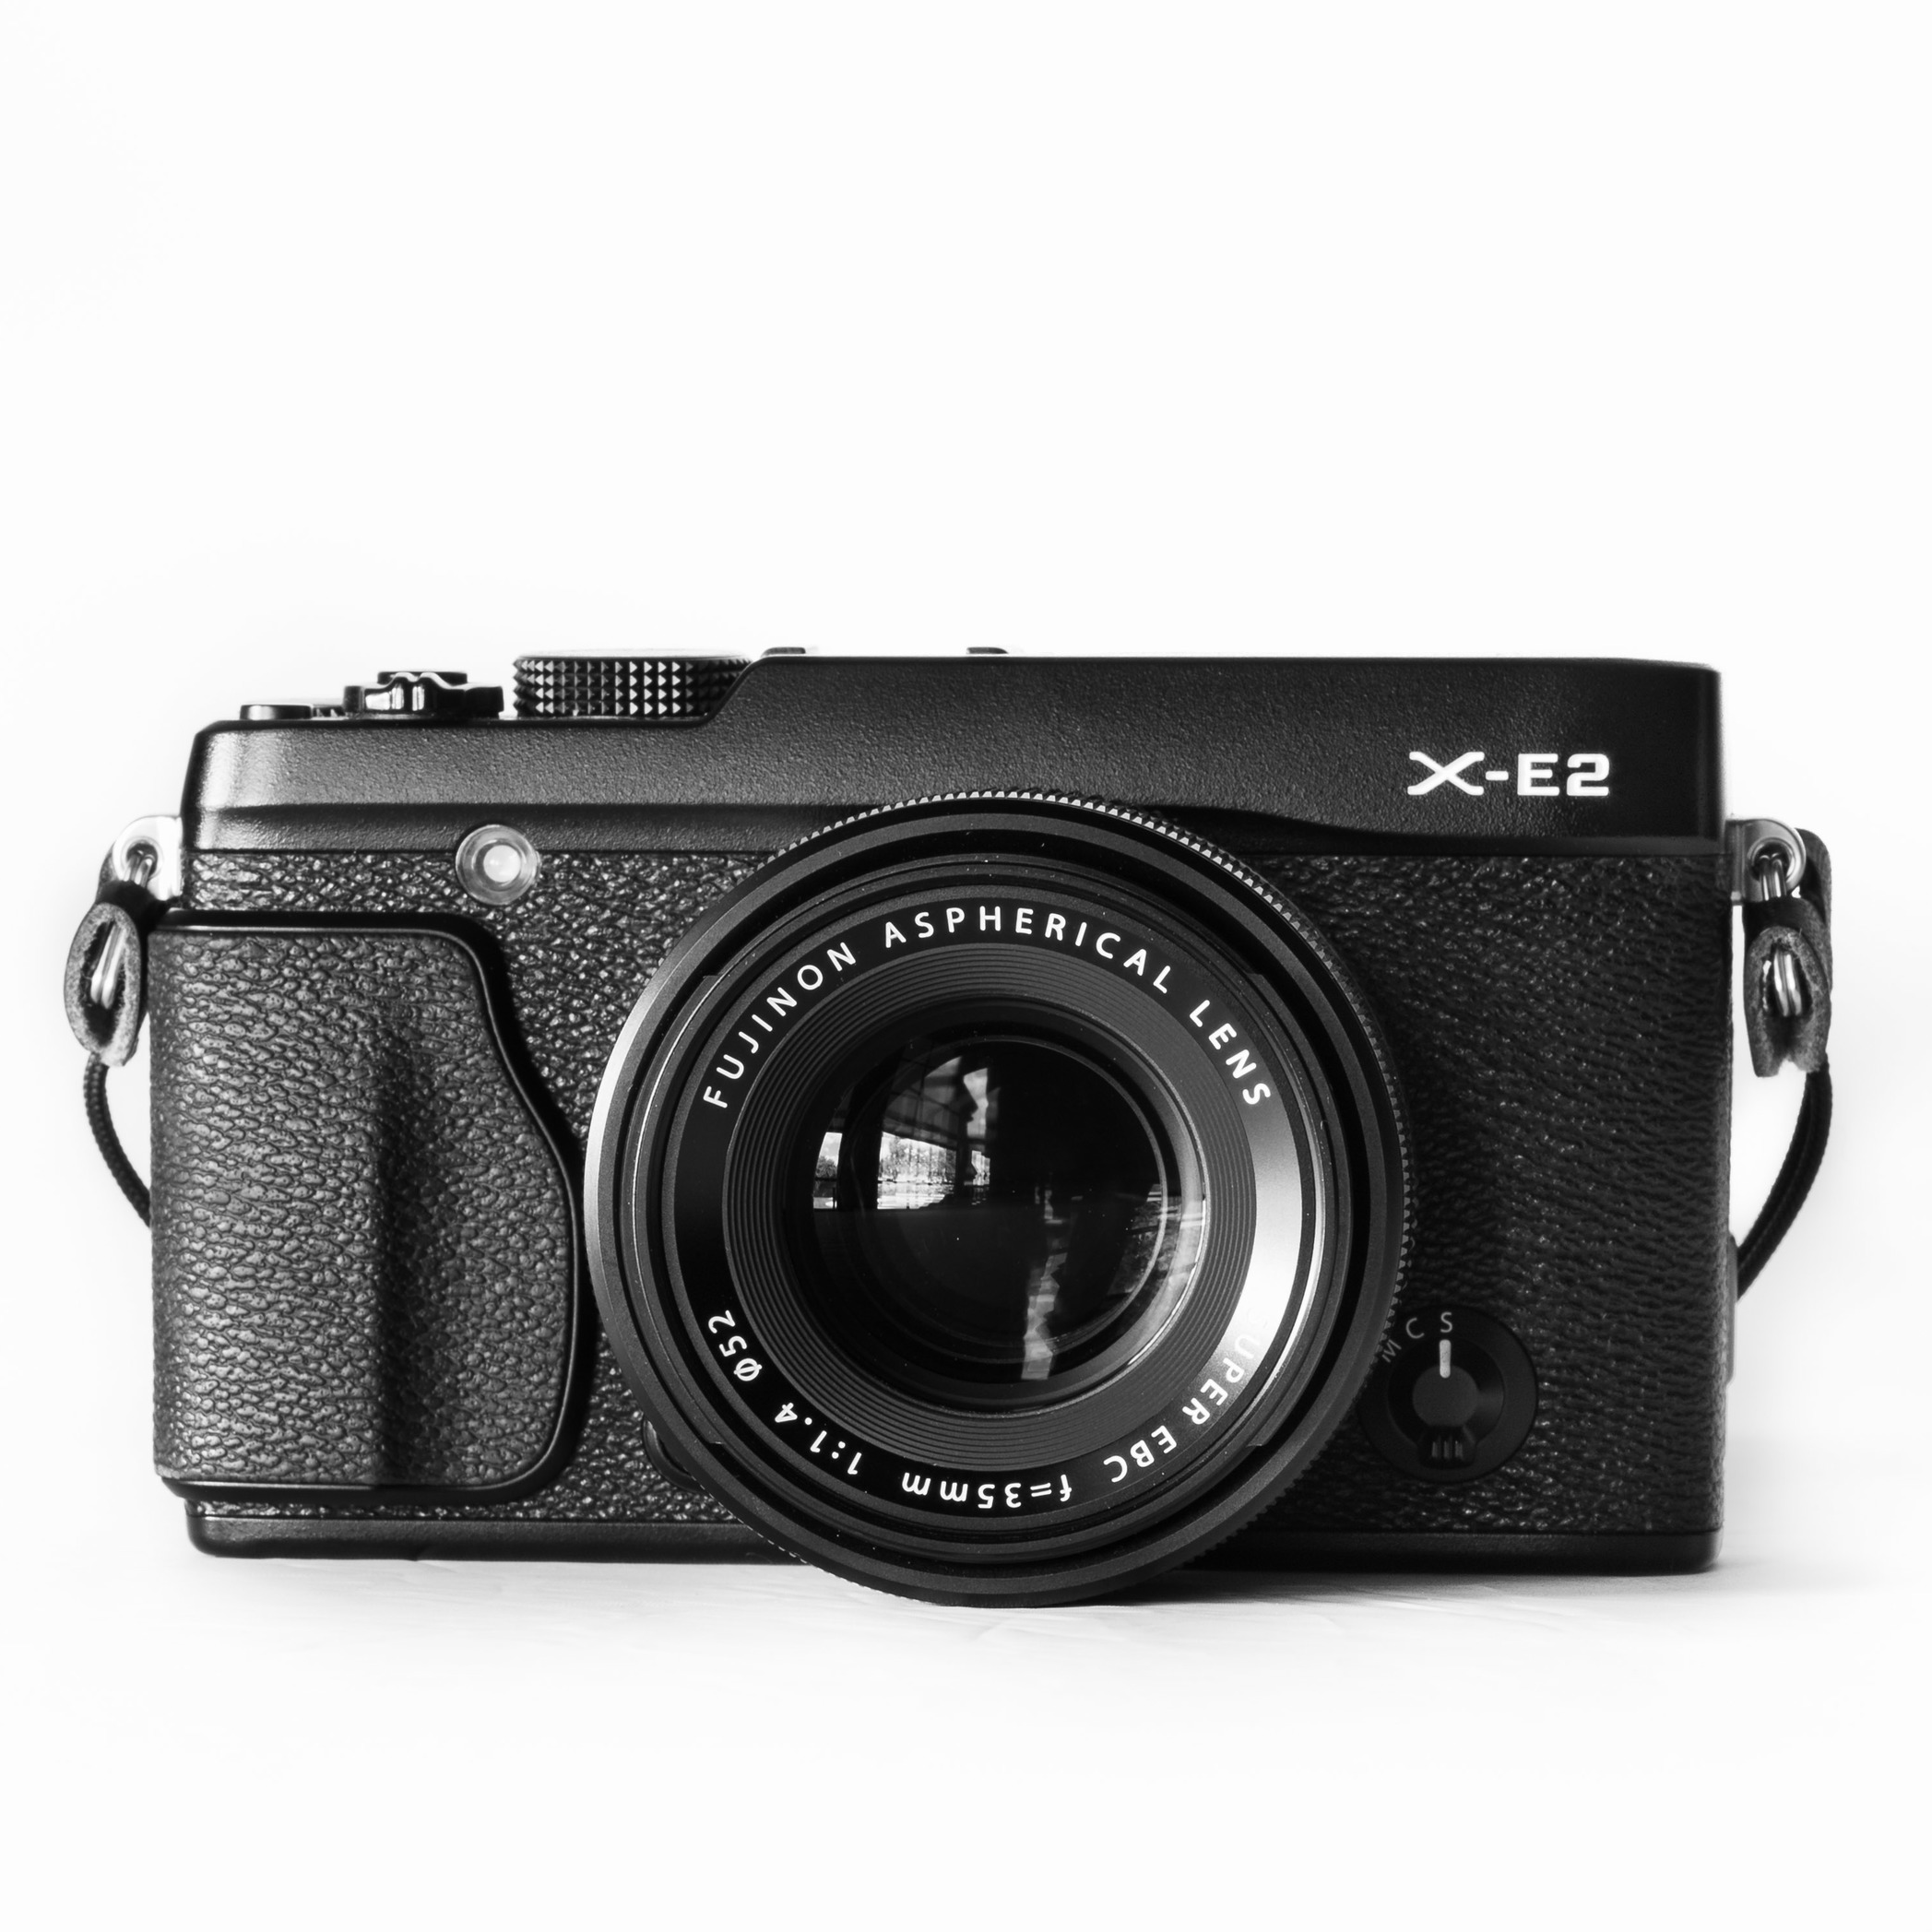
Fujifilm X-E2
Next up is my second most used camera. As much as I love my 5d, that reliability comes at a cost. That cost is sore shoulders and a sore back after using it for an entire day. I run around a lot in my free-time, and I always try to carry a camera with me. Since I wanted something a little lighter I started looking into mirrorless cameras. That’s when I came across my next baby, the Fujifilm X-E2. Not only do I find this camera aesthetically pleasing, but I hardly feel it when I have it slung over my shoulder. Ahhhh, what a relief it is. The funny thing is that I don’t feel like I sacrificed very much at all. The low-light capabilities can’t be pushed as far, but they’re still much better than those of the t2i I started with. I haven’t run into a situation yet where I have been let down by this camera. For walks with my fiancé, family dinners, or hanging out with my buddies, this camera is perfect. I’m in the process of throwing together a post all about this camera because I use it so often. When I’m in a relaxed mood and I care more about the memories being made instead of how technically perfect I can make each photo, this is the camera that I use.
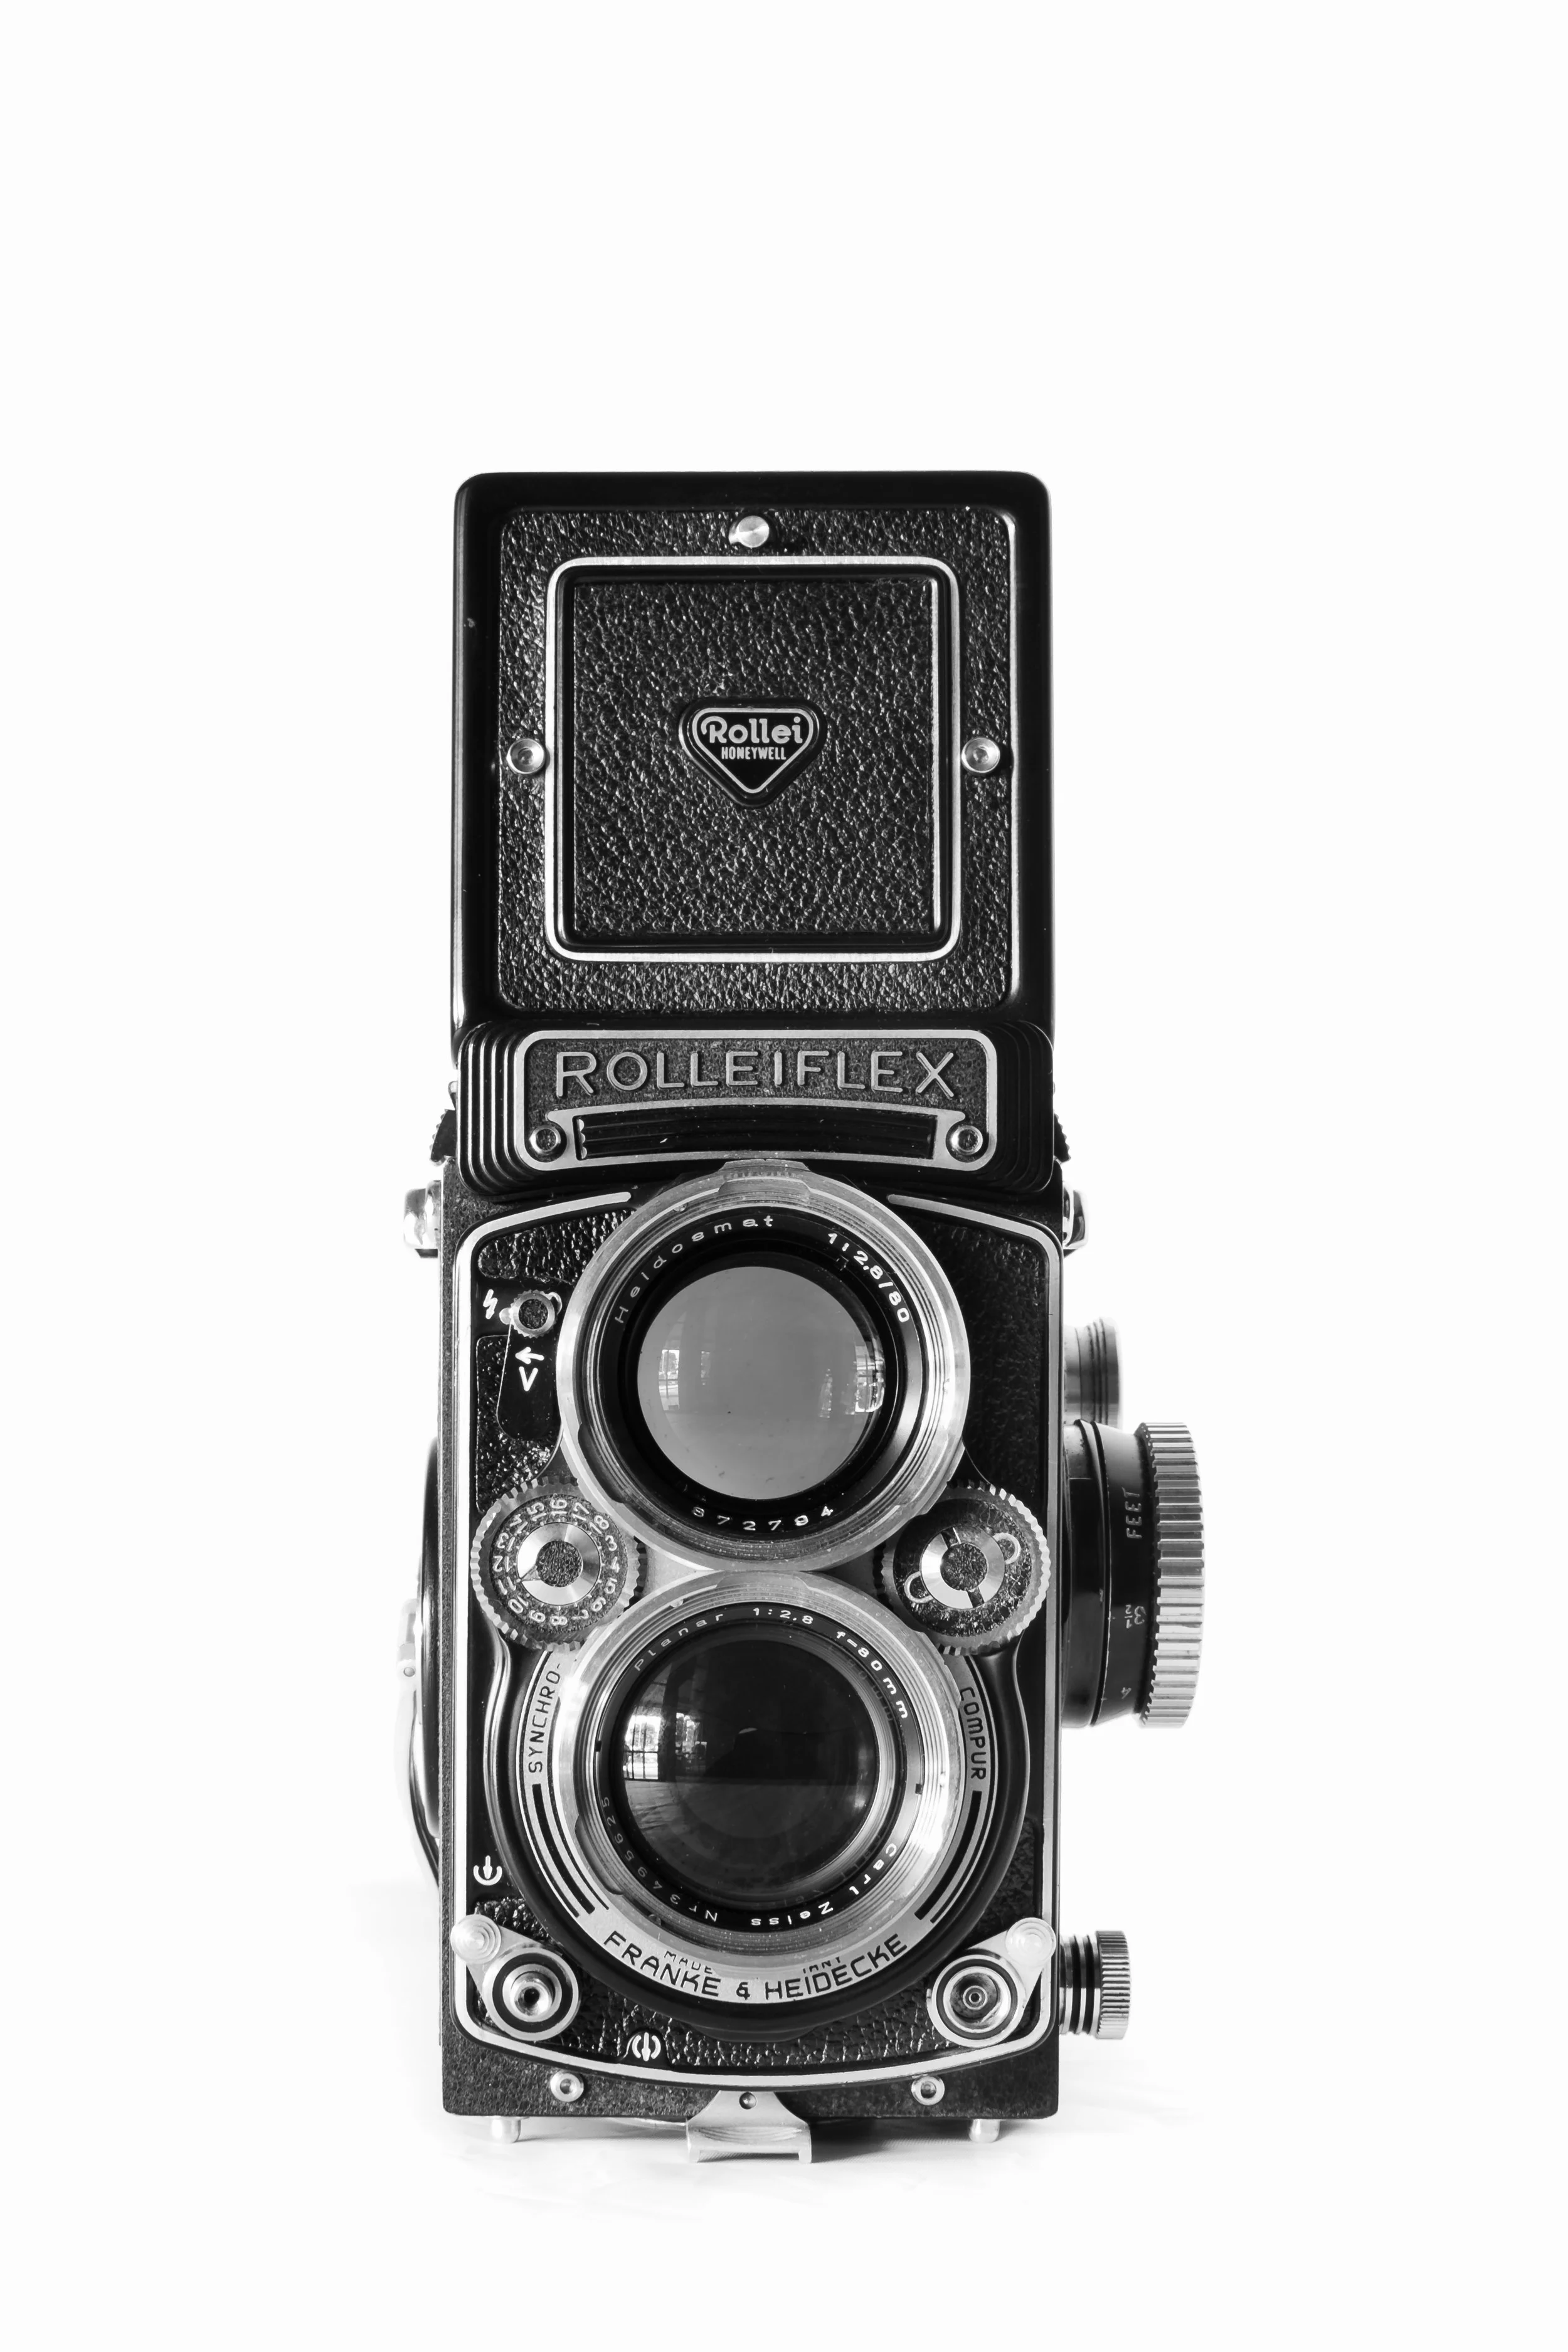
Rolleiflex 2.8e
Last but not least is something a little bit different. This well-engineered piece of photographic machinery is my Rolleiflex. I’m not even going to bother comparing any aspect of this camera to the two others. It’s special in its very own way. There’s something fun about shooting film, and there’s something even more fun about shooting film on a twin lens reflex camera from the early 1960s. Looking down through the top of the camera into the waist level viewfinder to adjust the frame evokes a certain type of awe from me every time that I do it. When I’m feeling burnt out and like I need a change of pace this is my go-to camera.
I'm always focused on taking the best possible photograph, but how I go about that is entirely different on each of these cameras. Sometimes it's good to slow down, relax and focus on the task at hand until you get a result while other times you've just got to go at it non-stop until you get to that result. Each of these cameras allows me to do this in varying degrees until I achieve an outcome that I'm happy with. This is important to me because it mixes everything up and allows me to continue to create the best work that I can.
Bringing Dogs to Your Photo Shoot

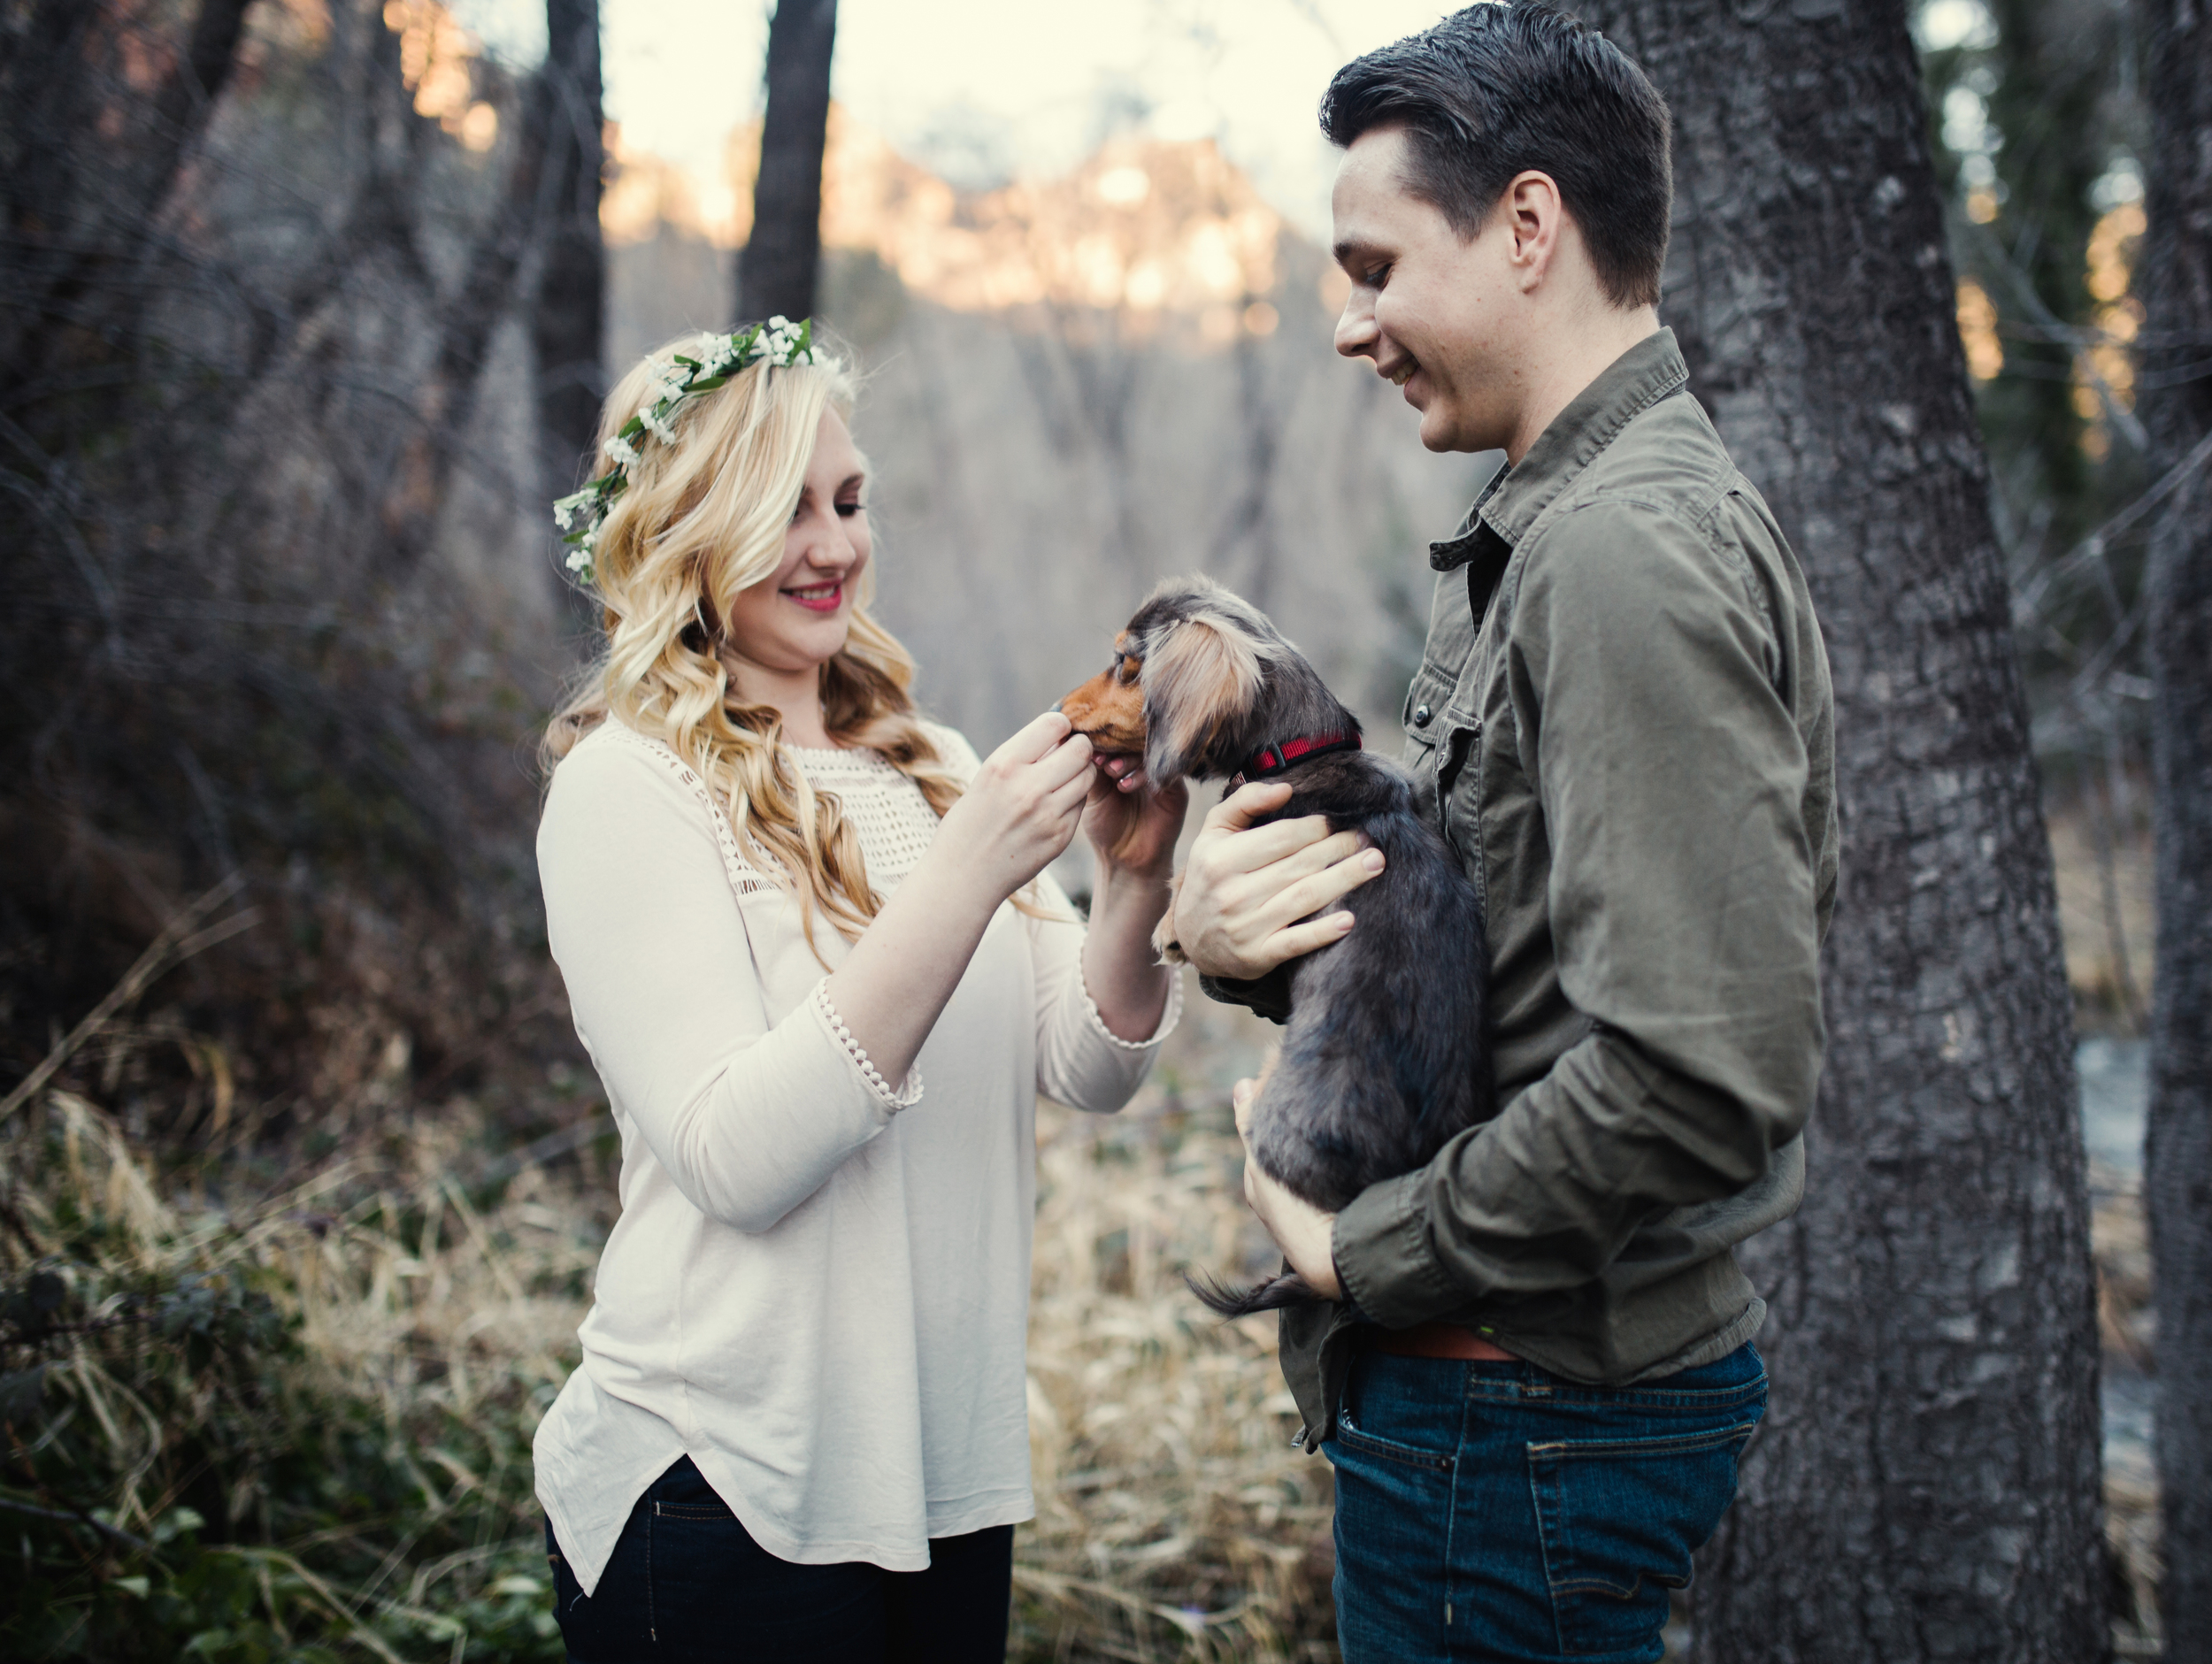
People create special bonds when it comes to their pets. This is something we understand very well being animal lovers and pet owners ourselves. However when we meet up with our couples or individuals to talk about the coming photo session they tend to be a little shy about the fact that they would really love their dogs to be part of it. Maybe they feel as though it causes trouble, or adds a level of difficulty we wouldn't want to deal with as photographers. If you happen to be someone that feels this way, don't be. On the contrary we believe your dog can be a wonderful addition to the photo shoot. They will bring an extra element to your photos that will make them that much more meaningful. Our ultimate goal is to provide you with photos that you absolutely love and will make you smile every time you walk by them in the hallway. Having said that, there are 5 important things to keep in mind for bringing your pooch to the shoot.

1. Have Patience
This is number one for a reason. Sometimes it's really easy to get frustrated when your dog isn't behaving the way you want them to. It's just like the child in the store that's screaming and the parent is so embarrassed that they can't control them. The parent gets irritated and is no longer having a good time. This is exactly what we want to avoid. We never want you to be at a point where you aren't enjoying yourself anymore, or you're regretting the fact that you brought your dog. You have to go in with realistic expectations. Dogs aren't always so different than us. They get excited when they get to go out, meet new people, or do new things just like we do. Keeping that in mind, you have to know that your dog probably won't turn into a movie star for the camera. There's a good chance they'll be kind of antsy. They may not want to sit or look at the camera all the time. That's okay because there are a few things we can do to help that a little. In the meantime try to smile and instead of getting frustrated think about how cute it is that they're so excited.
2. Calm Them Down Beforehand
One thing that can really help combat the antsiness in your dog is wearing them out a little before you come to the shoot. Take them for a walk or let them run around the park for a bit. You don't want them to be sleepy, but getting some of their energy out can really help. Your dog may be older and calm as it is, but even then I would say take them on at least a little walk. Because even if they're calm for the most part, they'll probably still get excited when you bring them out.
3. Treat and Toys
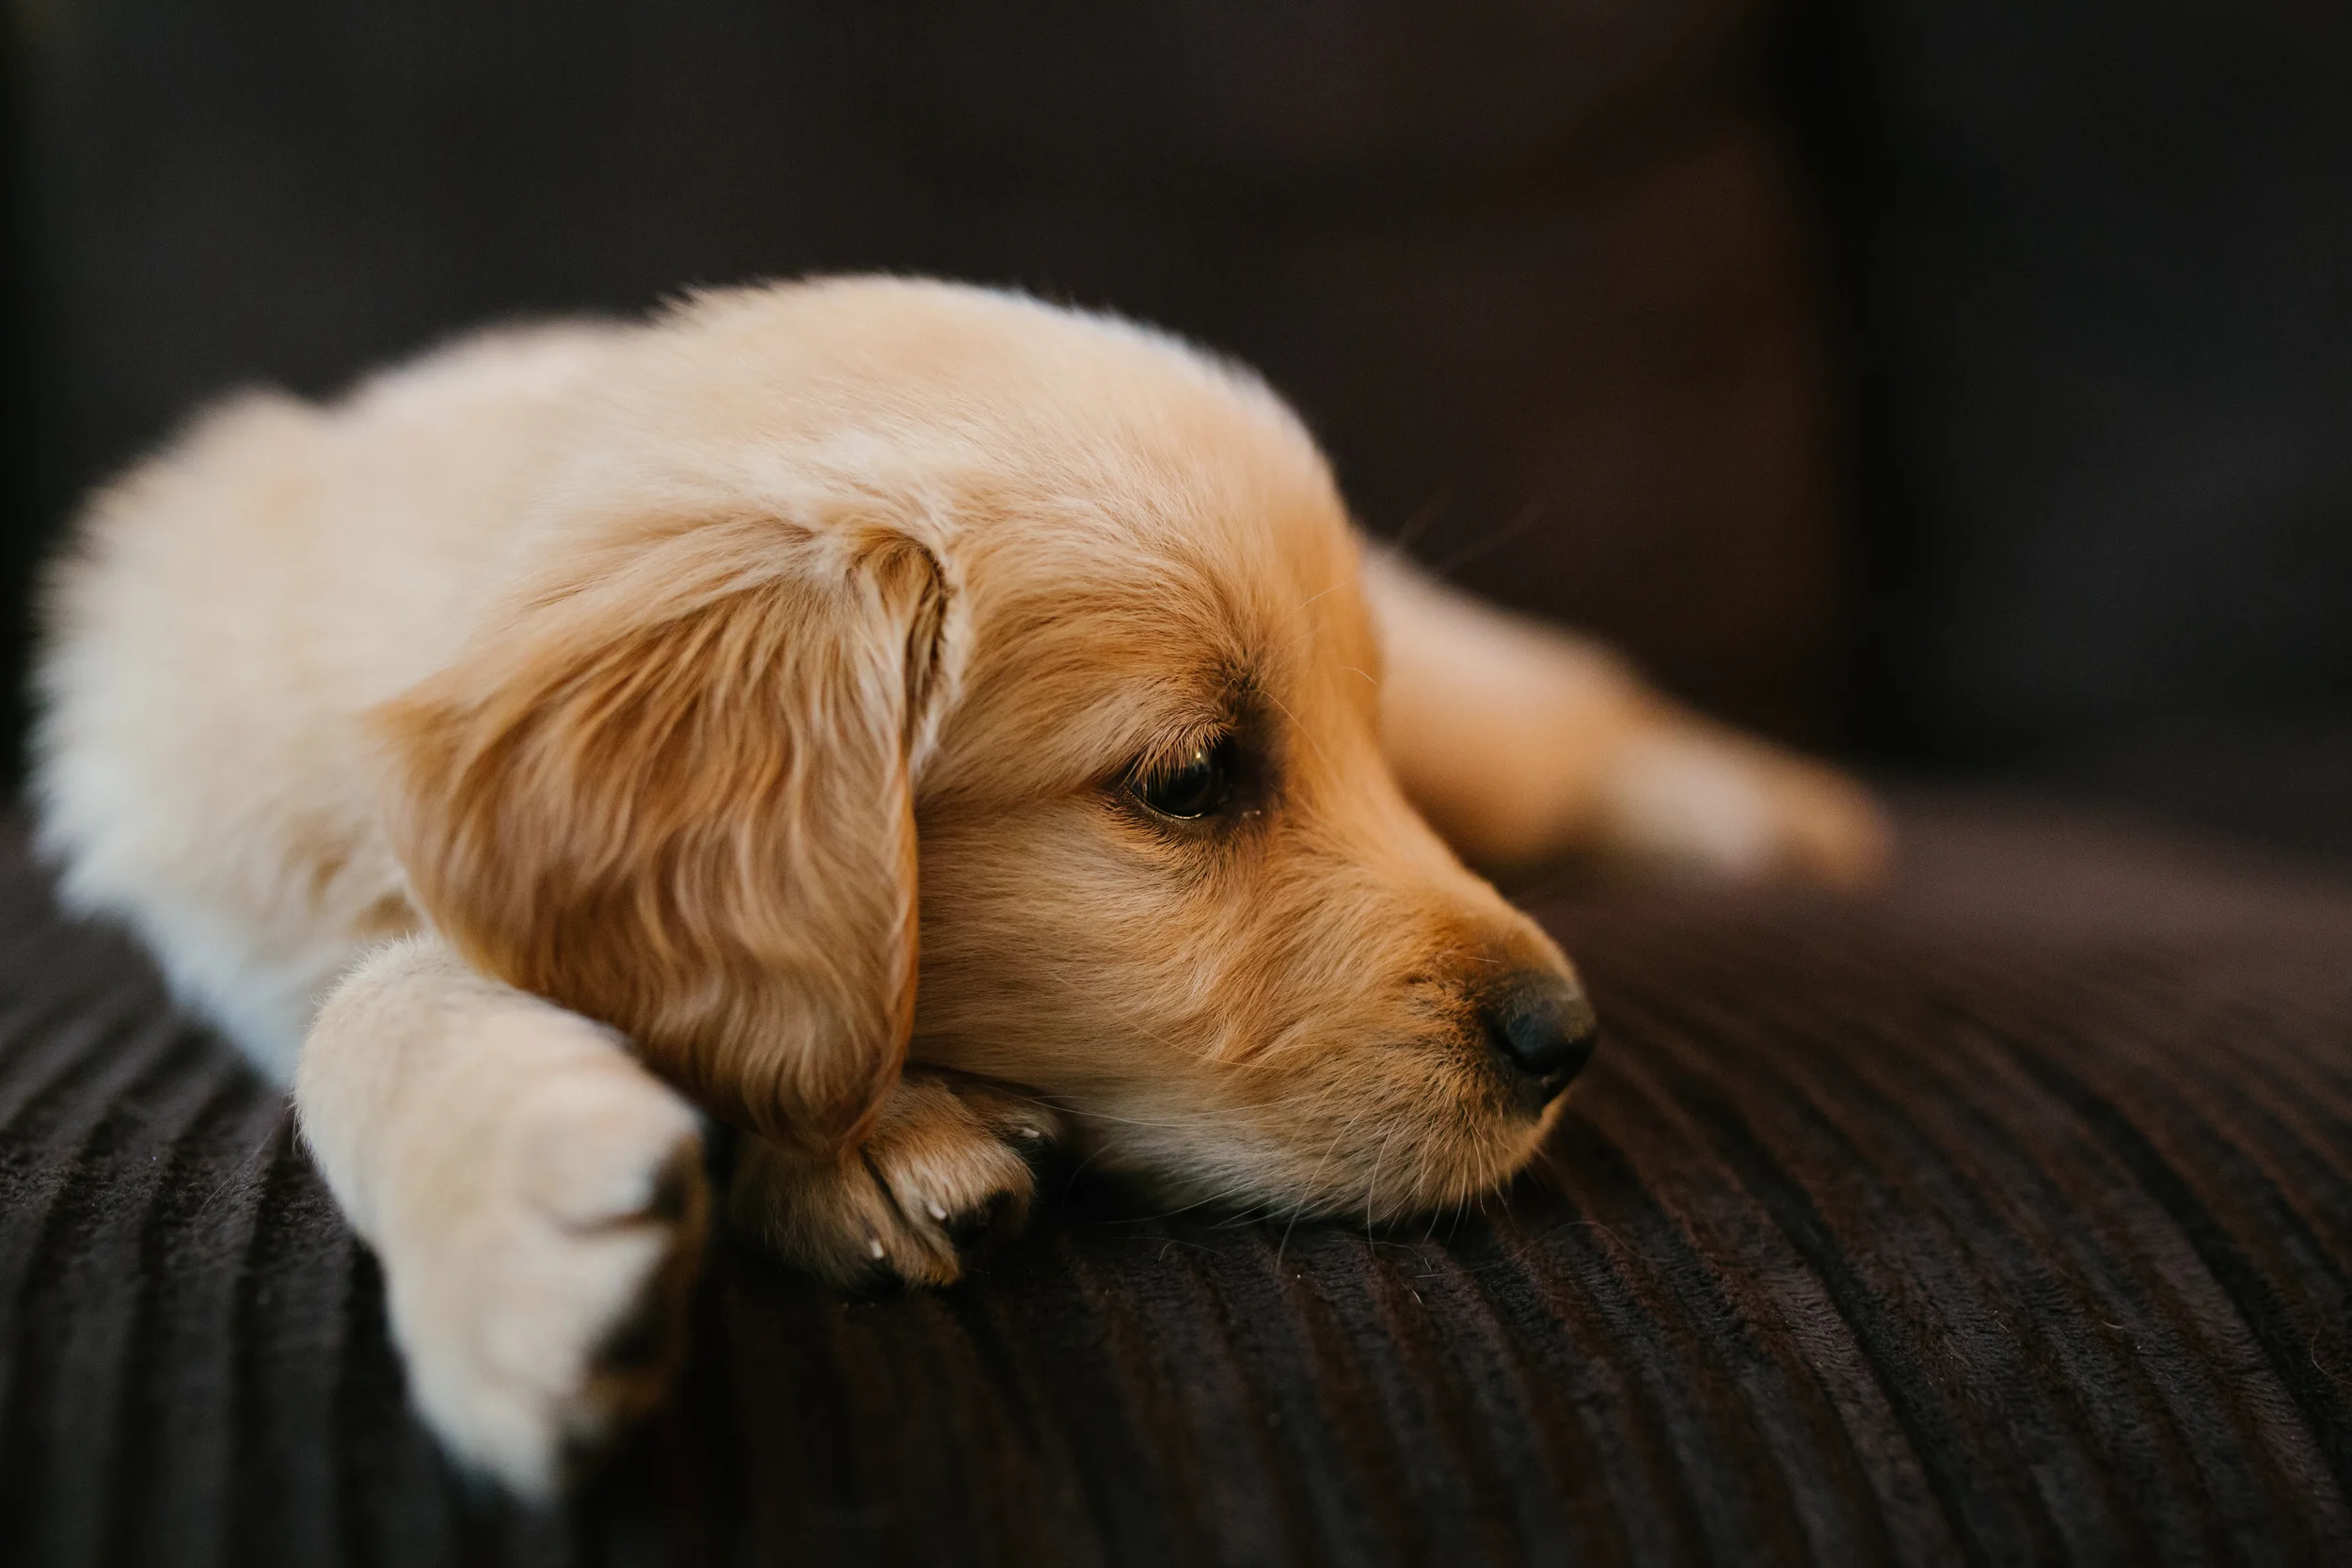
Treats or toys are a great way to get your dog to pay attention and look at the camera. They will be more willing to cooperate with you when they have incentives. In our case we have some dog treats that we will bring to the photo shoot as back up. However not all photographers will, and if your dog has a favorite treat or chew toy it is better that you provide that. It's just a matter of working with them and getting them to stay still and hopefully look a little happier when they know treats are coming their way. When it came to working with a 6 month old golden retriever puppy with endless amounts of energy, treats made a HUGE difference. Without them, getting her to sit still was an impossible feat. The second we pulled out a bag of her favorite treats we got a handful of cute pictures in no time. Never underestimate the power of an incentive.
4. Think About Your Dog's Personality
This ties into a lot of things when talking about bringing your dog to a photo session. You know your dog much better than we do, so you have to think about the way they will react in certain situations. If they are really hyper then calming them down beforehand will be more important than you think. Also, think about whether your dog is a little ADD or not. If they will be distracted by everything or they want to bark at people walking by then that's something your photographer needs to know. It's definitely possible to find locations where there won't be so many distractions for your dog if this is the case. We can work with you and figure it out. All is not lost! Another thing is bringing props. Props can be cute, but some dogs will be far too distracted by something on them that isn't normally there. They may just want to chew on it the whole time, or they may become agitated with something like a sign around their neck.
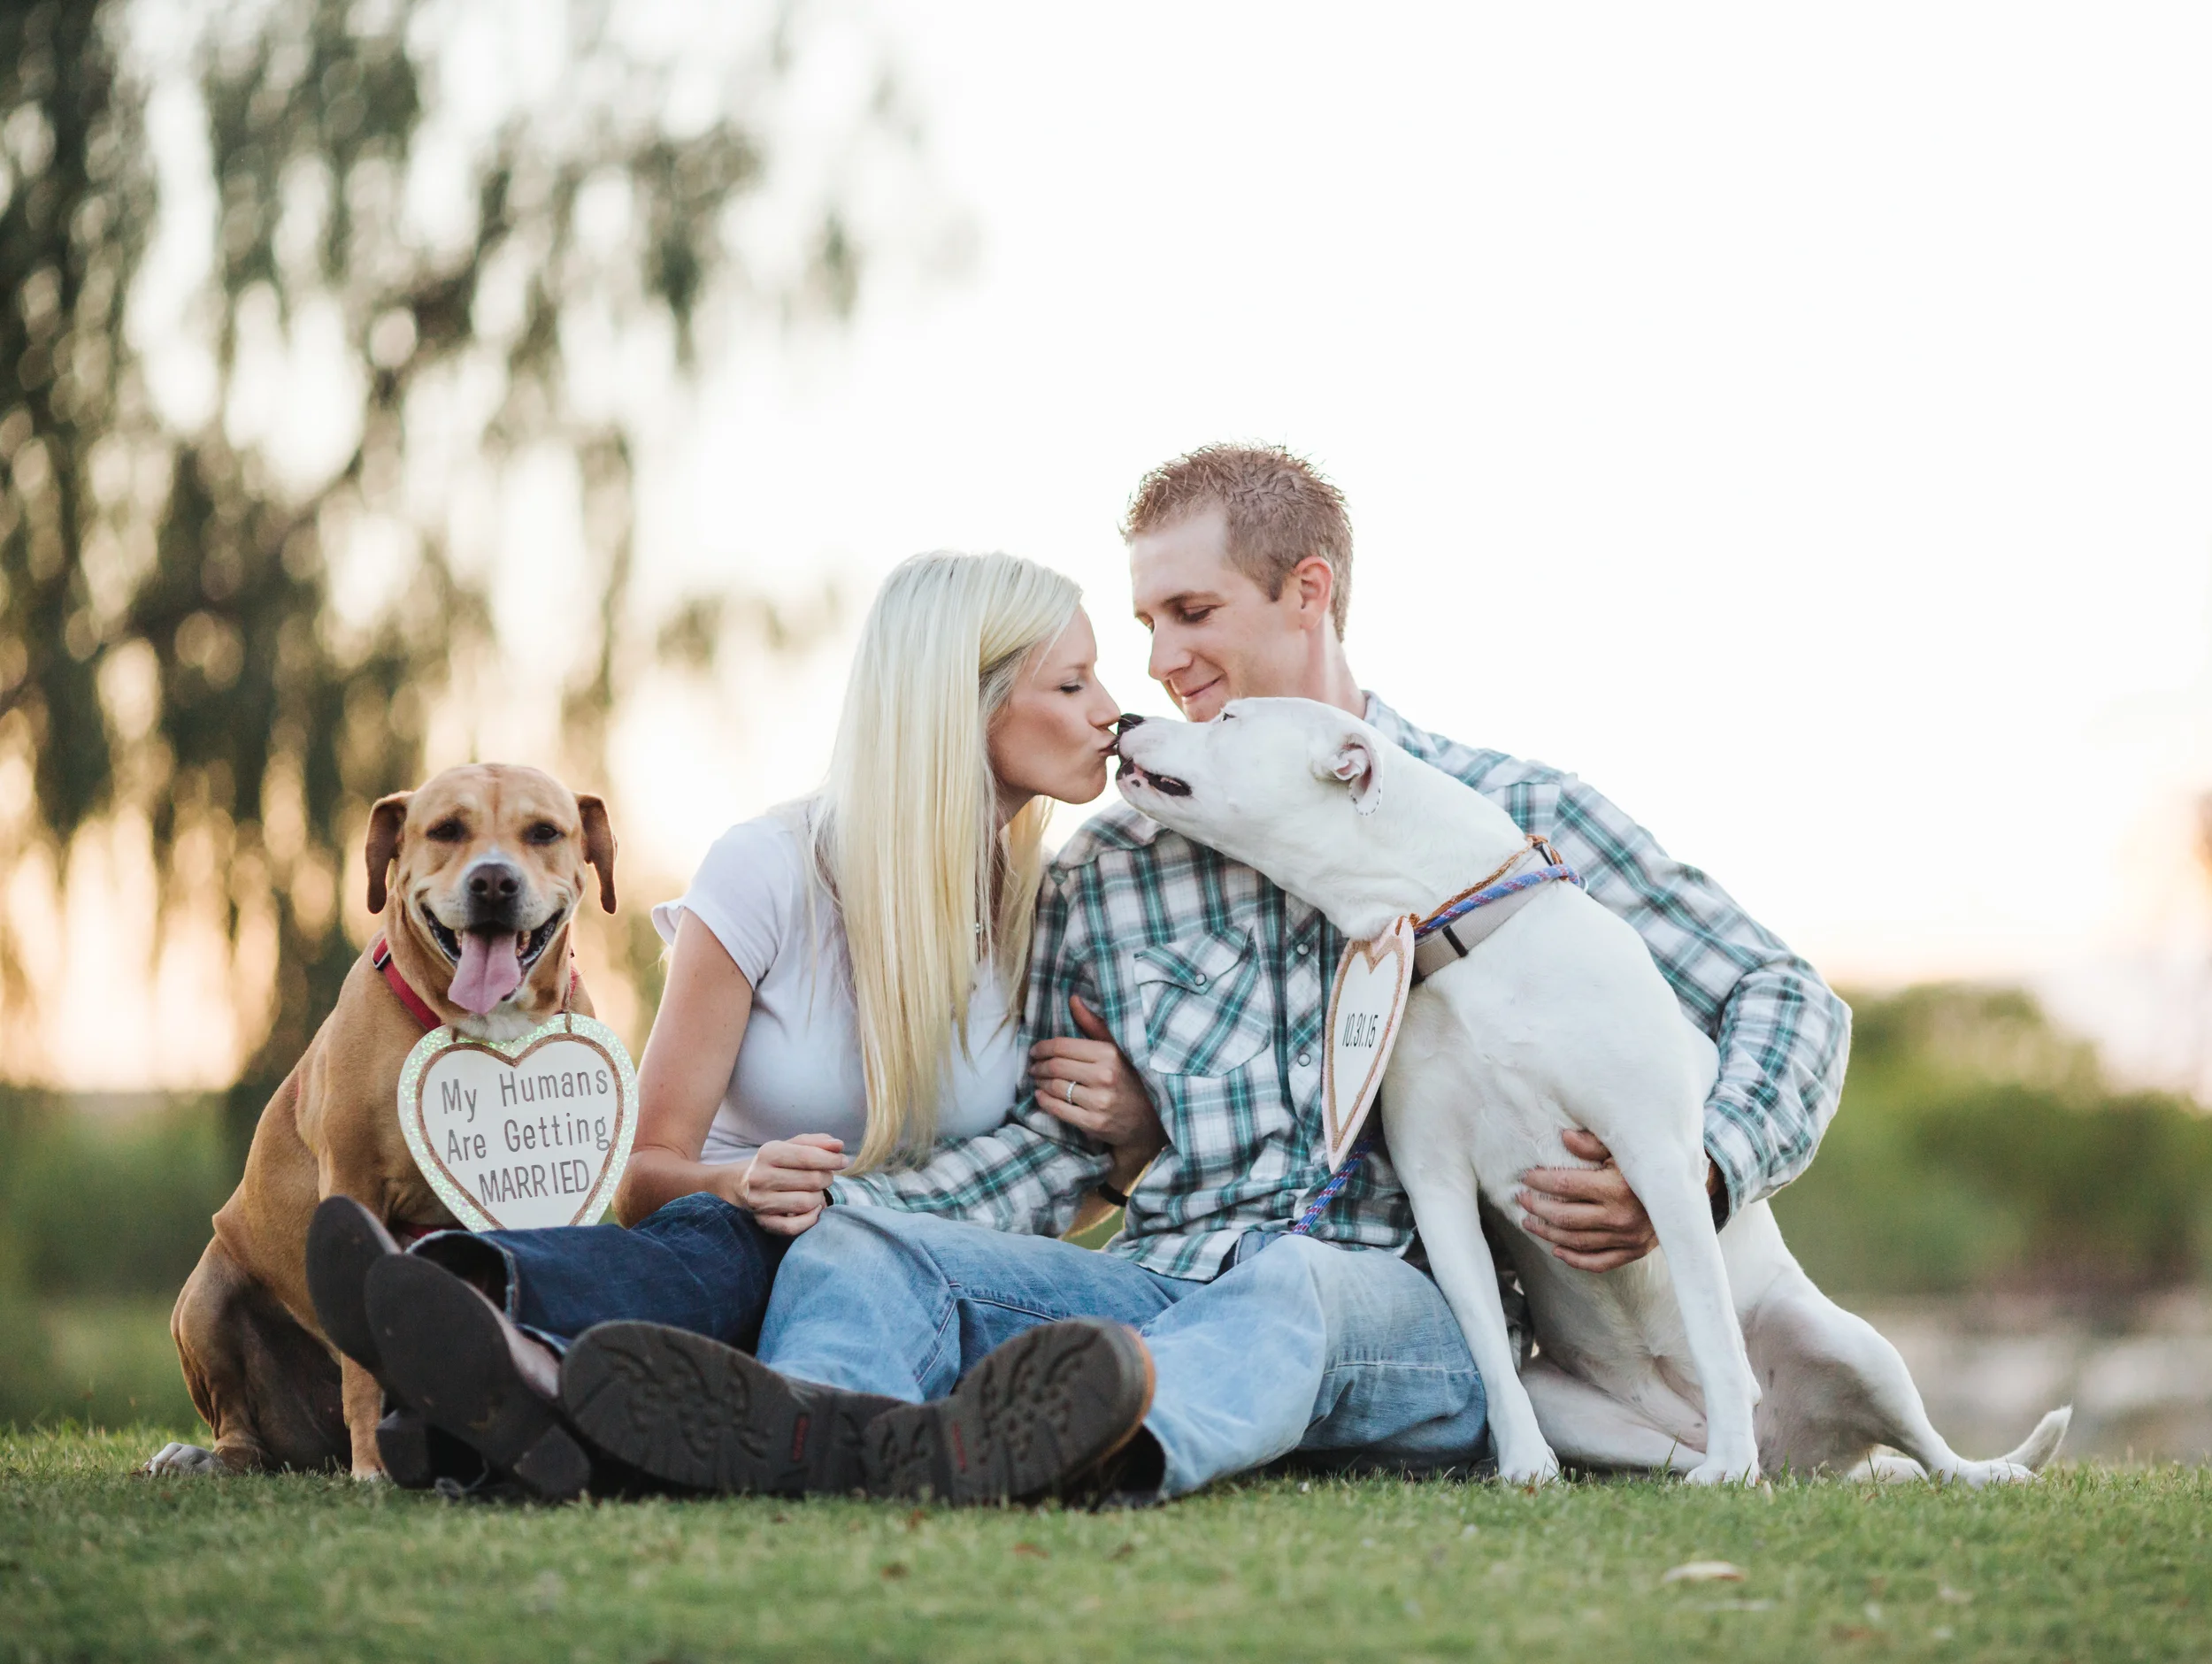
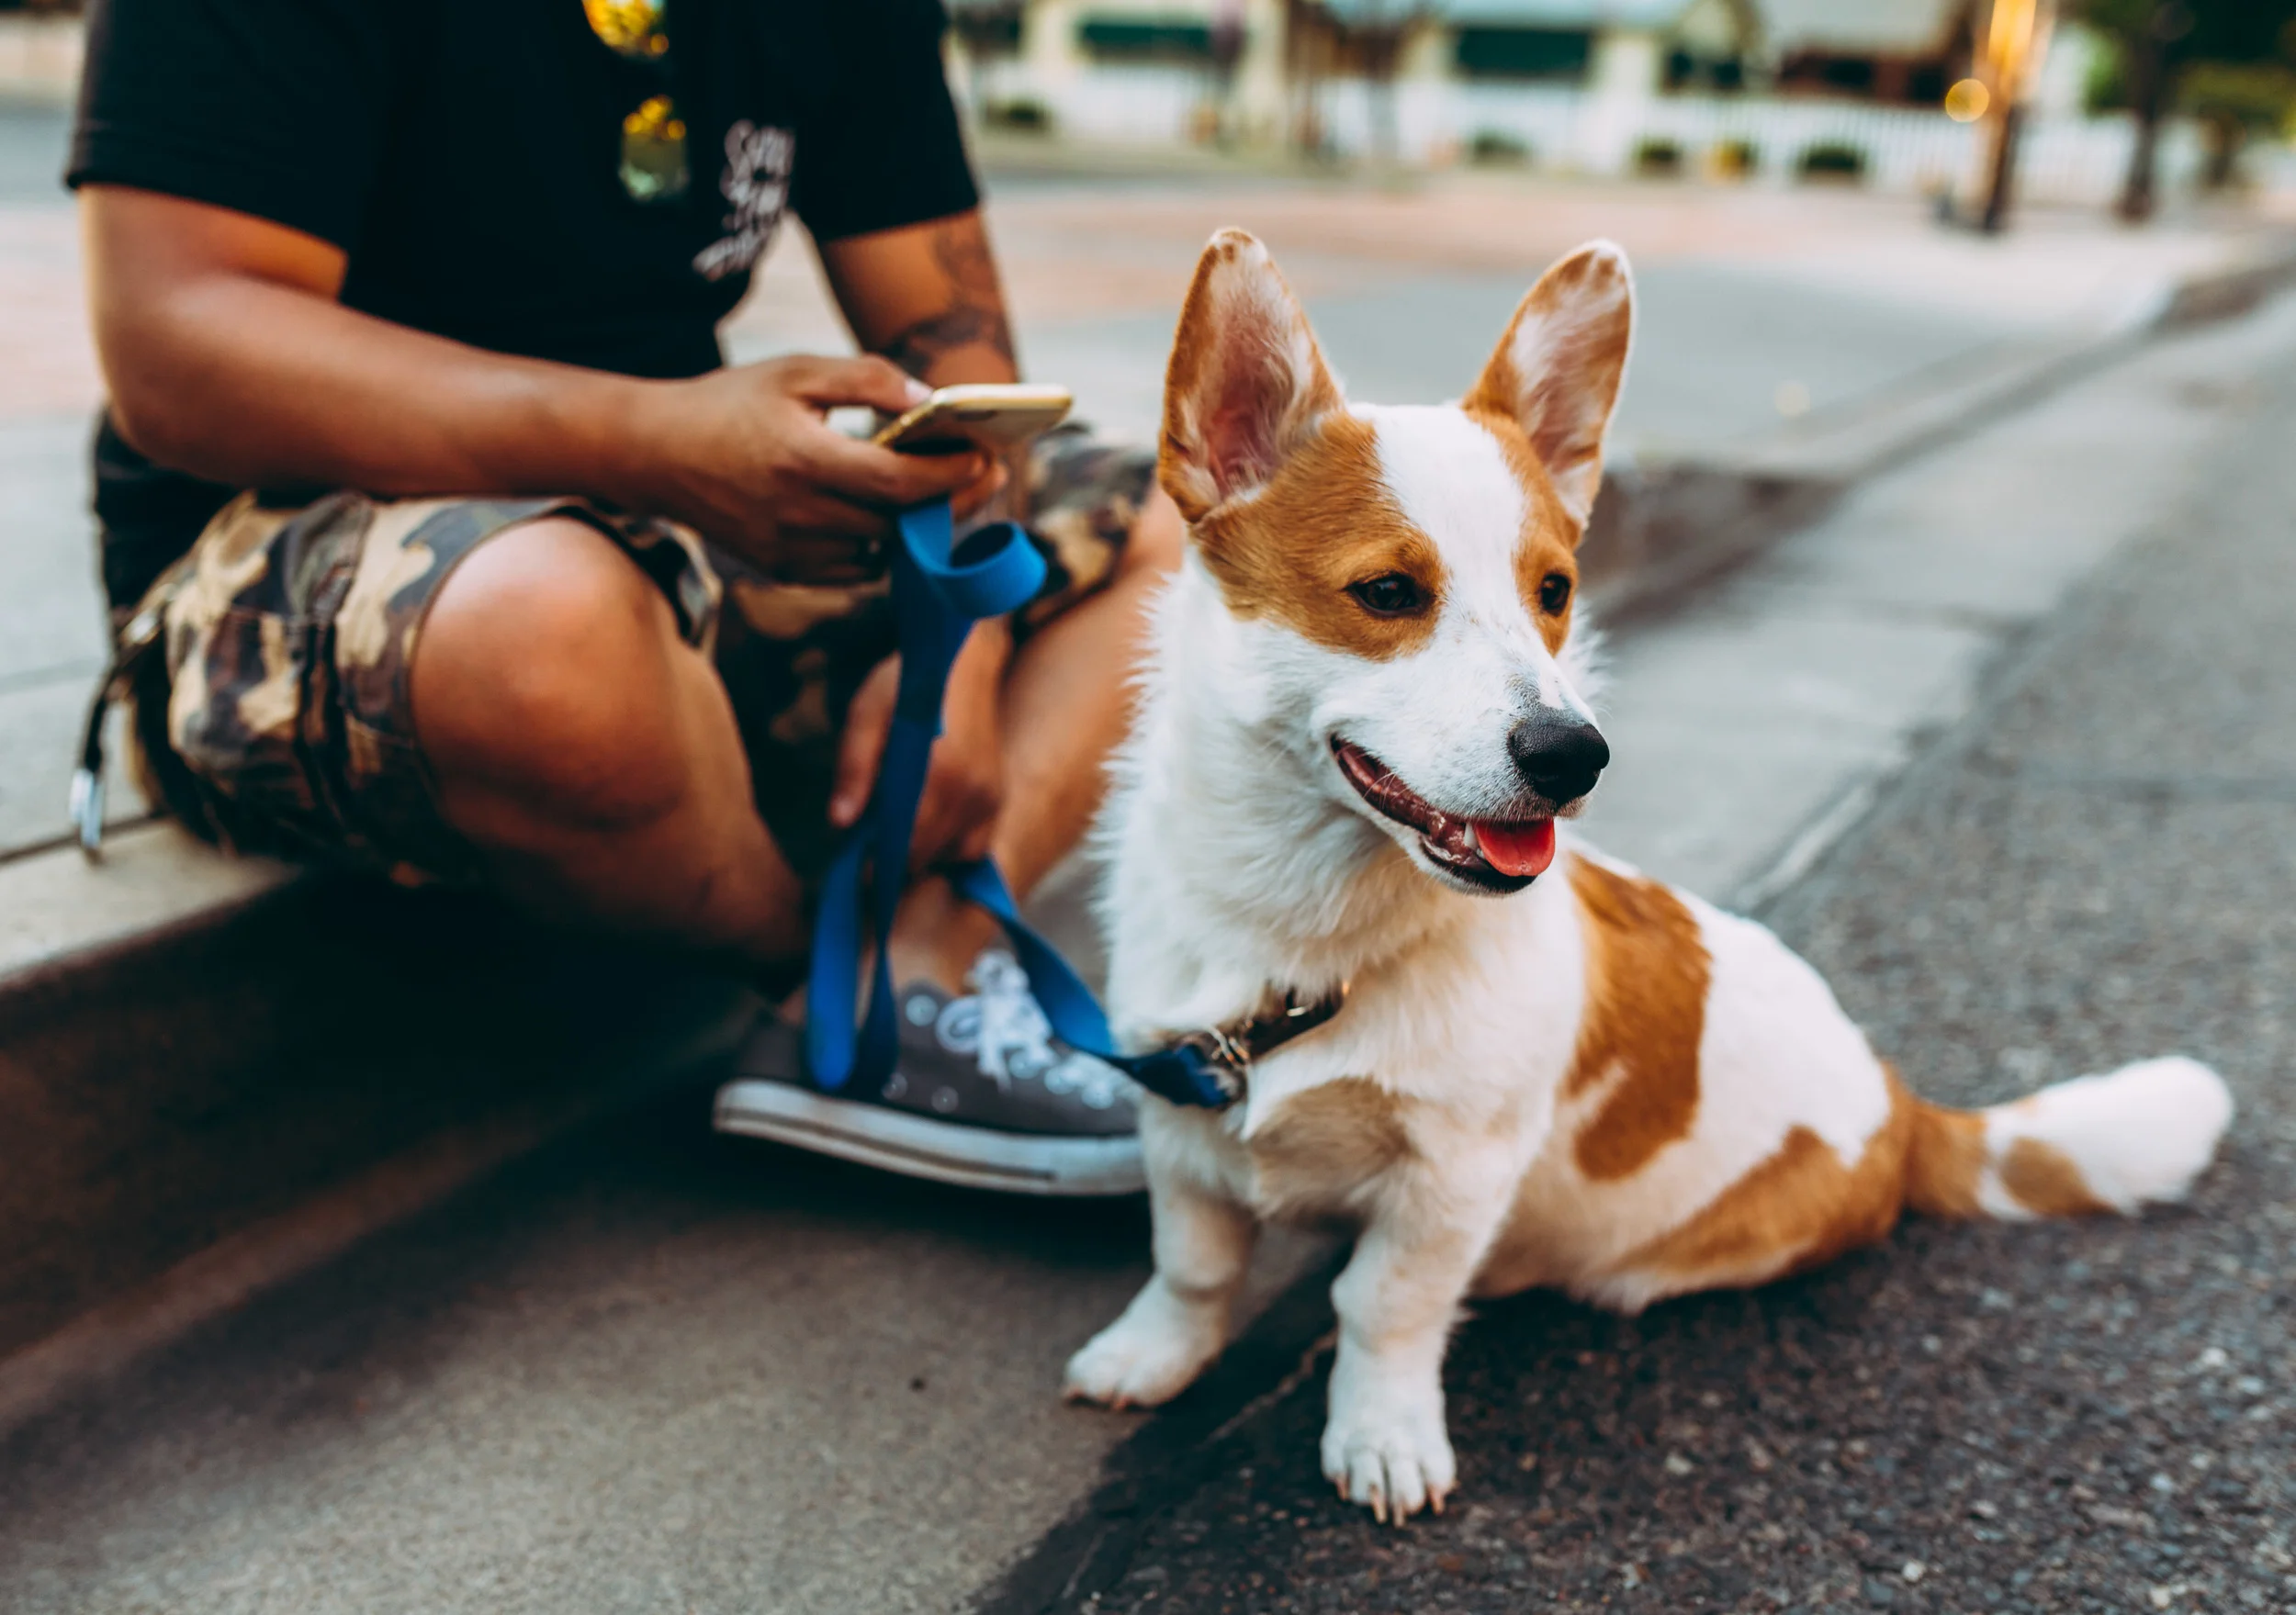
5. Have Fun With It
Always remember this step. You will have to let go of the perfect posed photo with your dog because that doesn't really happen most of the time. It can, but it's better if you just have fun. The photo above is a great example of that. It wasn't posed at all, and it's one of our favorites. The owners are just interacting and having a good time with their dogs. So stay patient, smile, and remember to have fun with it!
Mother's Day Gift Idea: DIY Canvas Prints
I wanted to create a new display on my wall for some of my automotive photos recently, but I didn’t want to frame them. I also planned on doing it with quite a few photos and didn't really want to spend the substantial amount of money that it would have cost to turn them all into canvases. I love framed prints; however, it just seemed too reserved for the amount of energy and emotion I felt like some of the photos portrayed. That’s when I came across this idea online. It's not exactly the same as a canvas print or gallery wrap, but for a quick and fun little project that gets your art on the walls it does wonders.
We think that this is an awesome gift, and with Mother’s Day right around the corner we thought that it would be a great time to show you how we do it. Altogether it probably takes 30 to 45 minutes of actual work depending on how quickly you can paint. There’s a bit of drying time in-between too, but you can take that time to write your mom a lovely note telling her how much you love her. If you don’t have time for that, you can always aim a blow dryer at the Mod Podge or paint and speed up any of the drying processes.
Without further ado, let’s get into it!

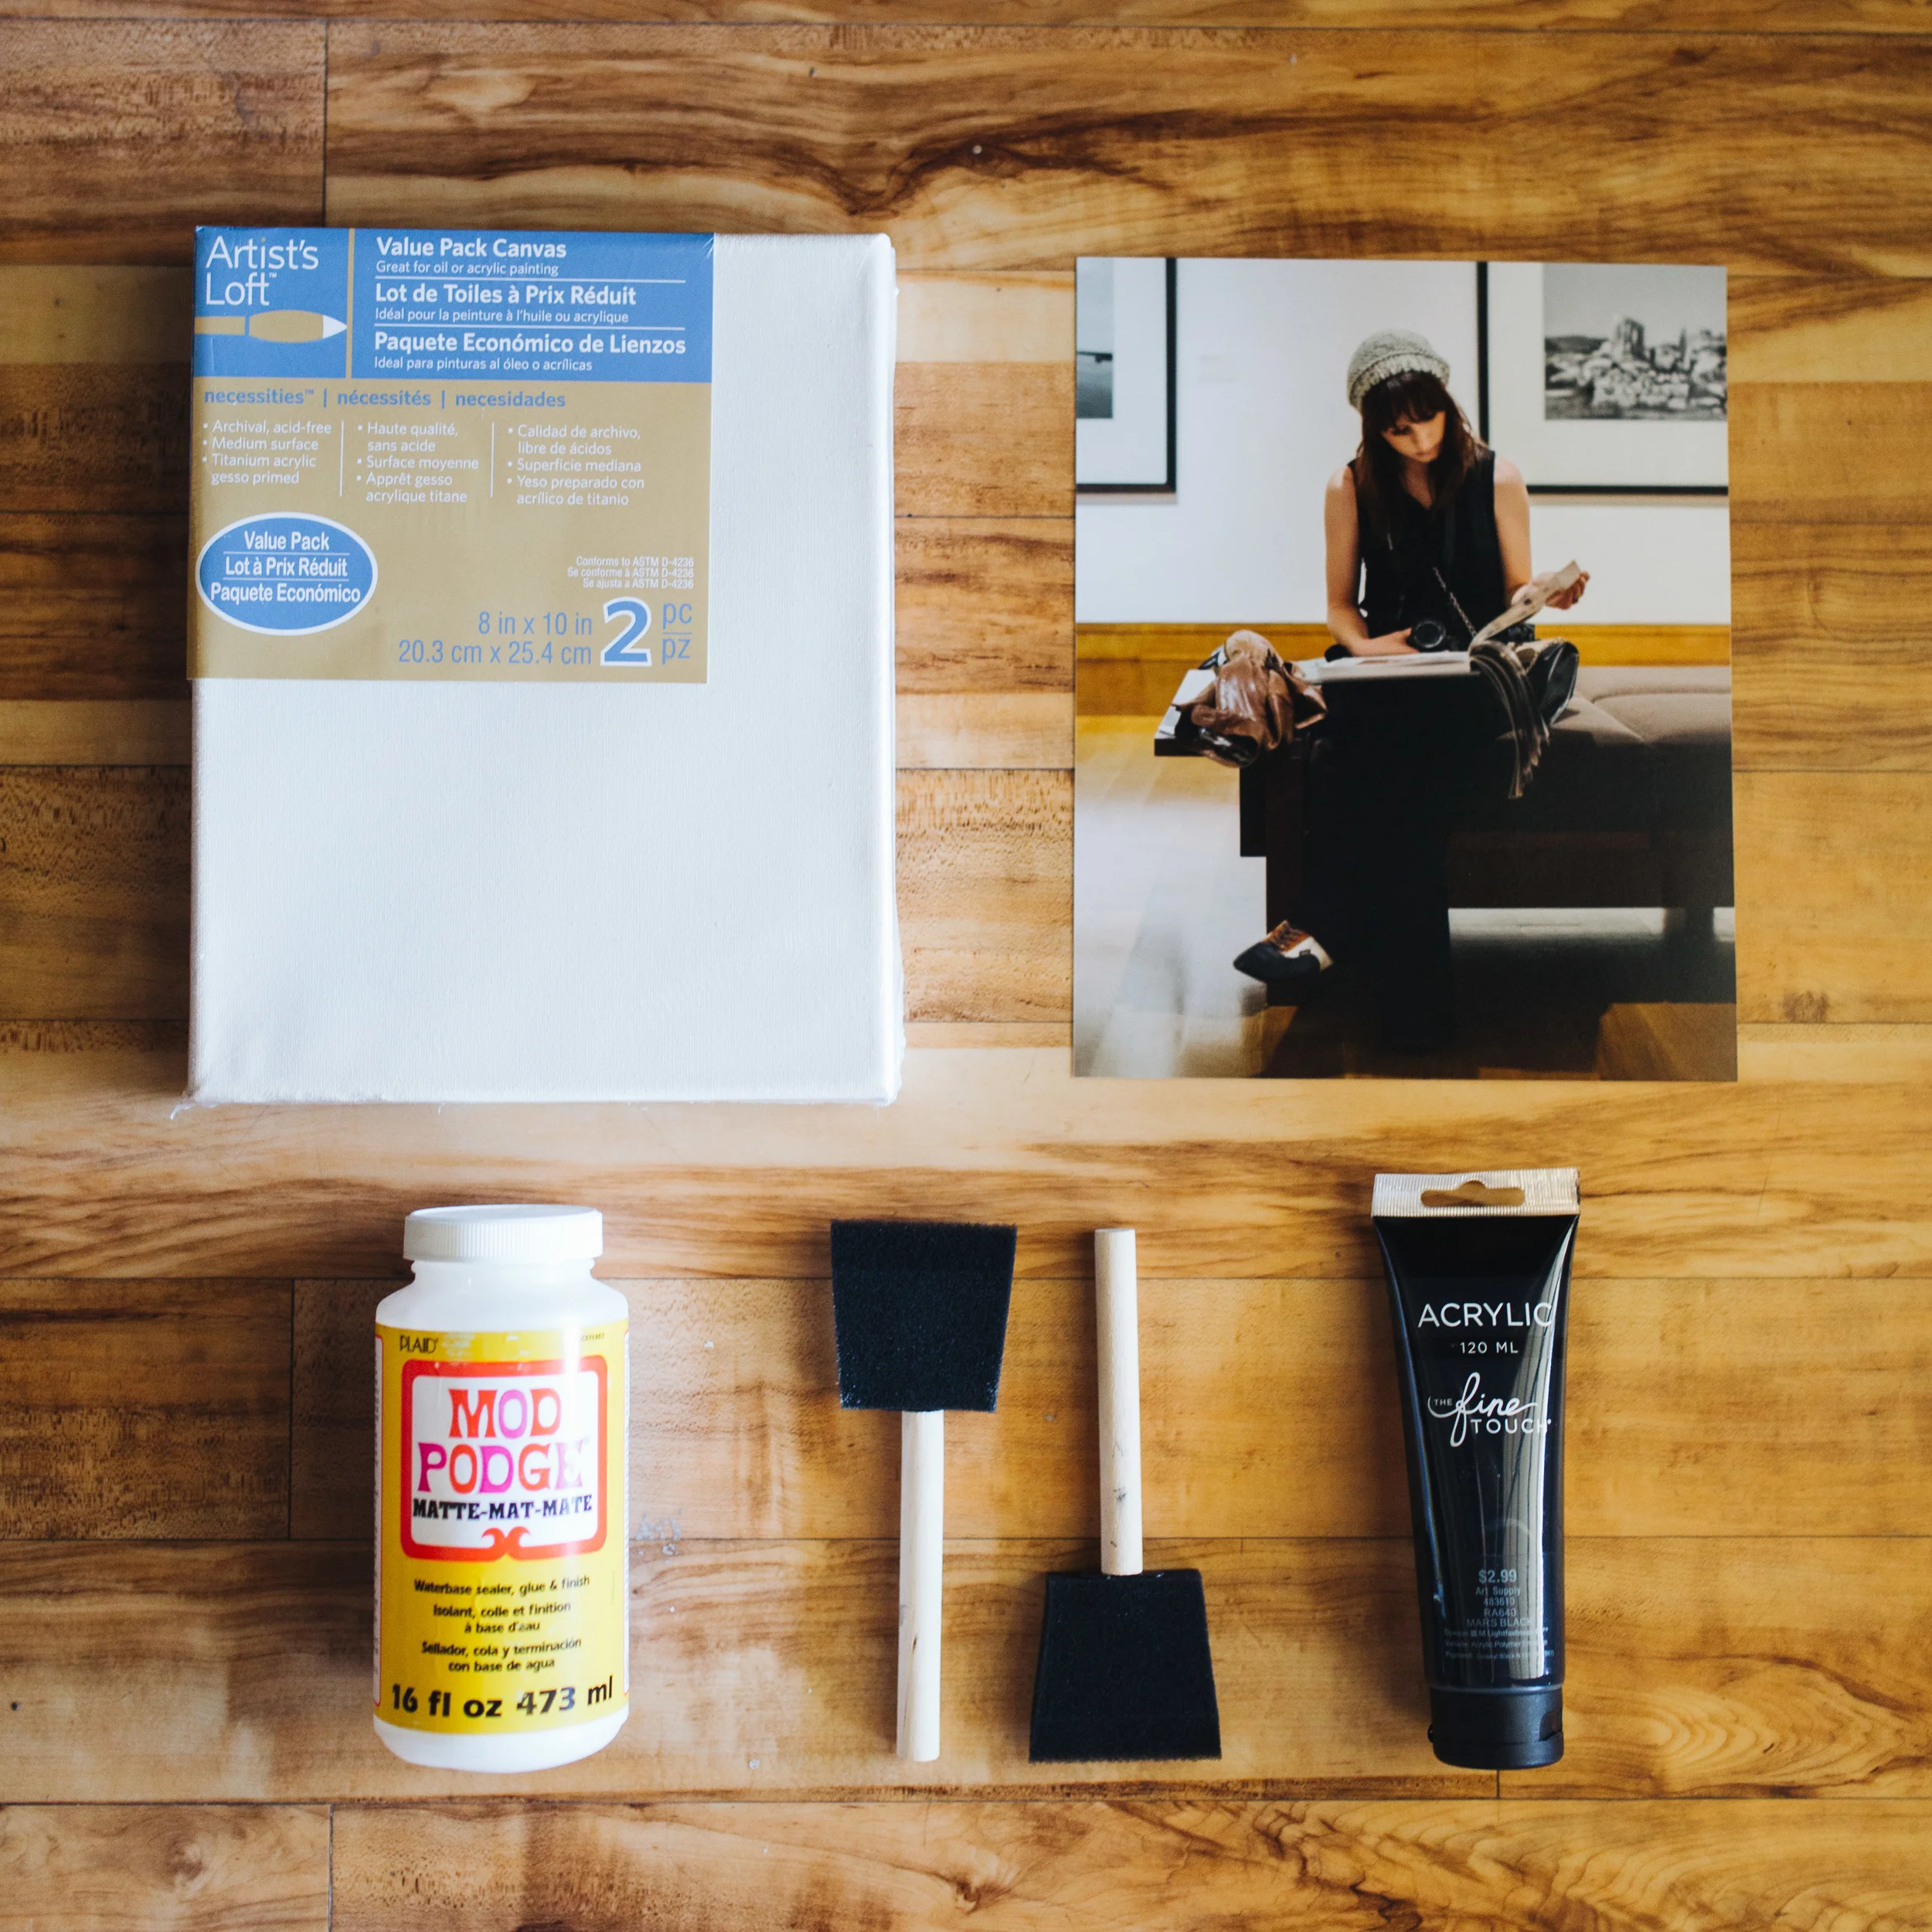
The materials that you’ll need are pretty simple:
· Two 8x10 canvases (You can use whatever size you’d like. It just needs to match the size of the print.)
· One photo print
· Matte Mod Podge
· A couple of foam brushes
· A small tube of acrylic paint
· Optional: Painter’s Tape
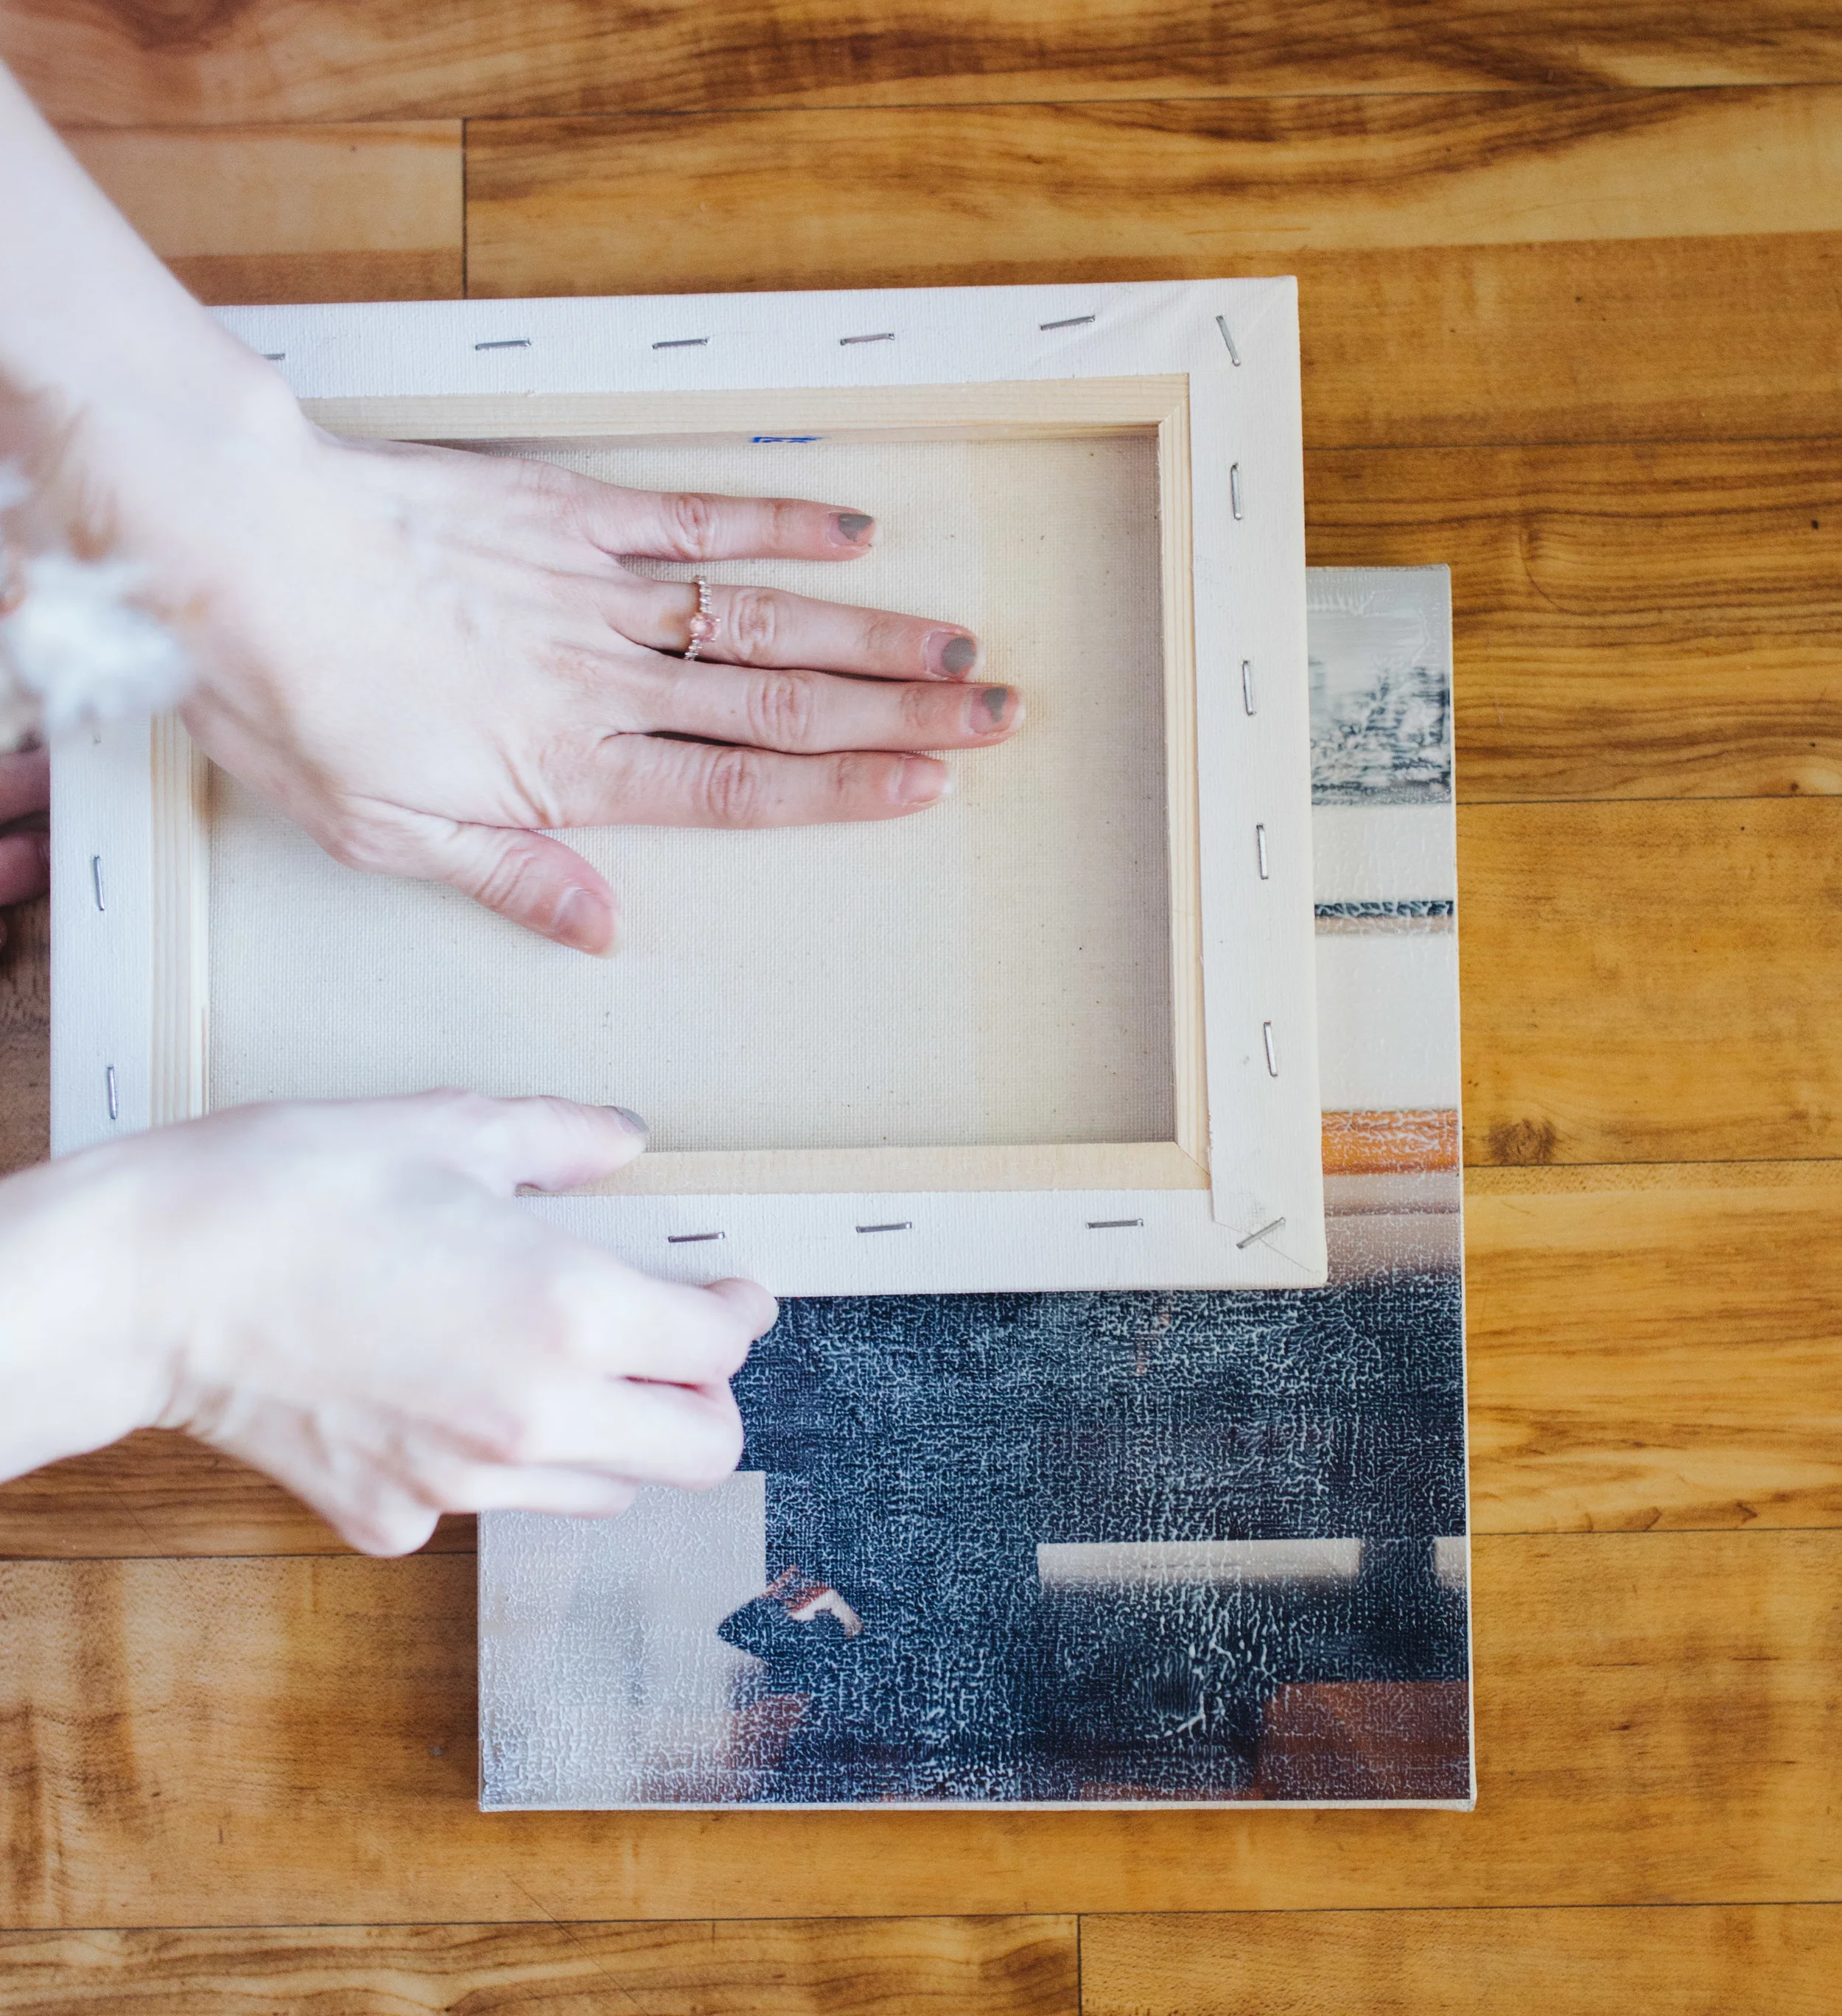
The first step involves laying down a thin layer of the Mod Podge on the canvas with one of the foam brushes. It doesn’t need to be incredibly thick here as you’re just using it to attach your photo to the canvas.

Then you’ll want to carefully lay the photo onto the top of the canvas and press it down. You need to make sure that the photo is glued down tight and won’t peel up before the next step. Now it’s time for one of those drying moments.


Now that your print is glued down on that canvas it’s time to lay down some more Mod Podge. This time it’s going right on top of the photo. I know what you’re thinking: here’s this lovely photo that I took, and I’m going to pour glue on top of it?! Stop, look at me, and take my hand. It will be okay. For this step you’ll want a little more Mod Podge poured on than in the previous step. Again, spread it around with a foam brush until it looks something like it does in the photos.


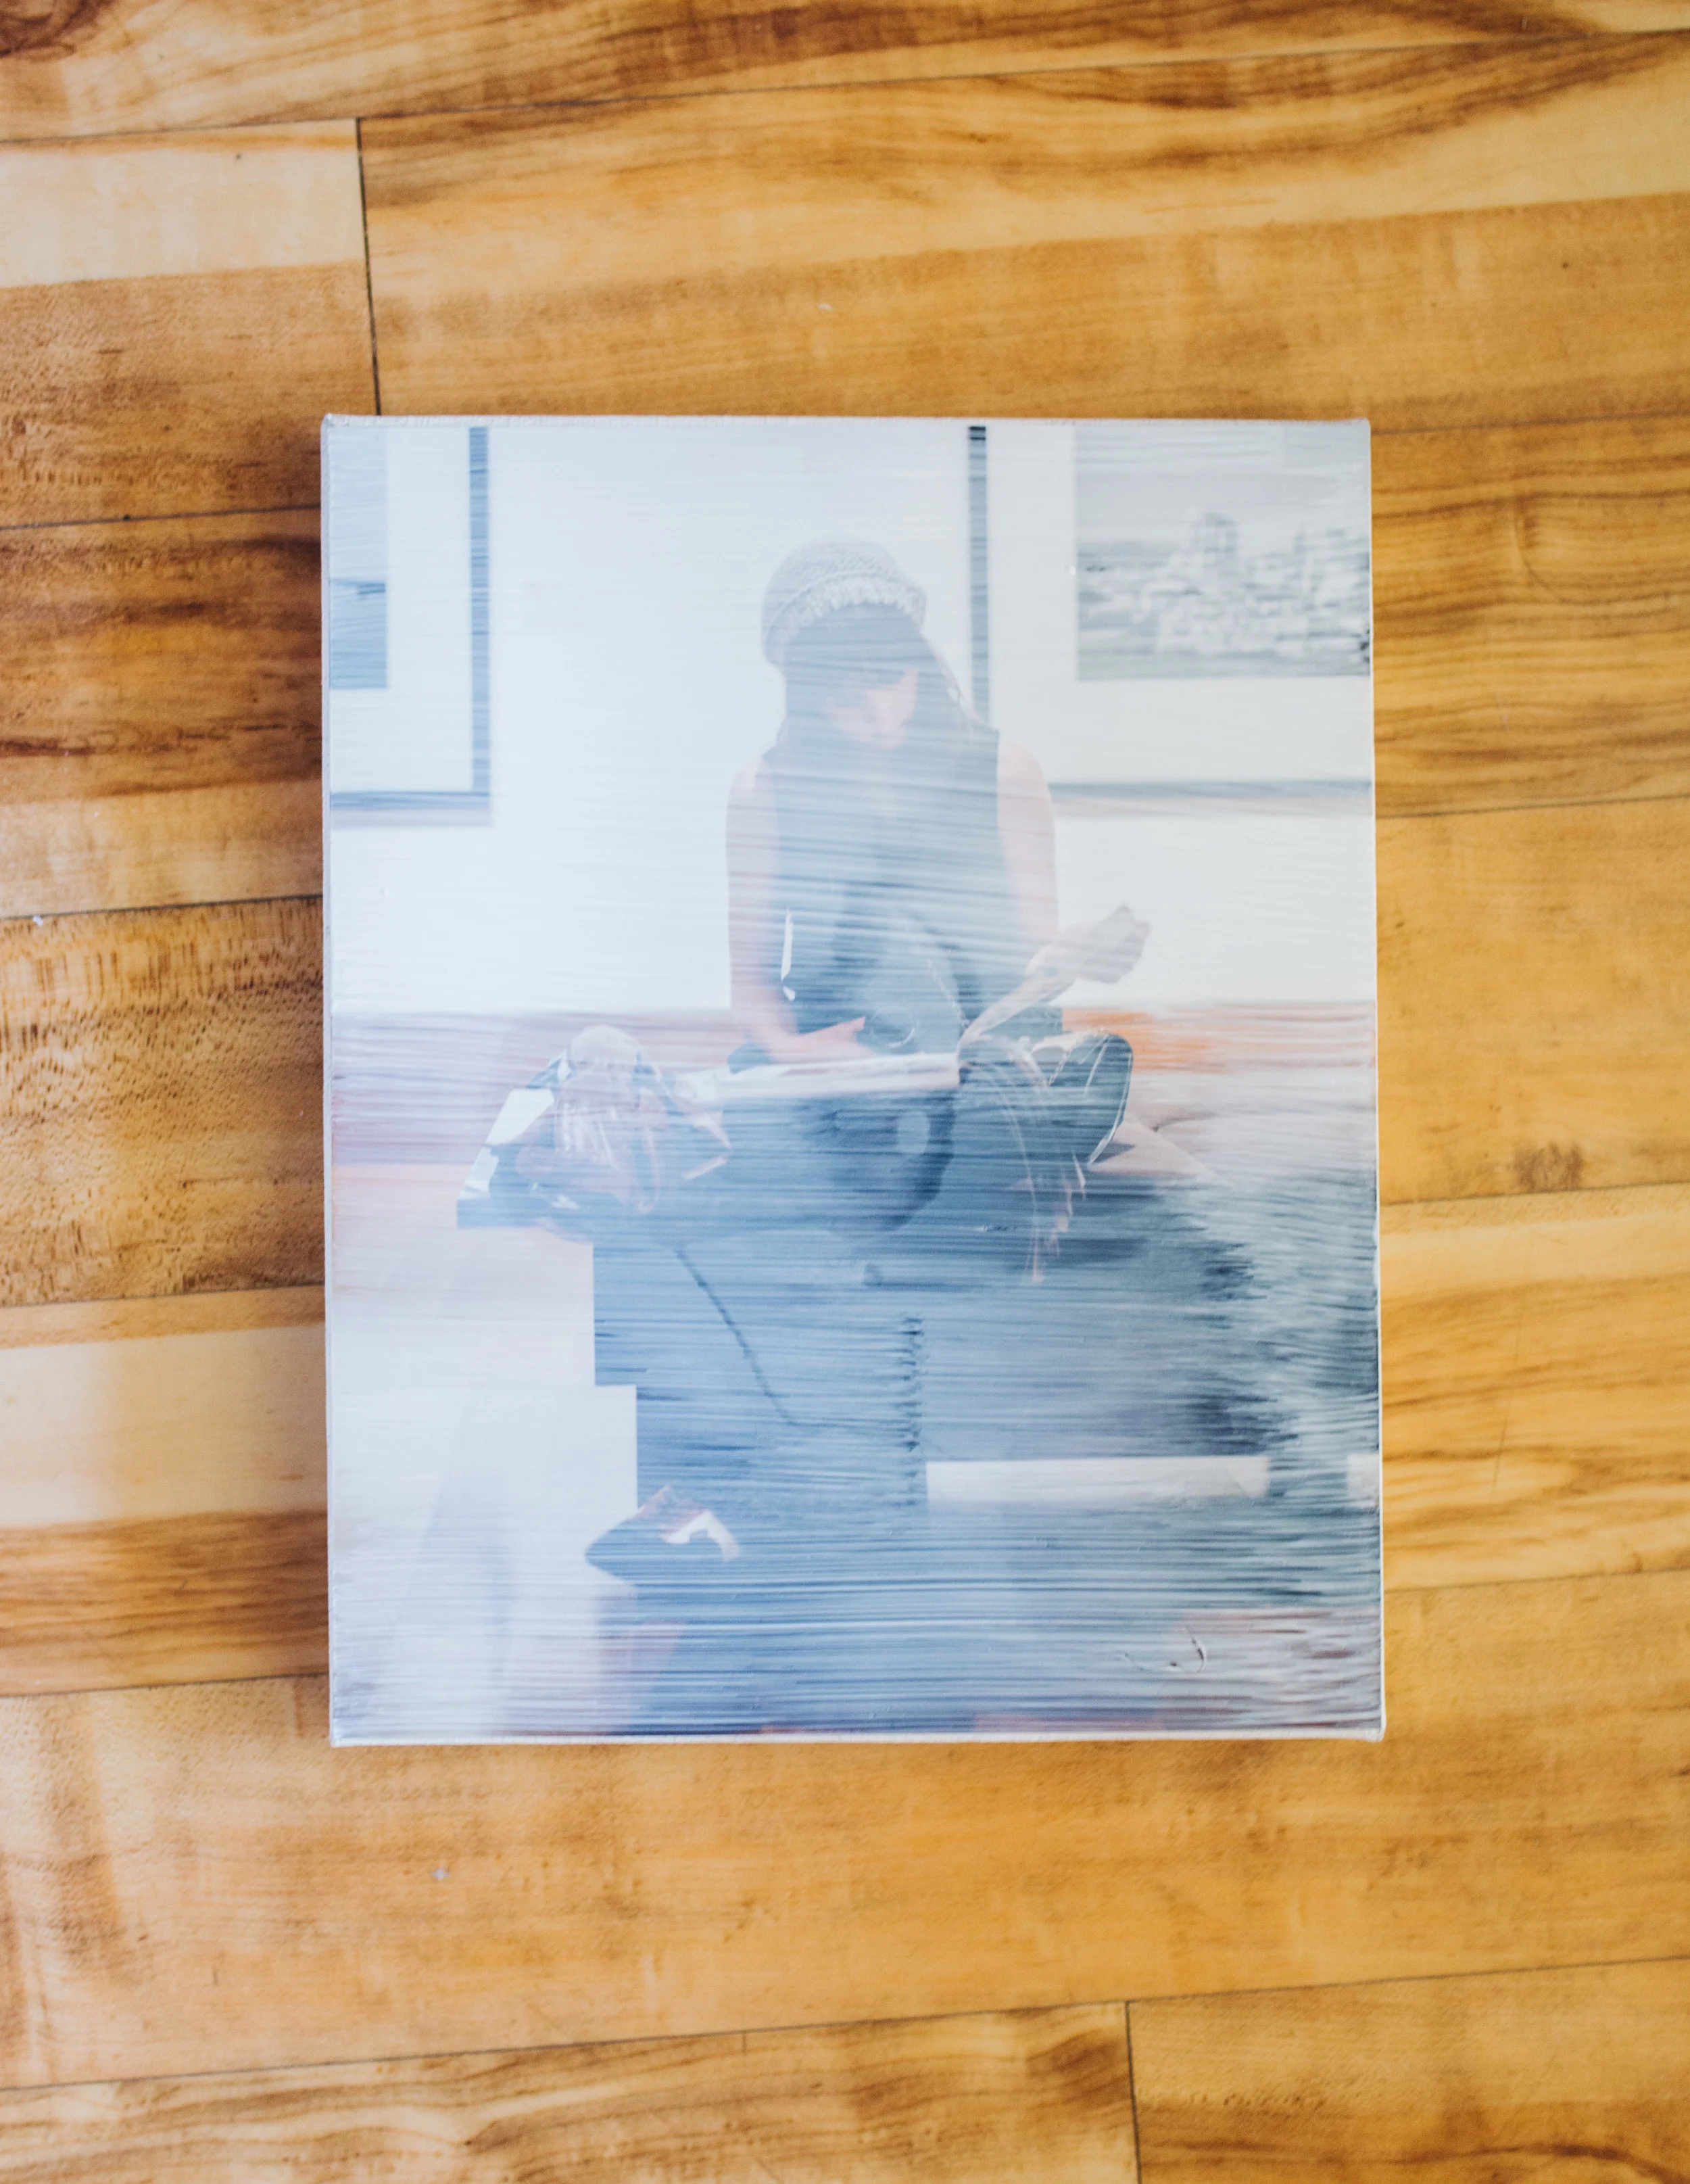
This is where that other canvas comes in handy, and it’s what makes this project a little different than just a photo glued onto a canvas. The purpose of this step is to transfer the texture from the canvas into the Mod Podge that you’ve put on top of your photo. In order to do this, you just need to flip the canvas and press it right on top of your canvas with the print glued to it. Make sure to press these two canvases together pretty tight. We usually run our hands along the back and the sides as hard as we can in order to make sure that it was pressed together everywhere.


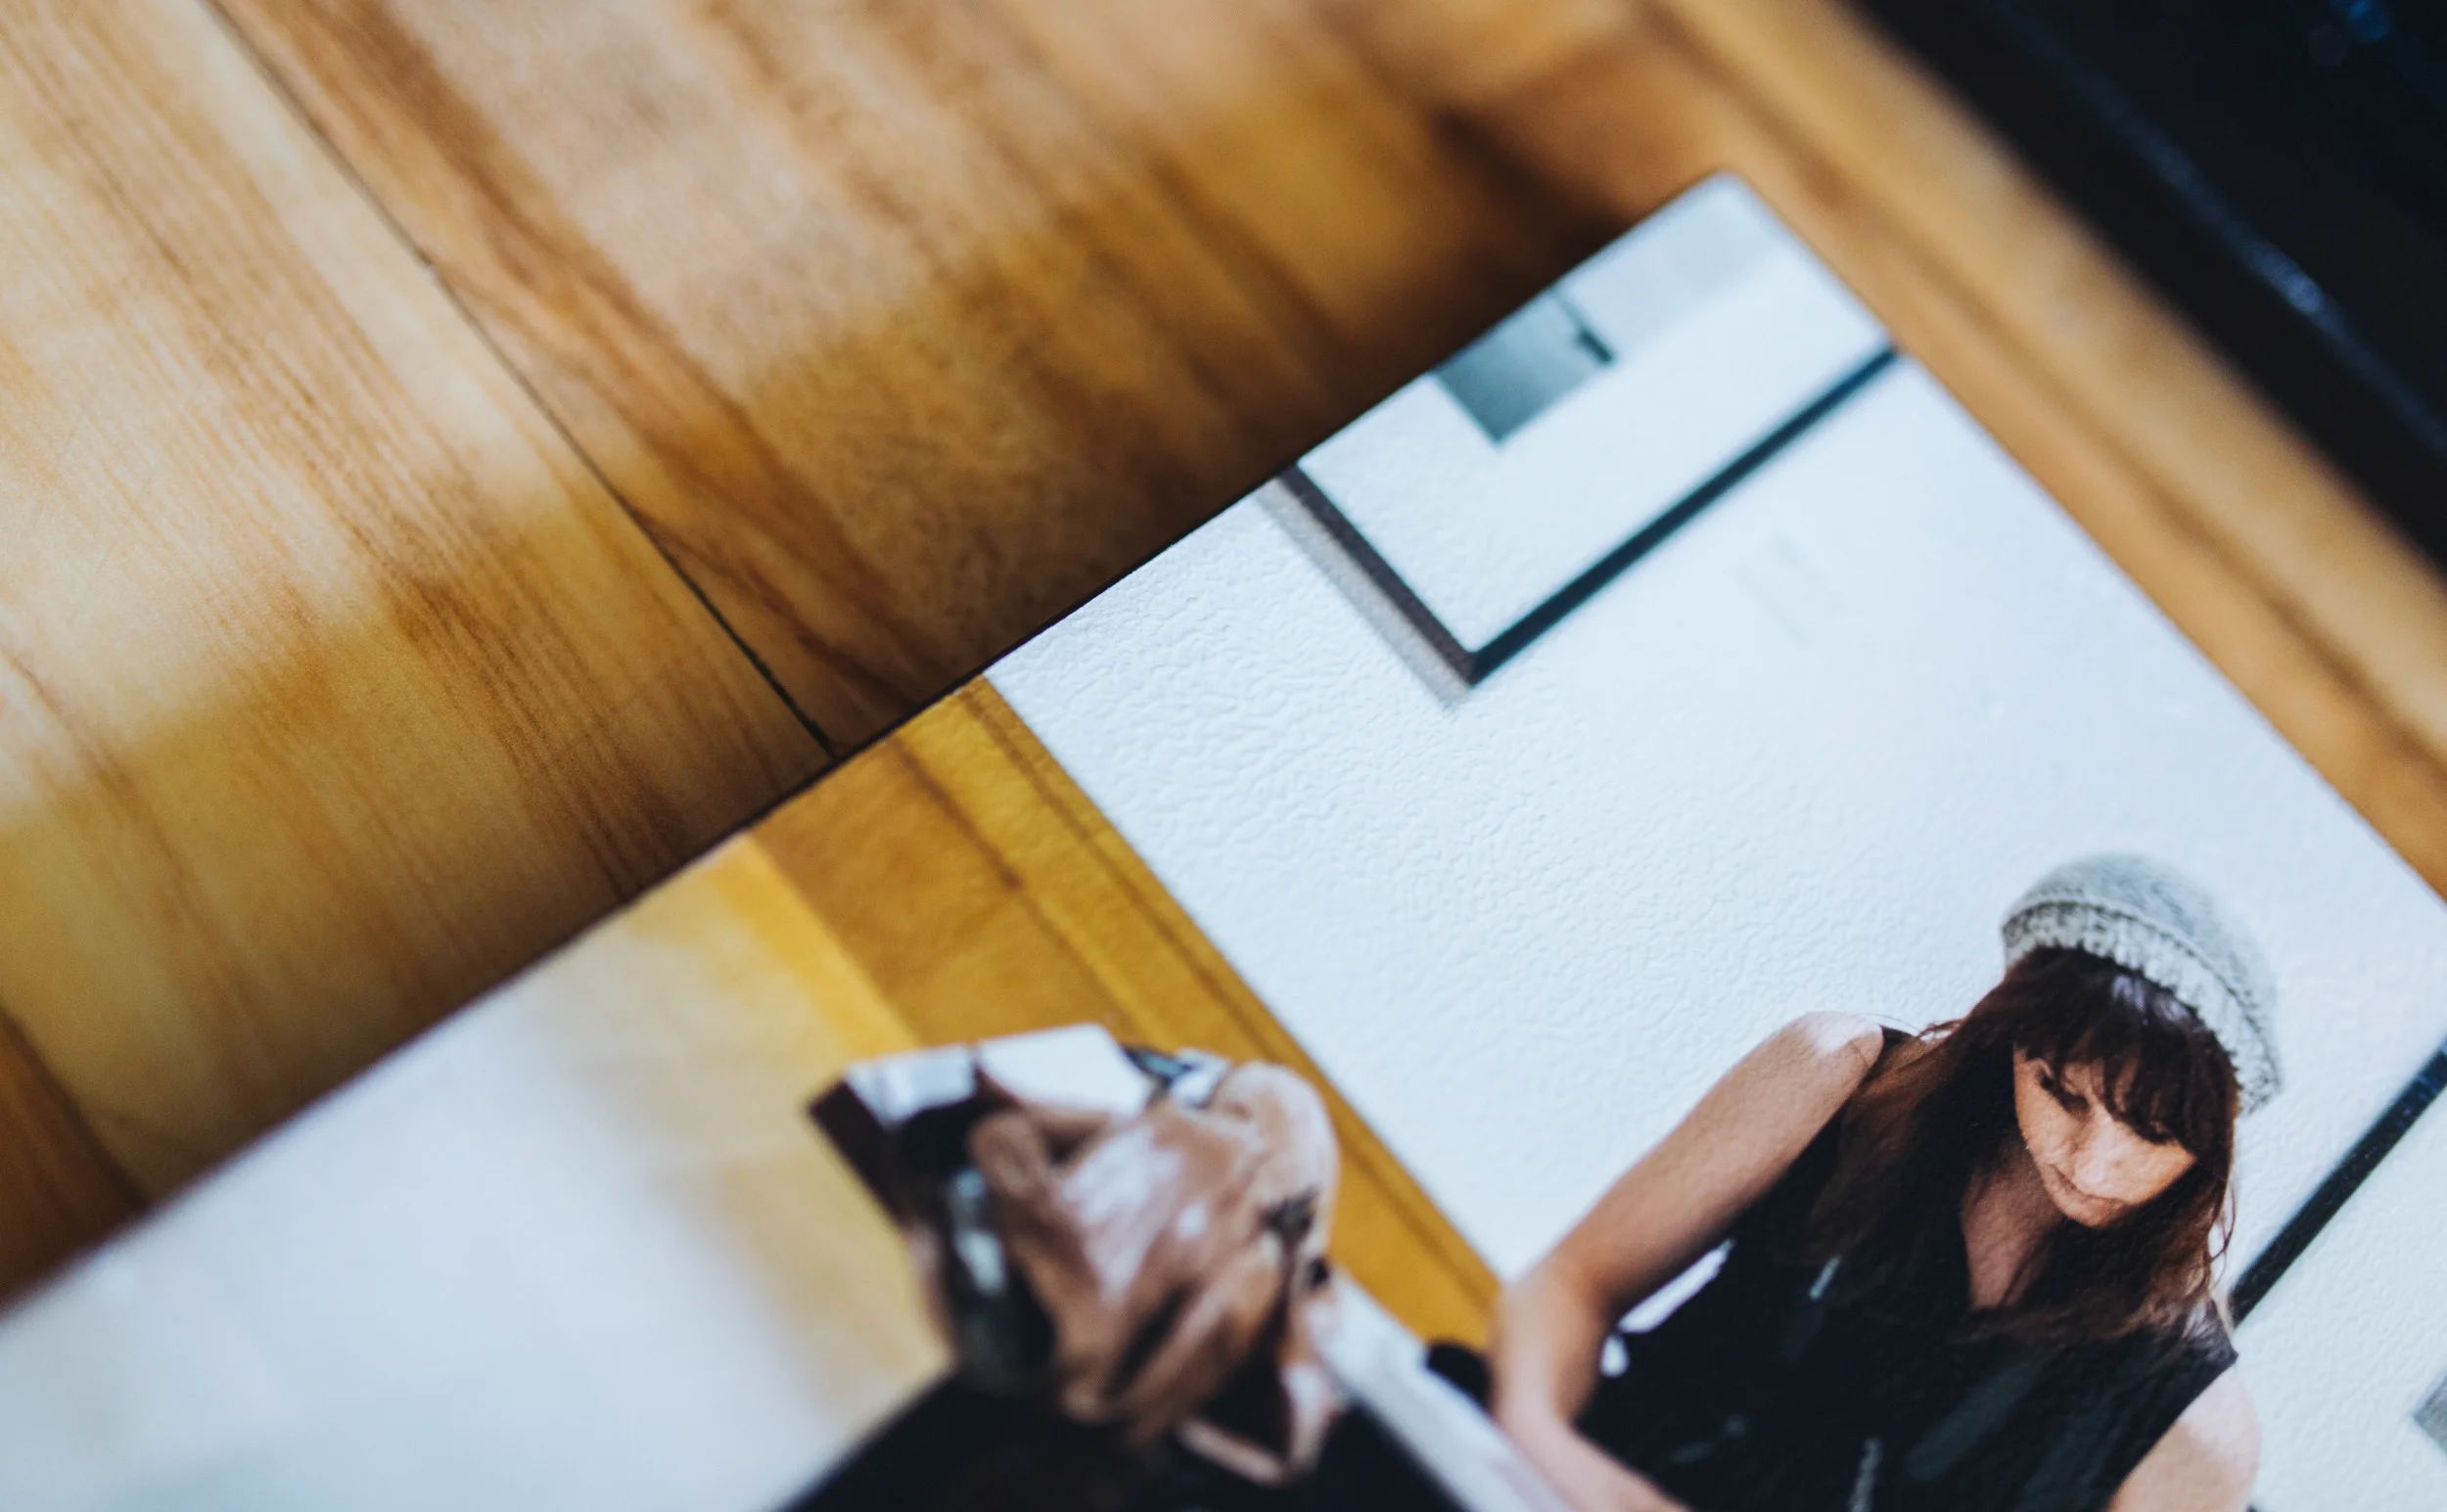
You can carefully peel the two canvases apart now and see what you’ve done. There’s a good chance that you may have a section on the canvas with the print where the texture did not transfer. In that case, you can take your blank canvas, target those spots, and re-press them in order to fix it.
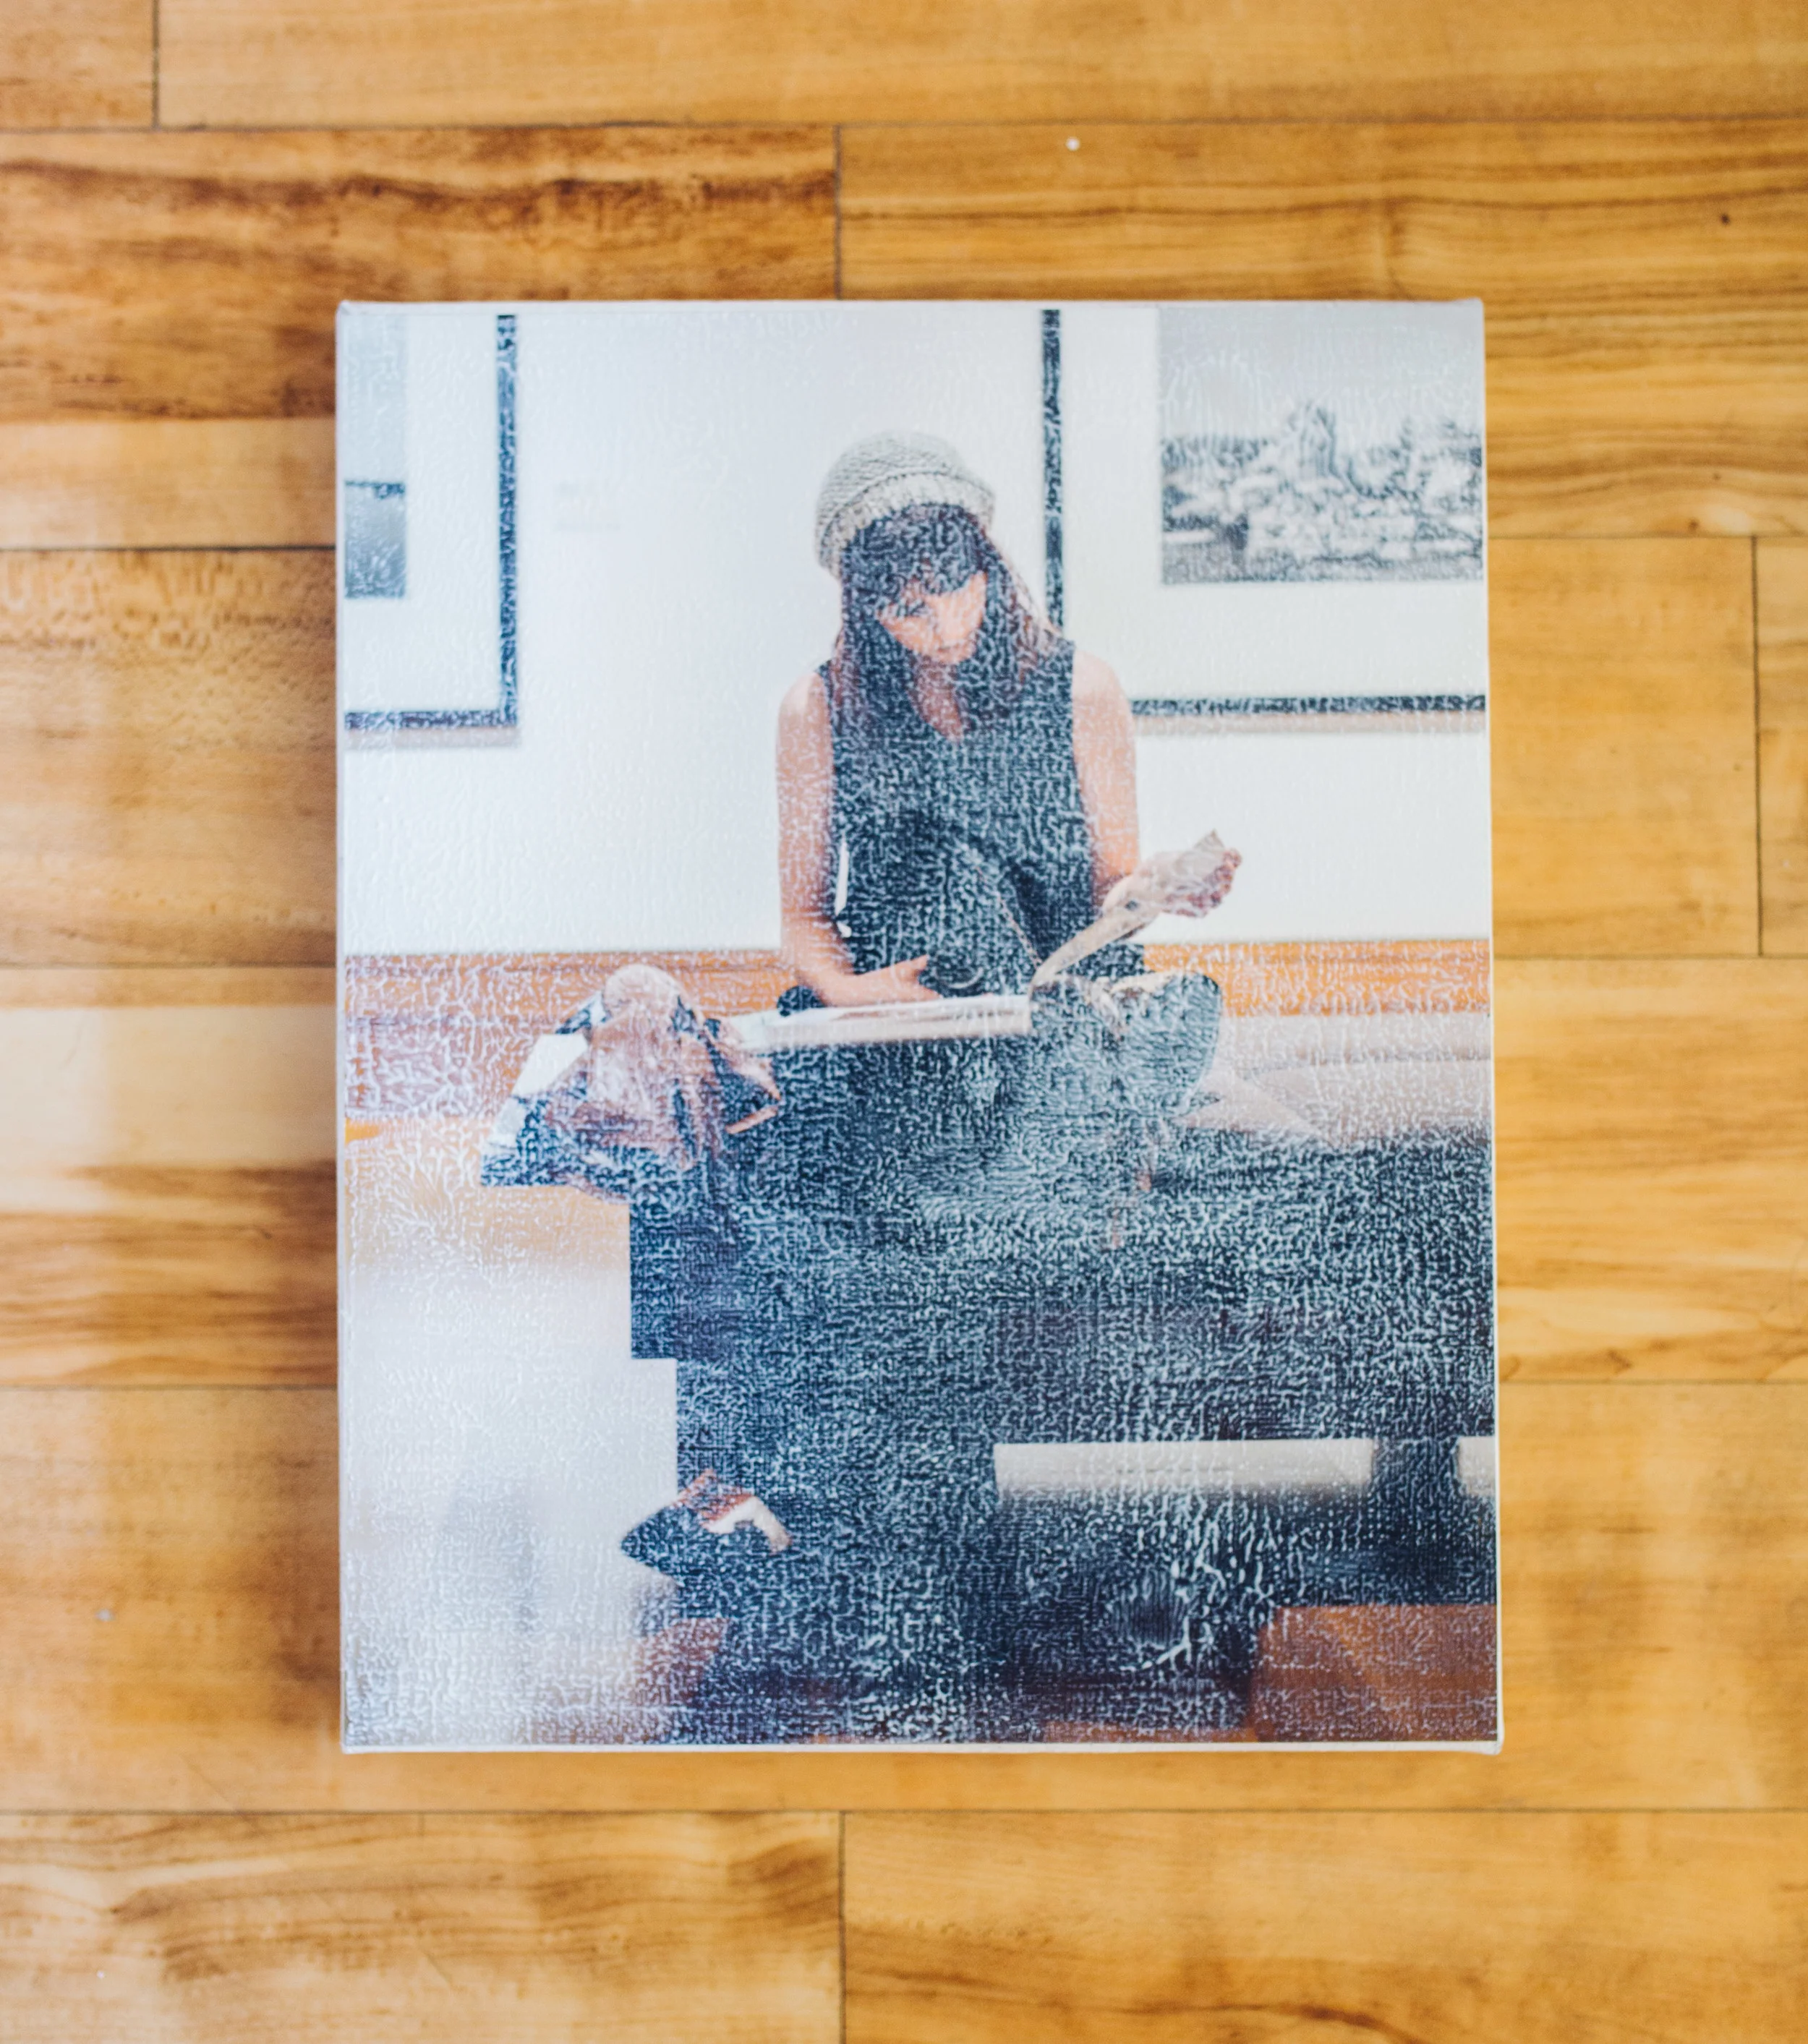
Voila! Now you have a really gross looking, spotty white photo! Wait, that’s not what we signed up for. Your mom is going to look at the canvas, look at you, and then look back at the canvas, then she’s probably going to give you a big hug anyway because she loves you no matter what. Remember that section about looking at me? It will all be okay? That all applies to this section as well. If you’ve already written your mom that brilliant note then take a minute and have some iced coffee because this is another one of those drying moments. Again, you can speed it up with a blow dryer if that strikes your fancy too, but once it starts to dry it will begin to clear.

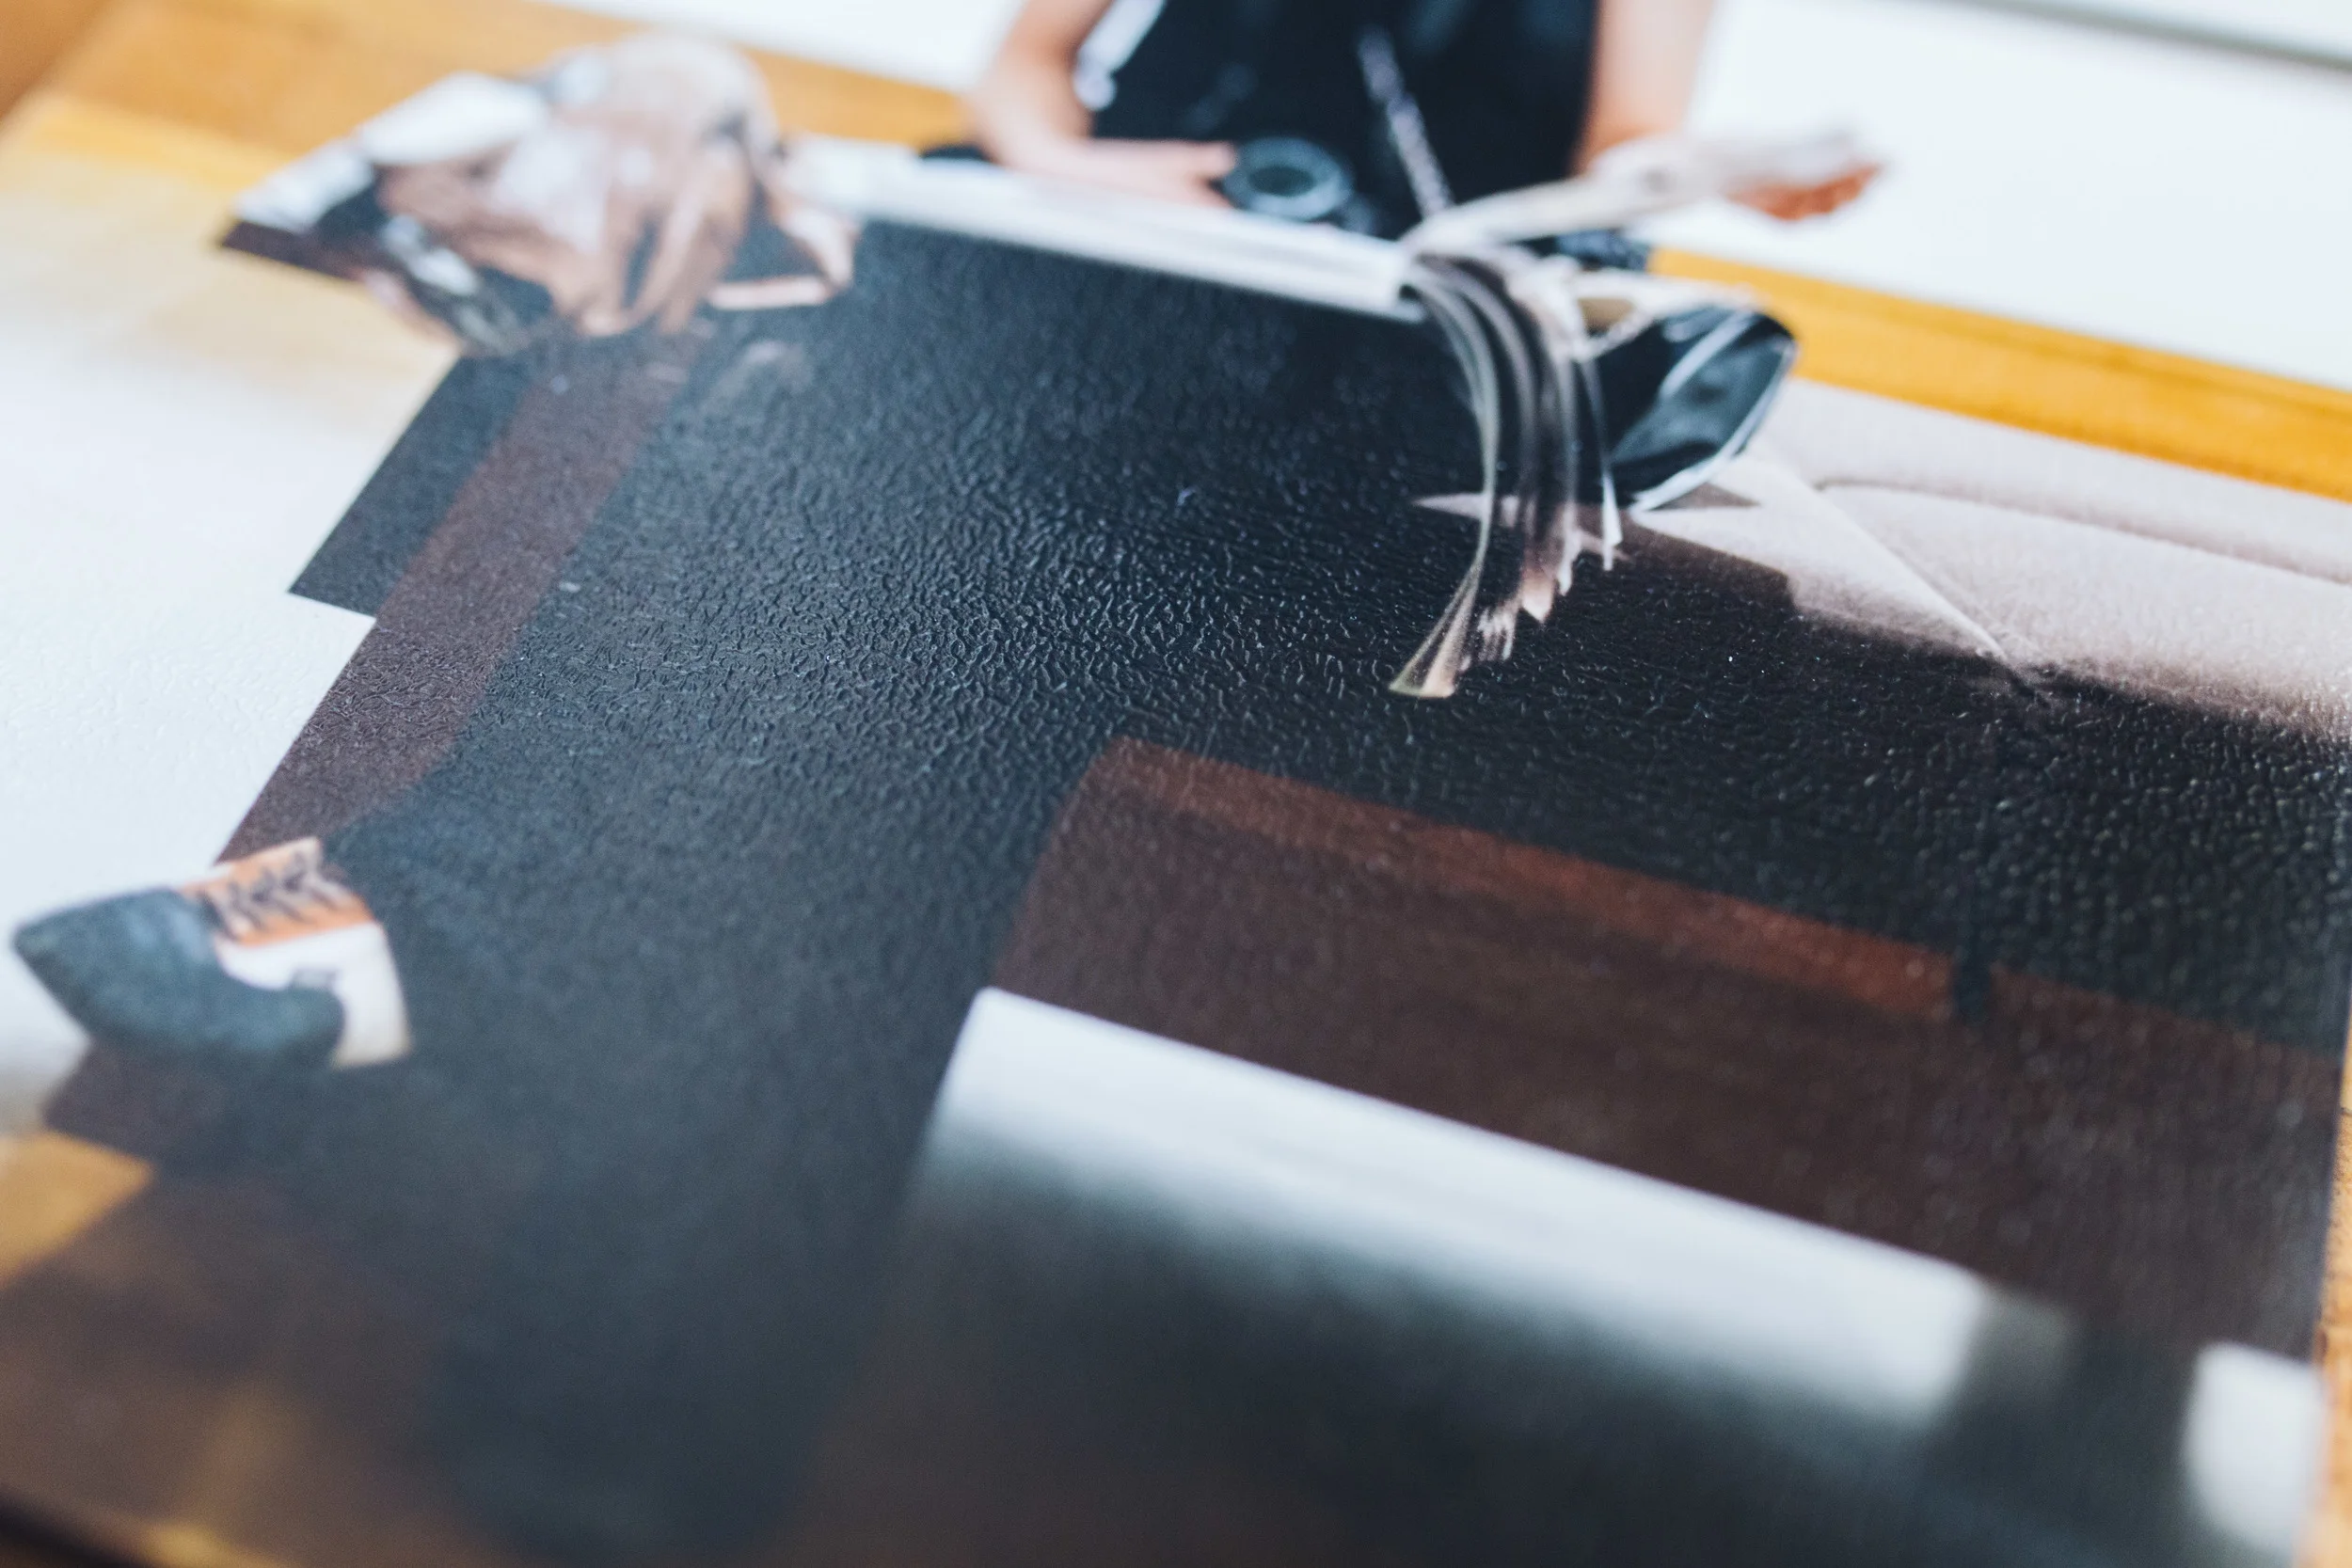
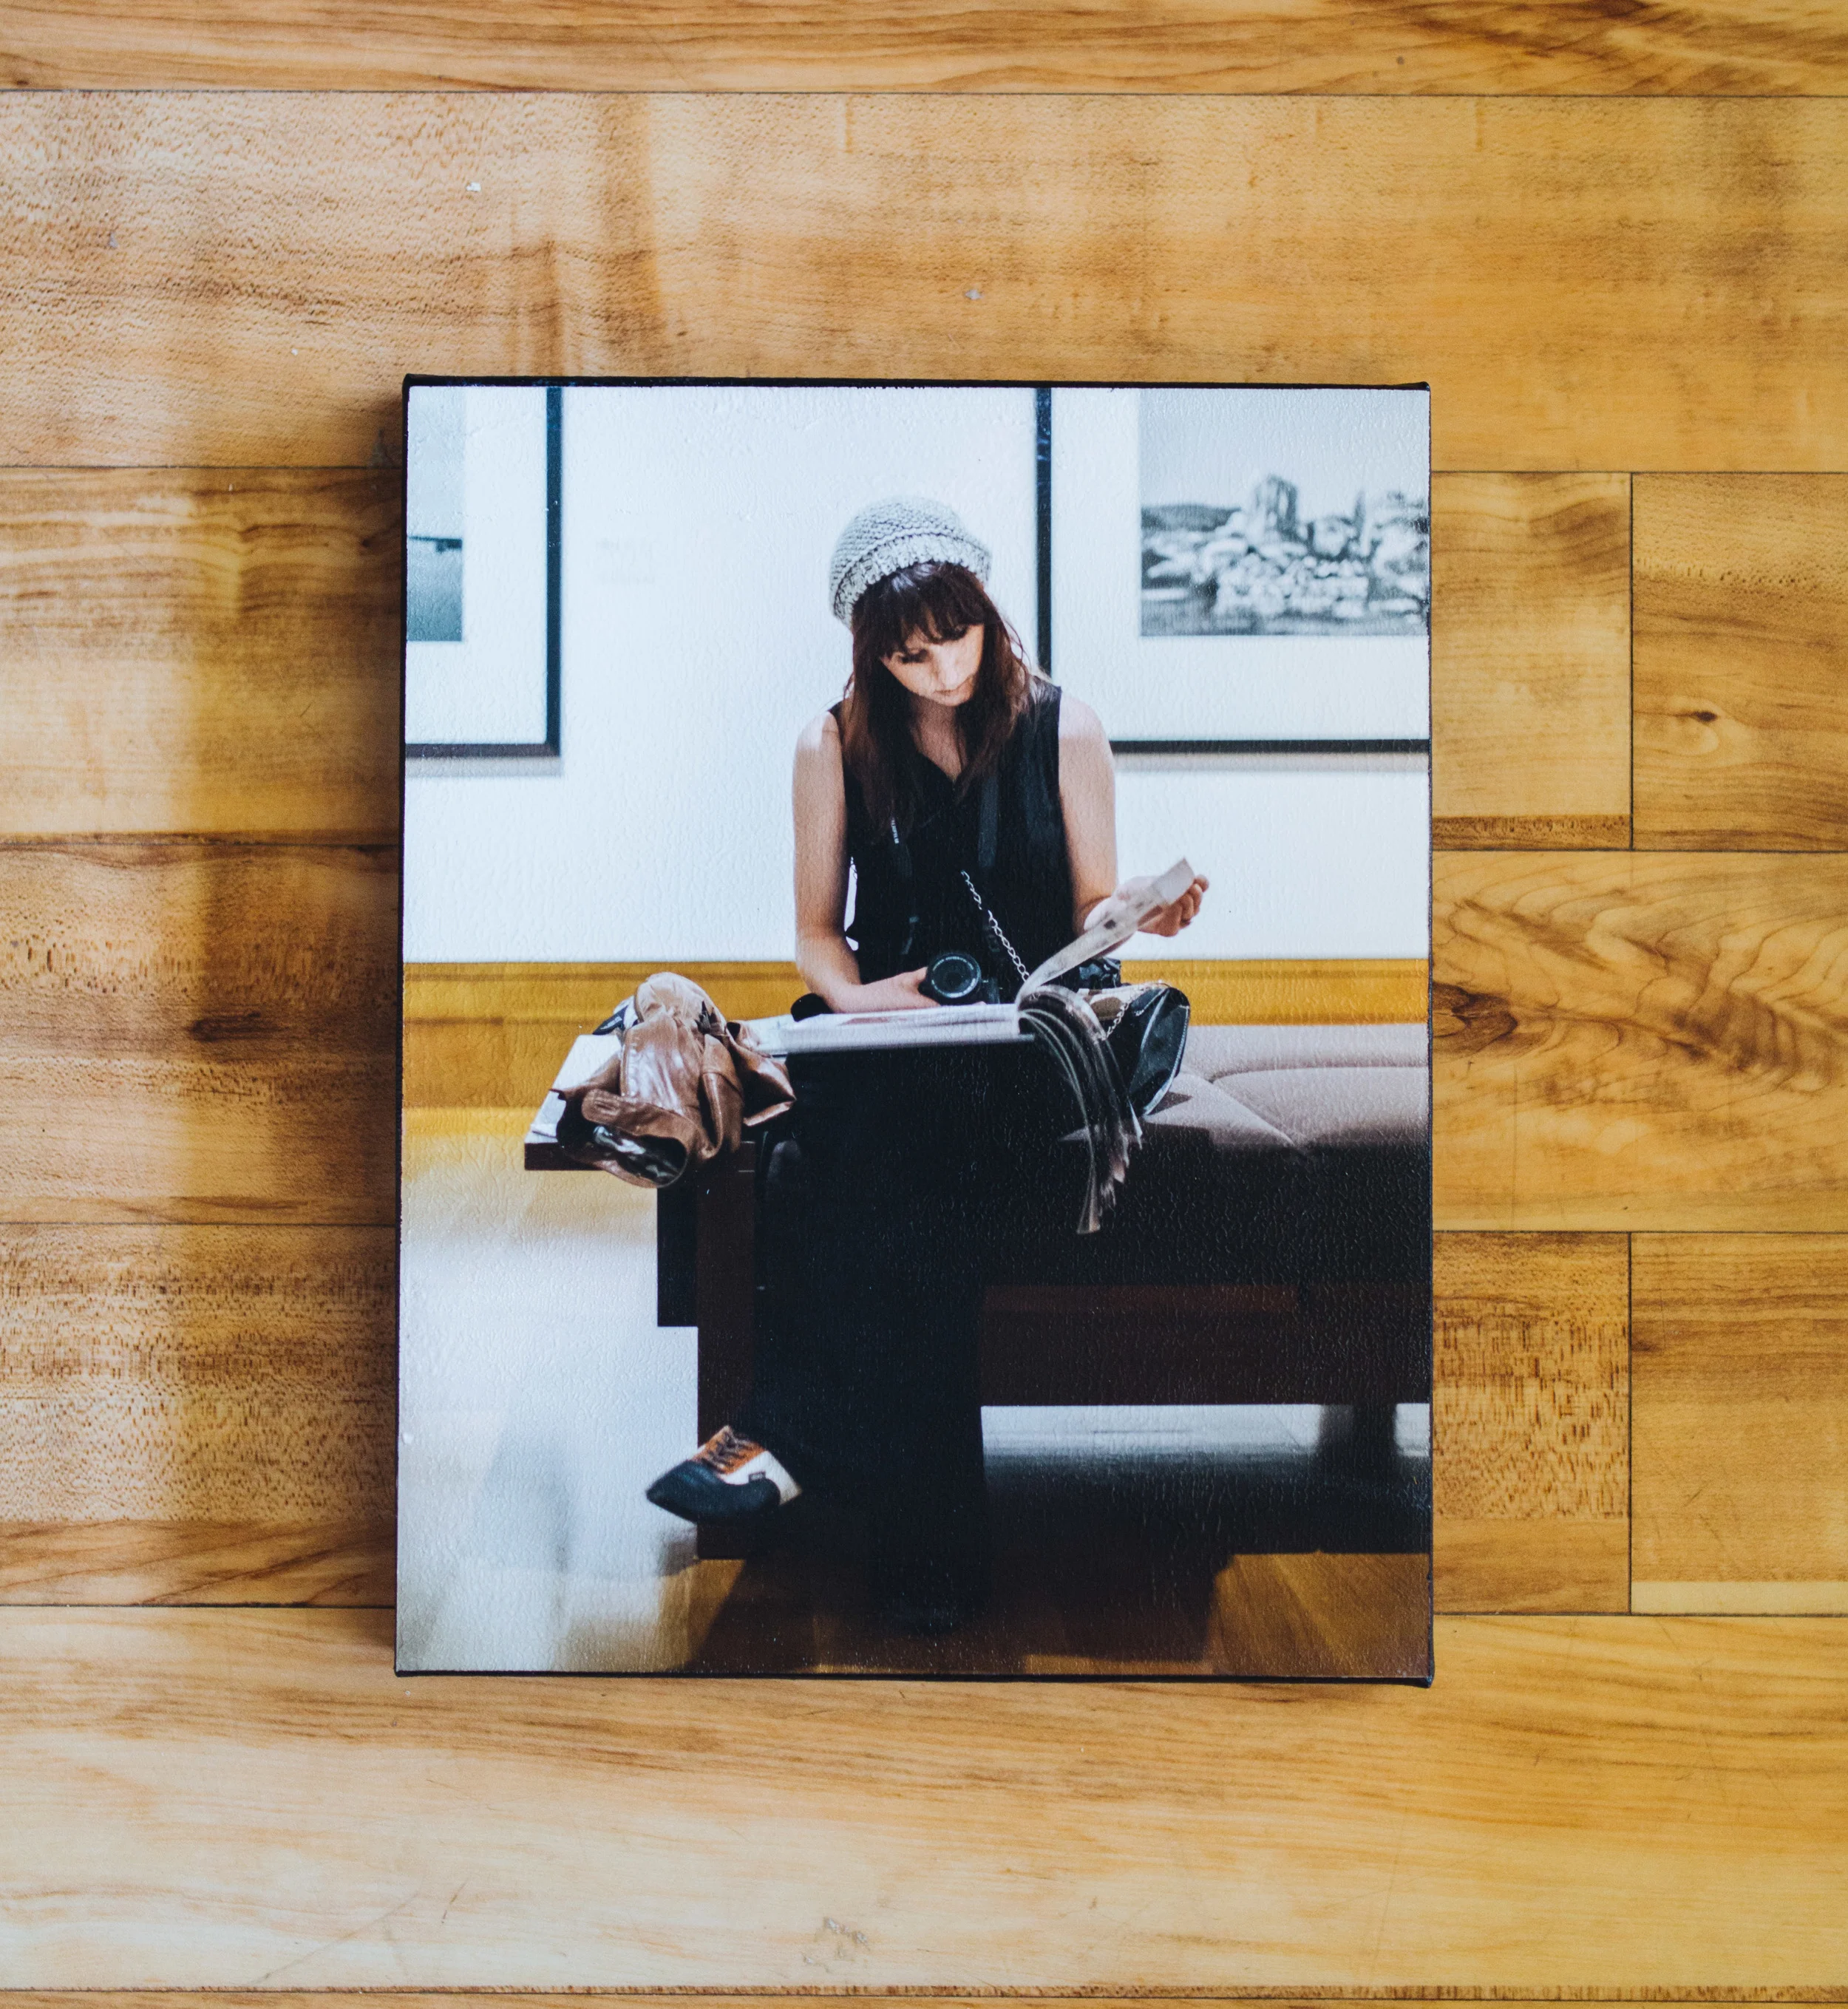
Here's a close-up of that texture you just built into it!
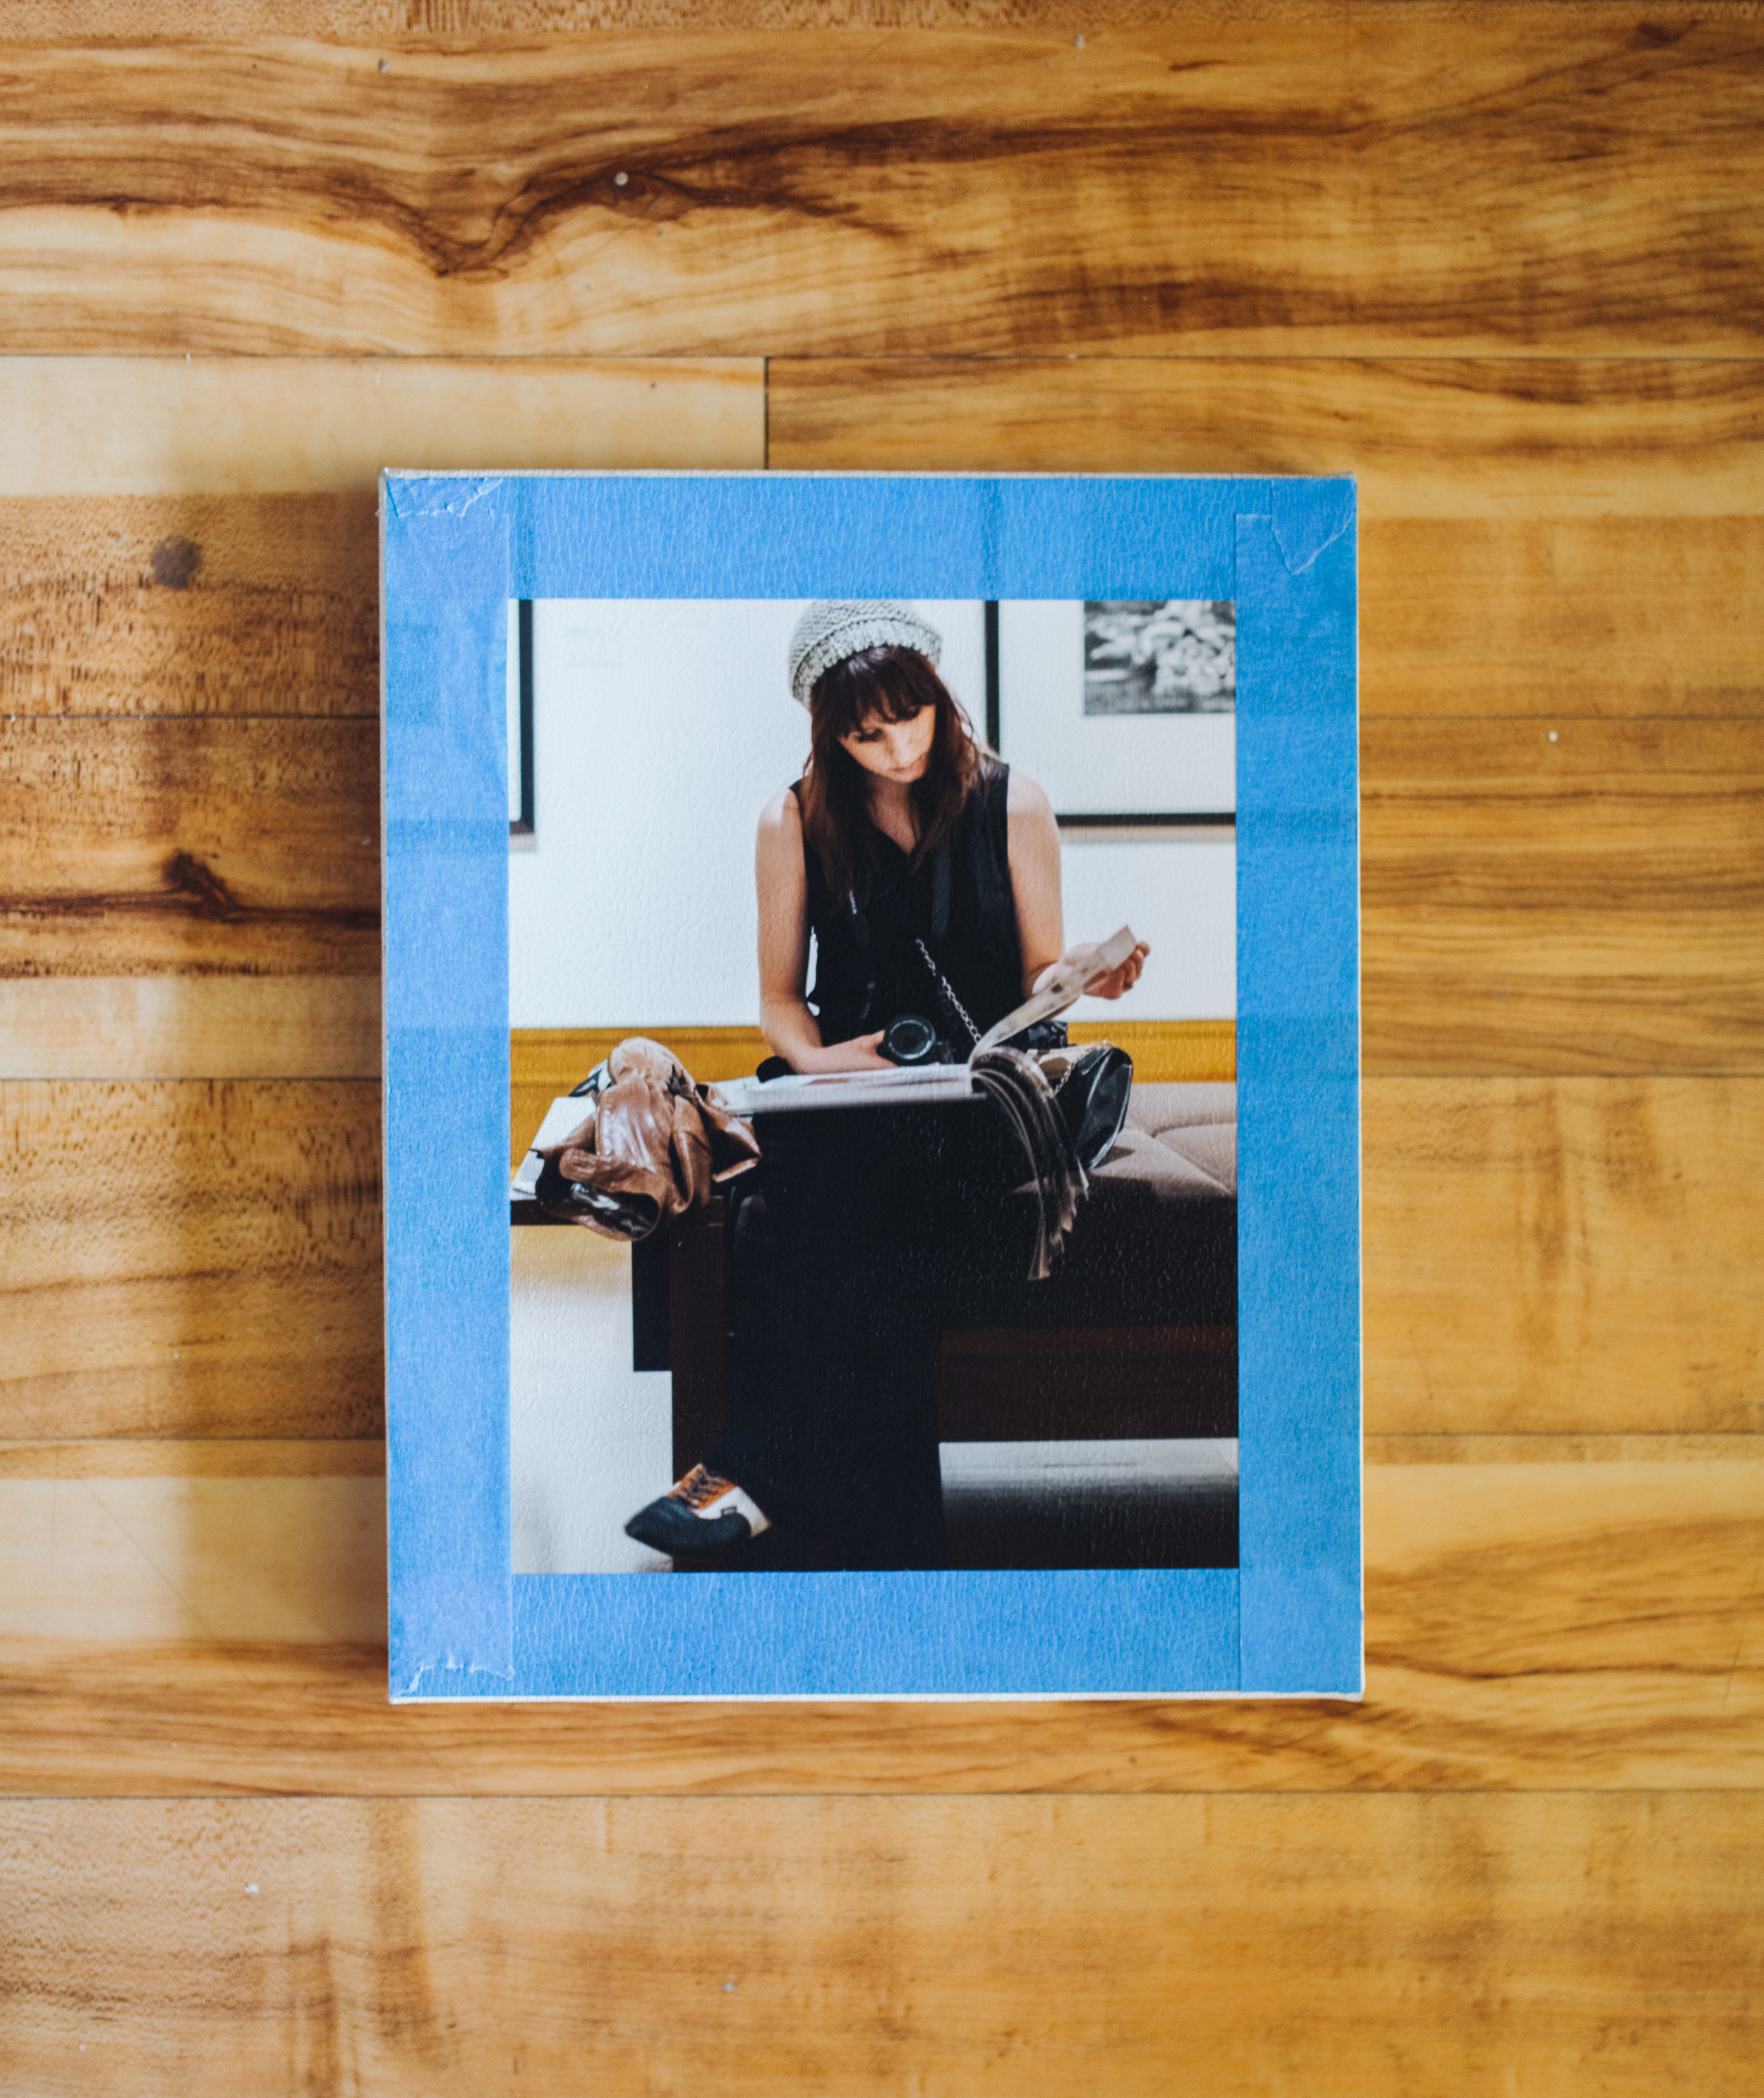
Now that it’s all dry it should be looking pretty sweet! If you’re happy with it at this point then you can call it a day and pull out the wrapping paper. There’s another step we like to take after this point though, and that is painting around the edges. I like using black paint because it works for most photos, but you can feel free to use whatever color you think would complement the photo. On this photo we taped off the edges with the blue painter’s tape so that we could get straight, clean lines. This isn't a step you have to take. We have an example below of one we had done without it. Once that is all taped down you can use your other foam brush and some of your acrylic paint and start working your way around the edges. When you’re done with that it’s time to let it dry.
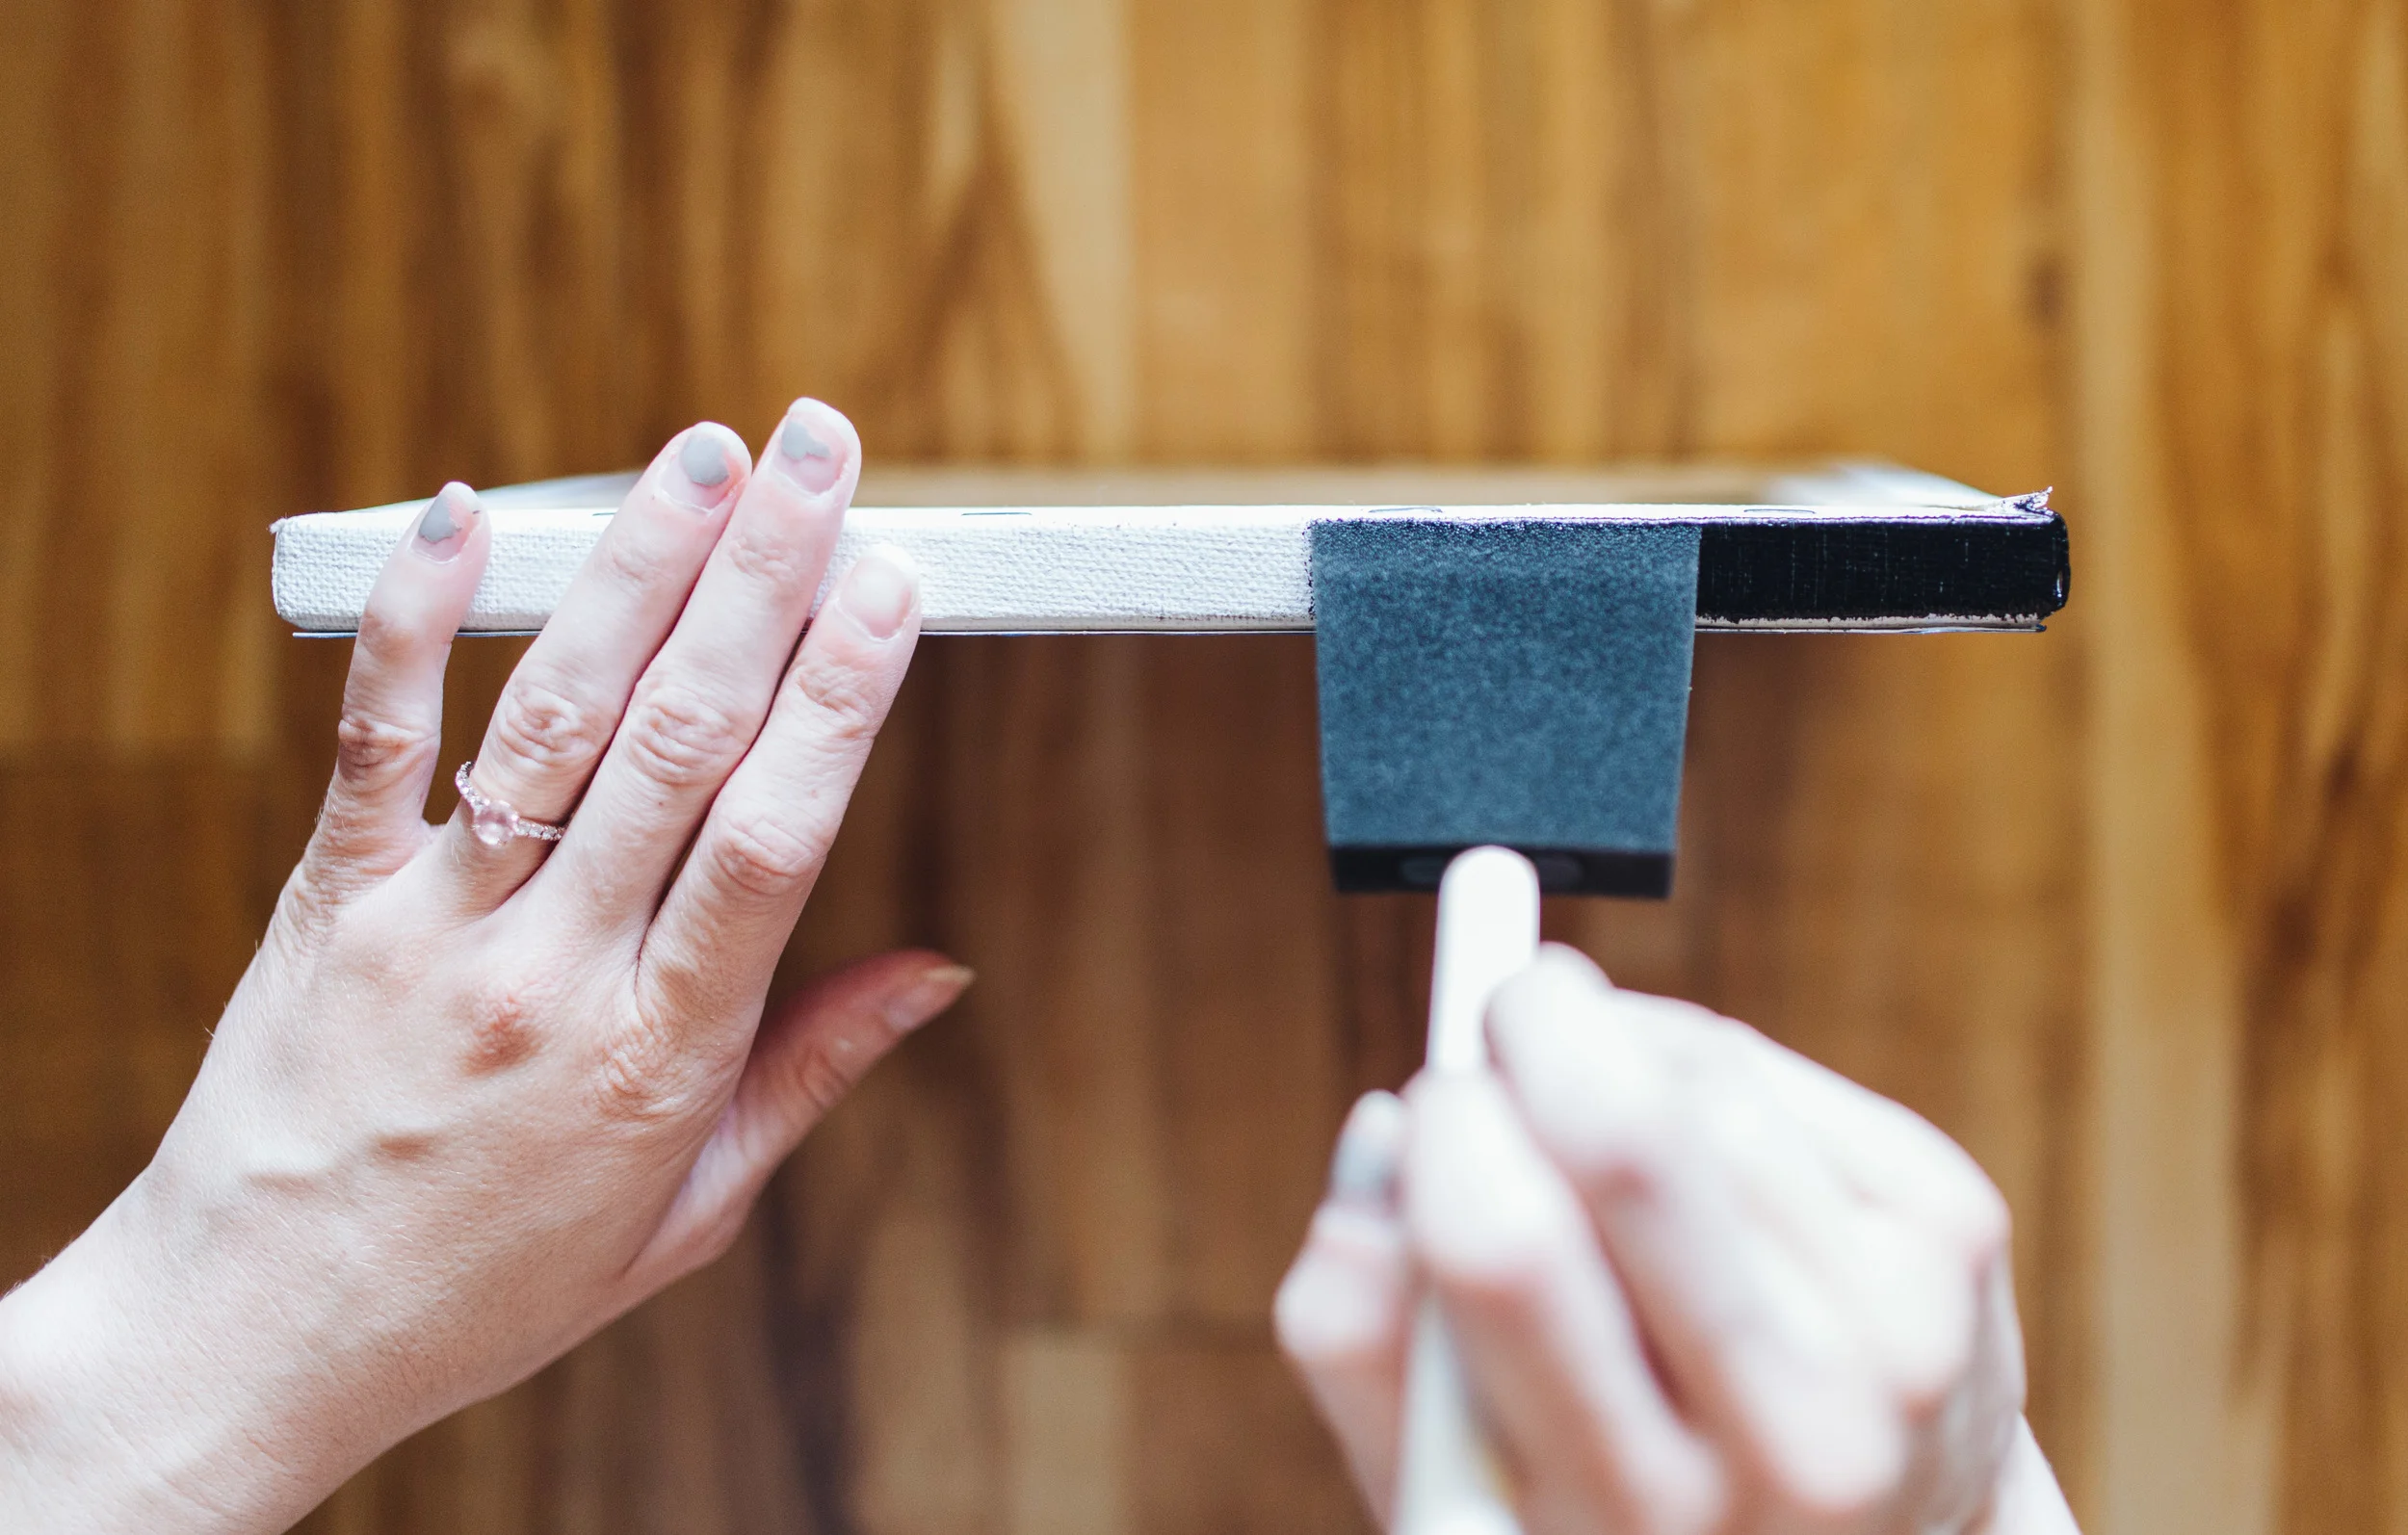
Here's that example without the painter's tape. We just use one of the foam brushes to touch up the edges. This has more of a rugged look to it. It’s really up to you on how you’d like the final product to appear.

Once it’s completely dry you can remove that painter’s tape if you used it. That’s it. You’re all done!
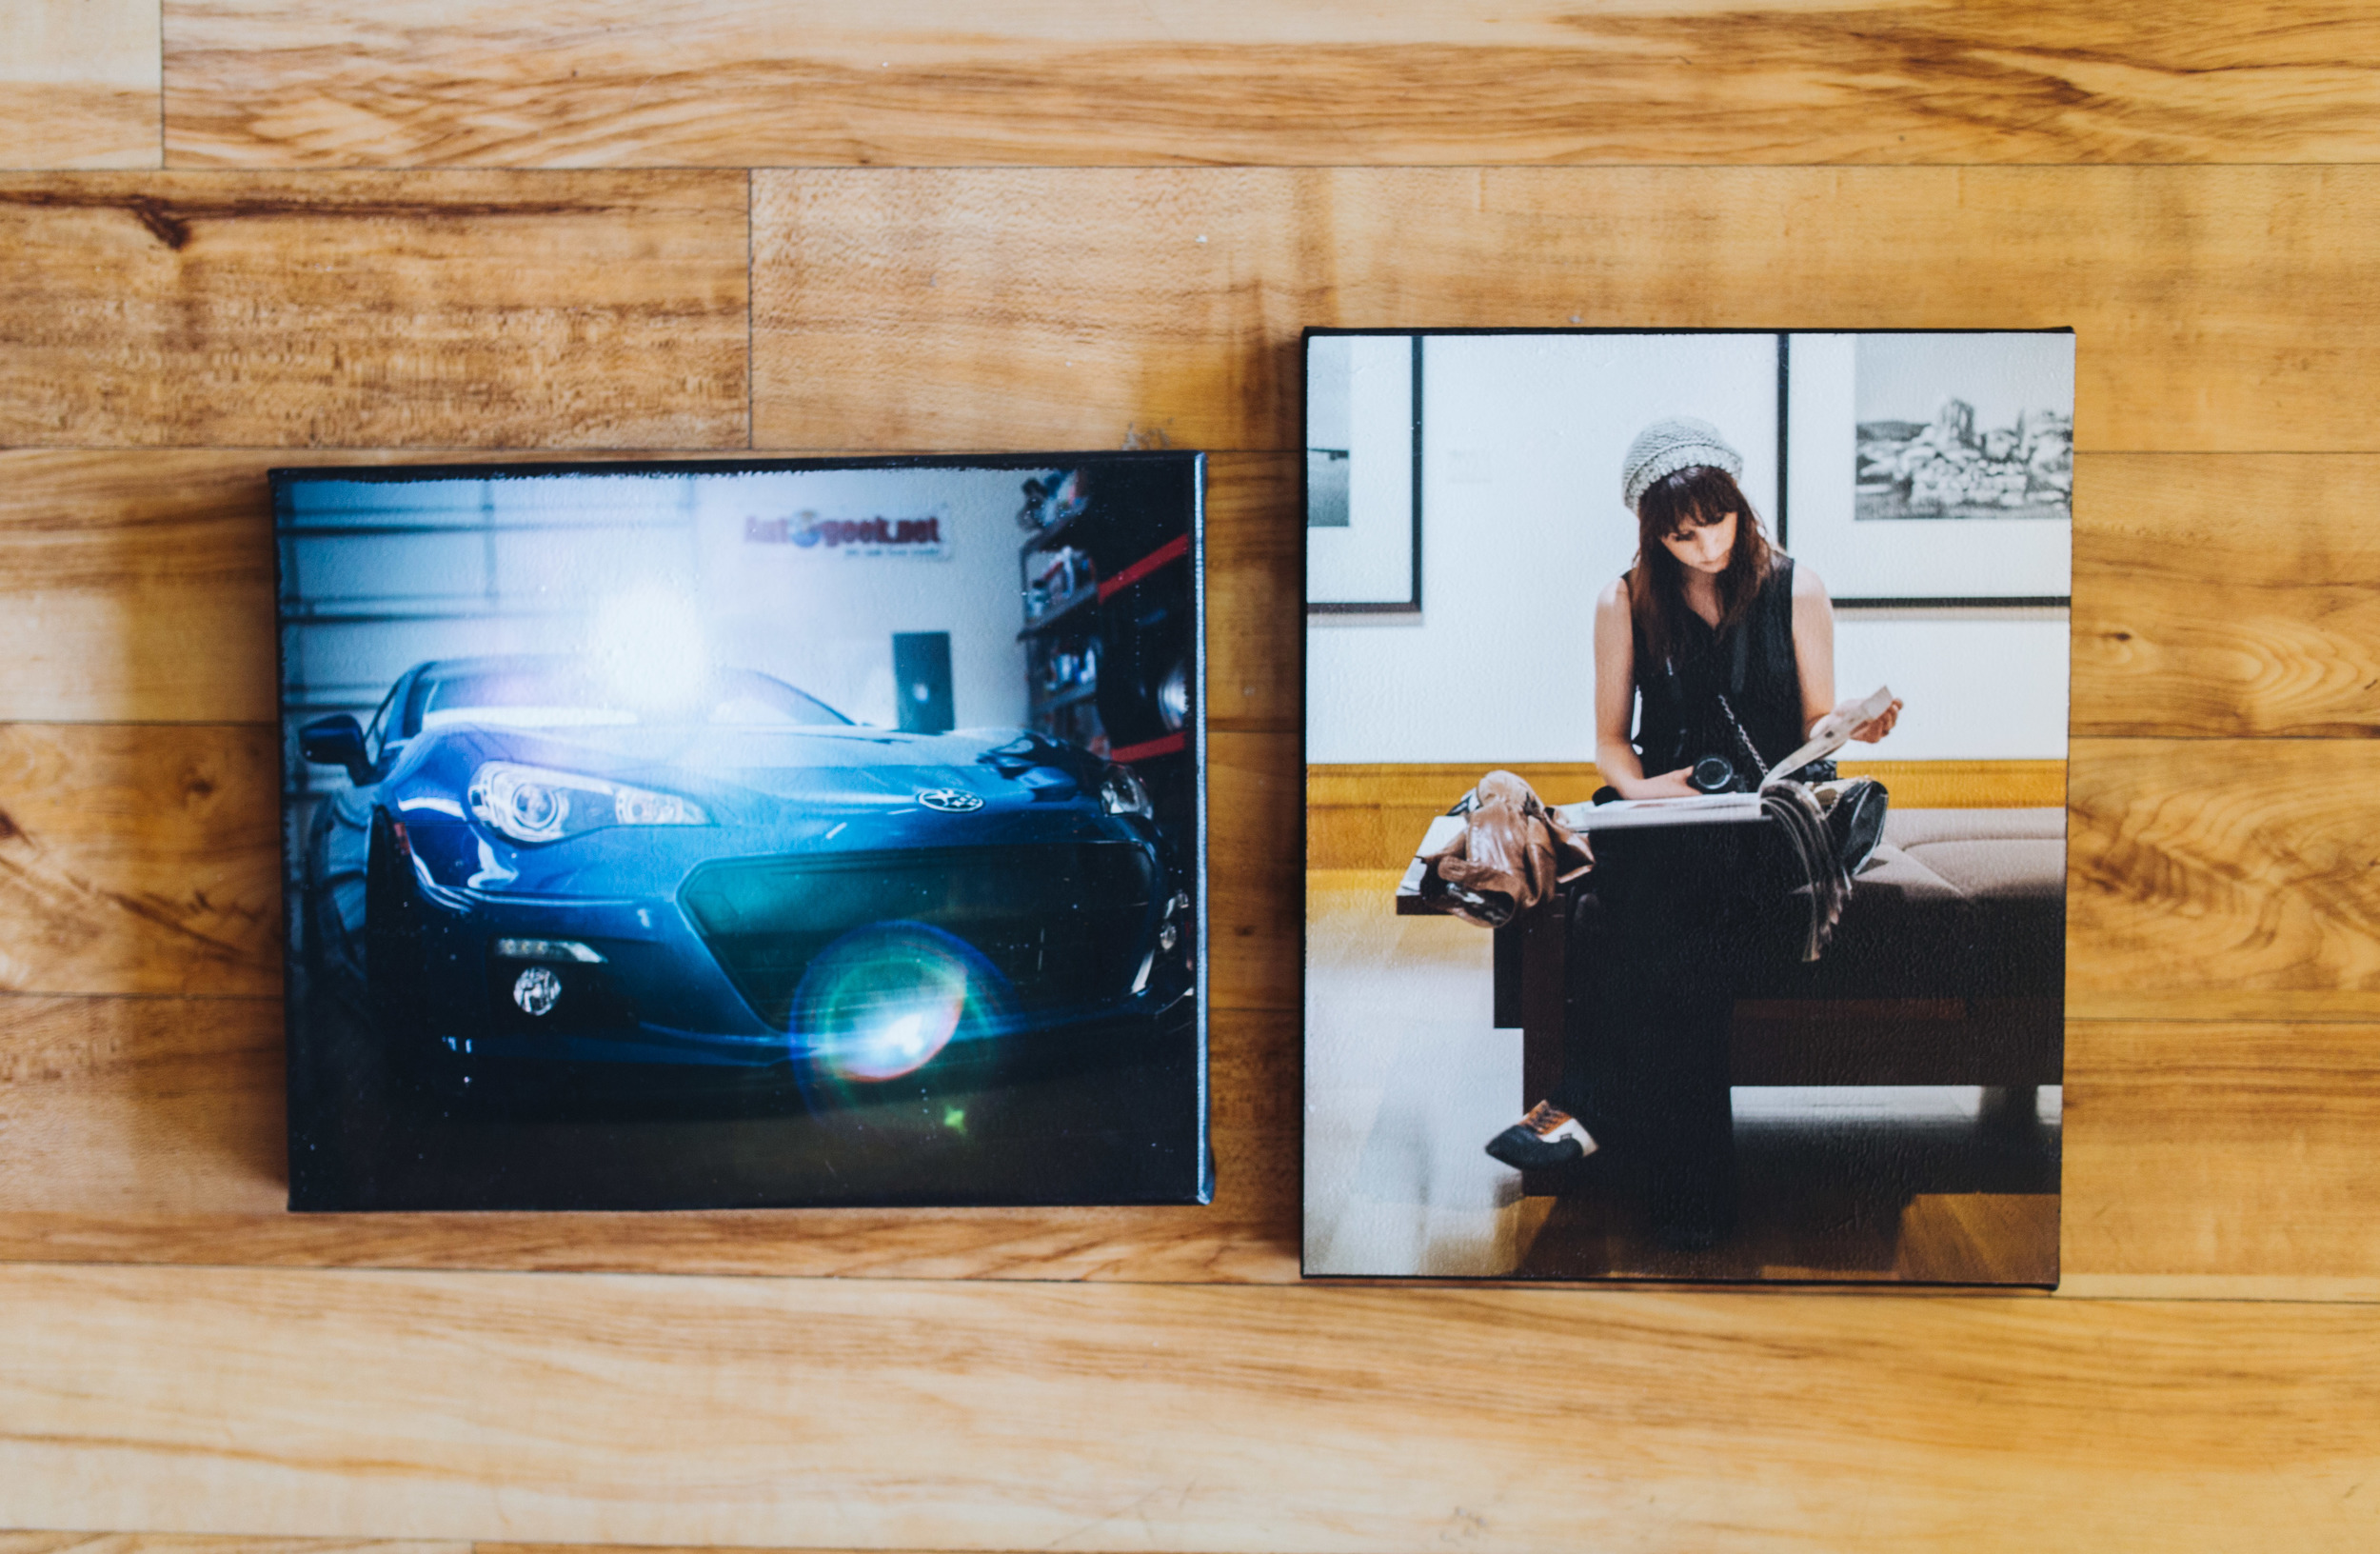
These are fun to hang up on the wall with a little nail, or you can prop them up against something on a shelf. Best of all, your mom will love it, and you will continue to be their favorite son or daughter.
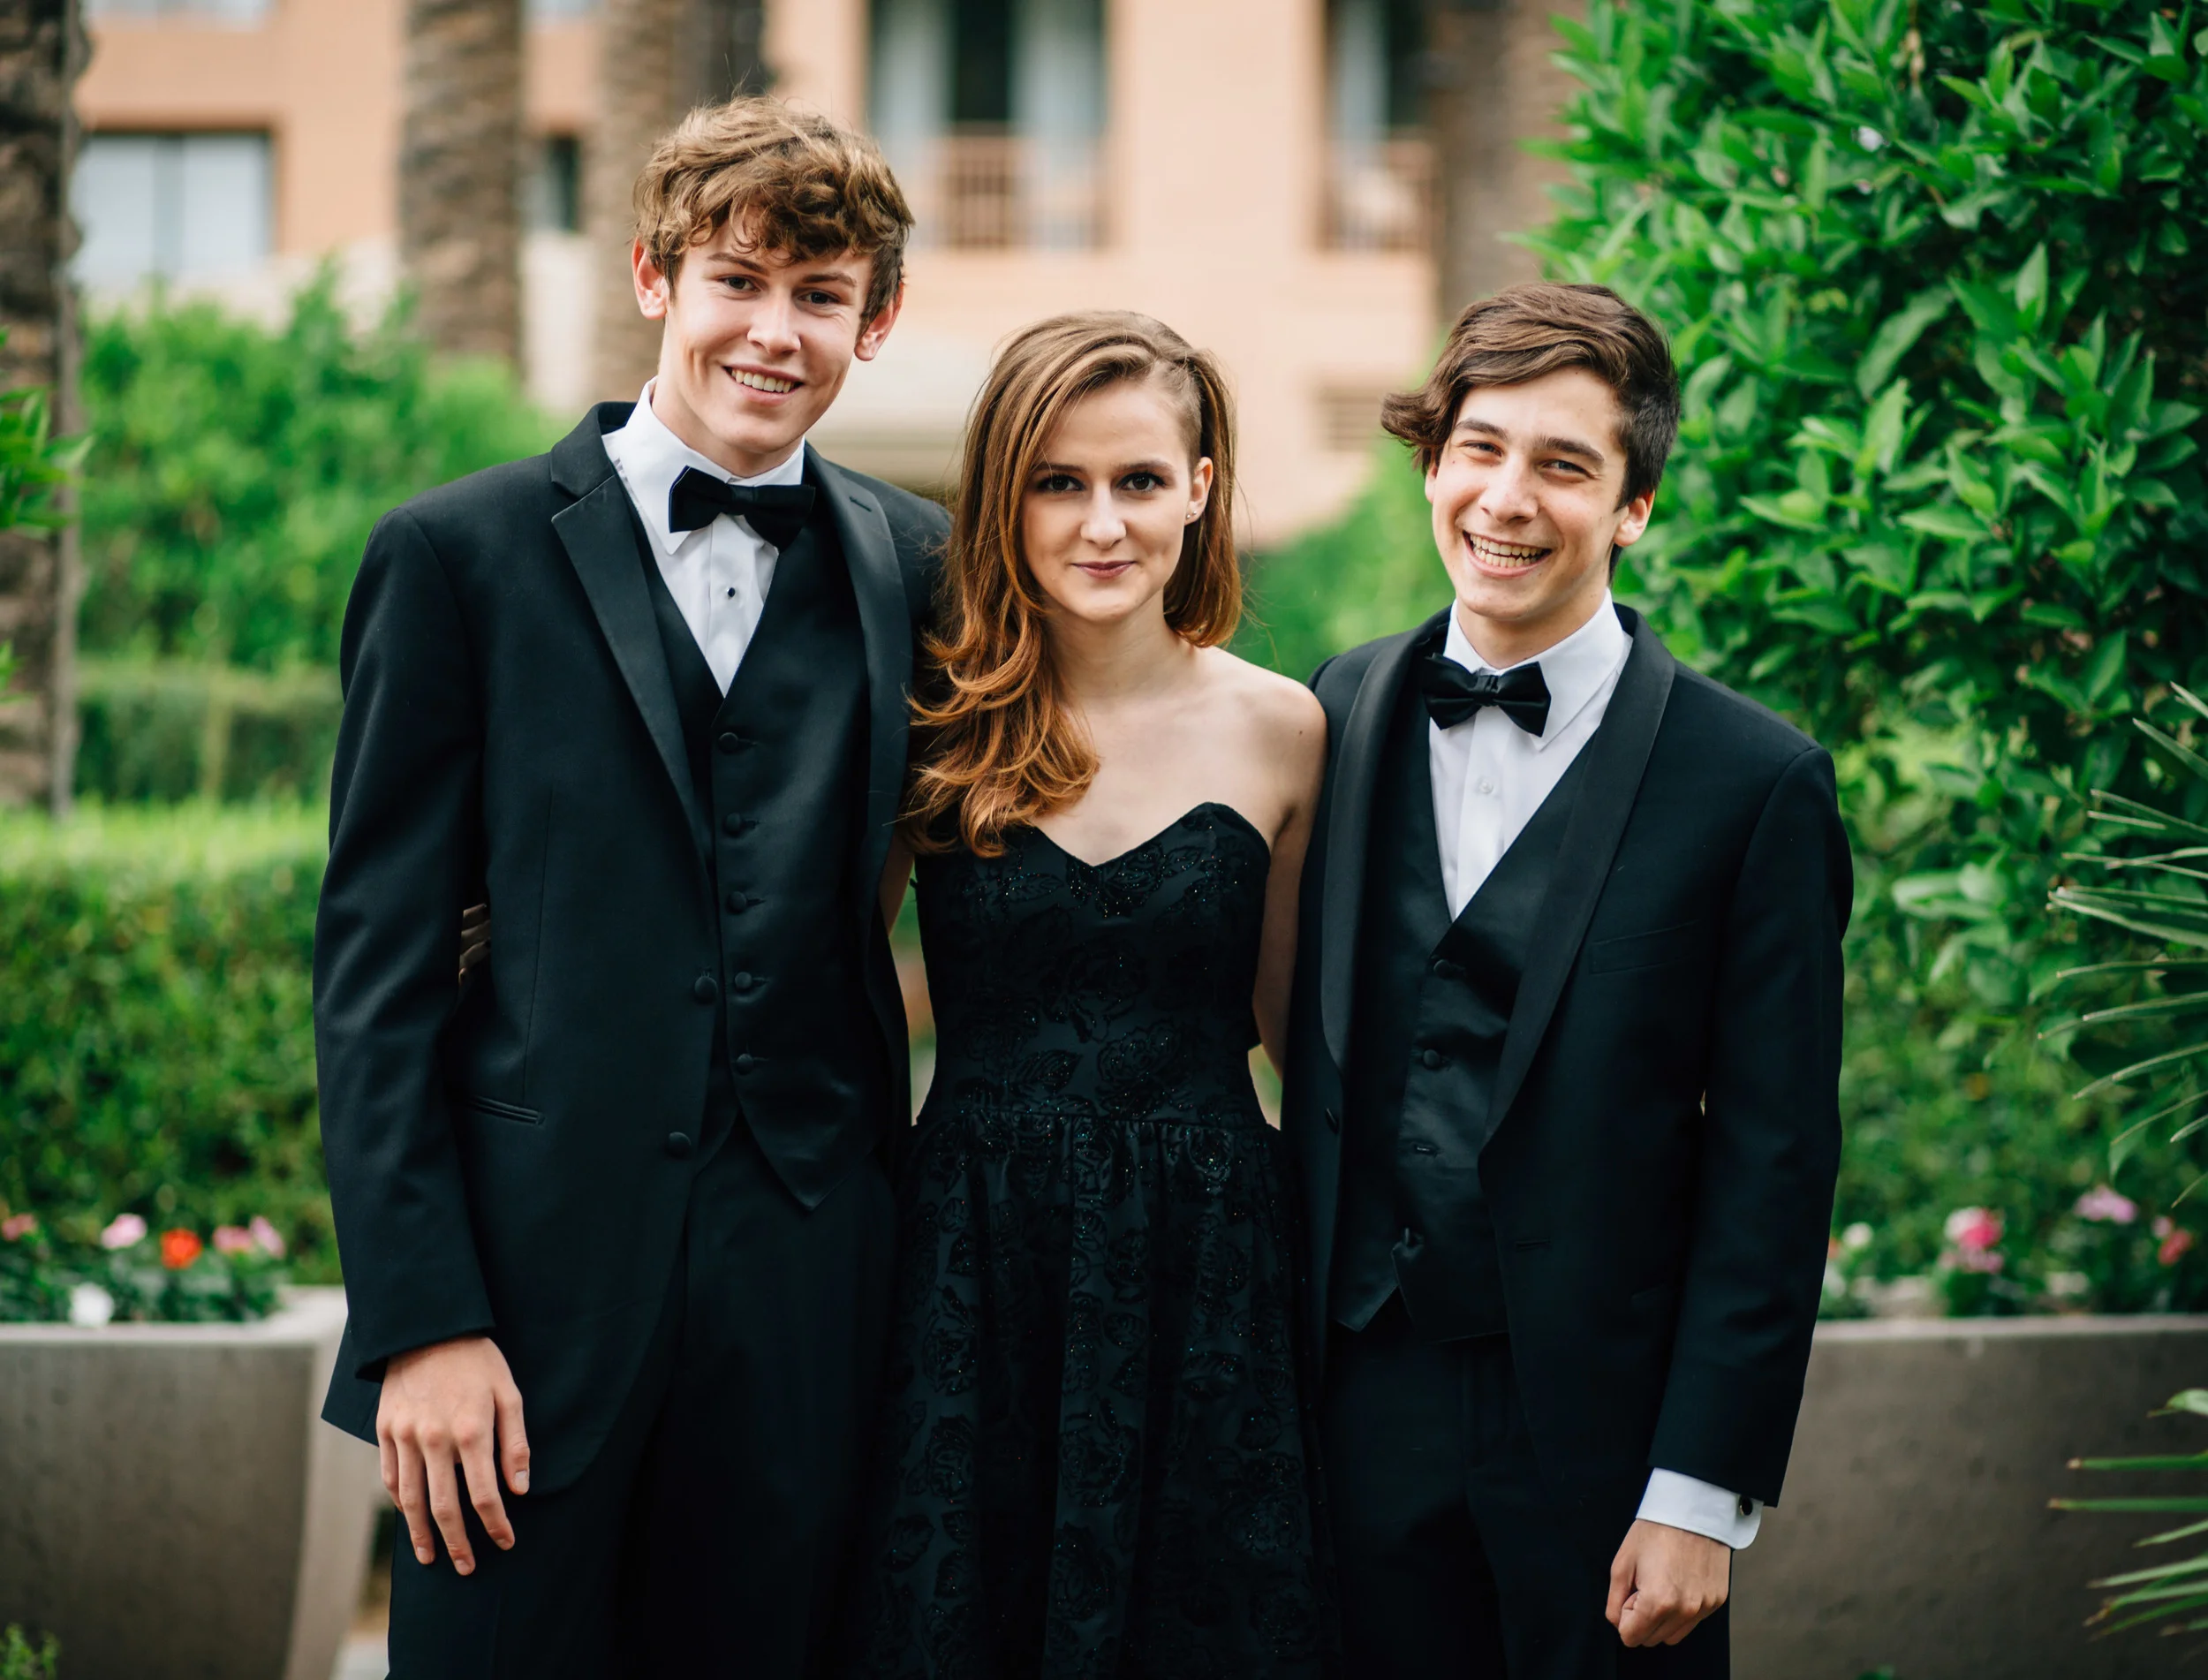
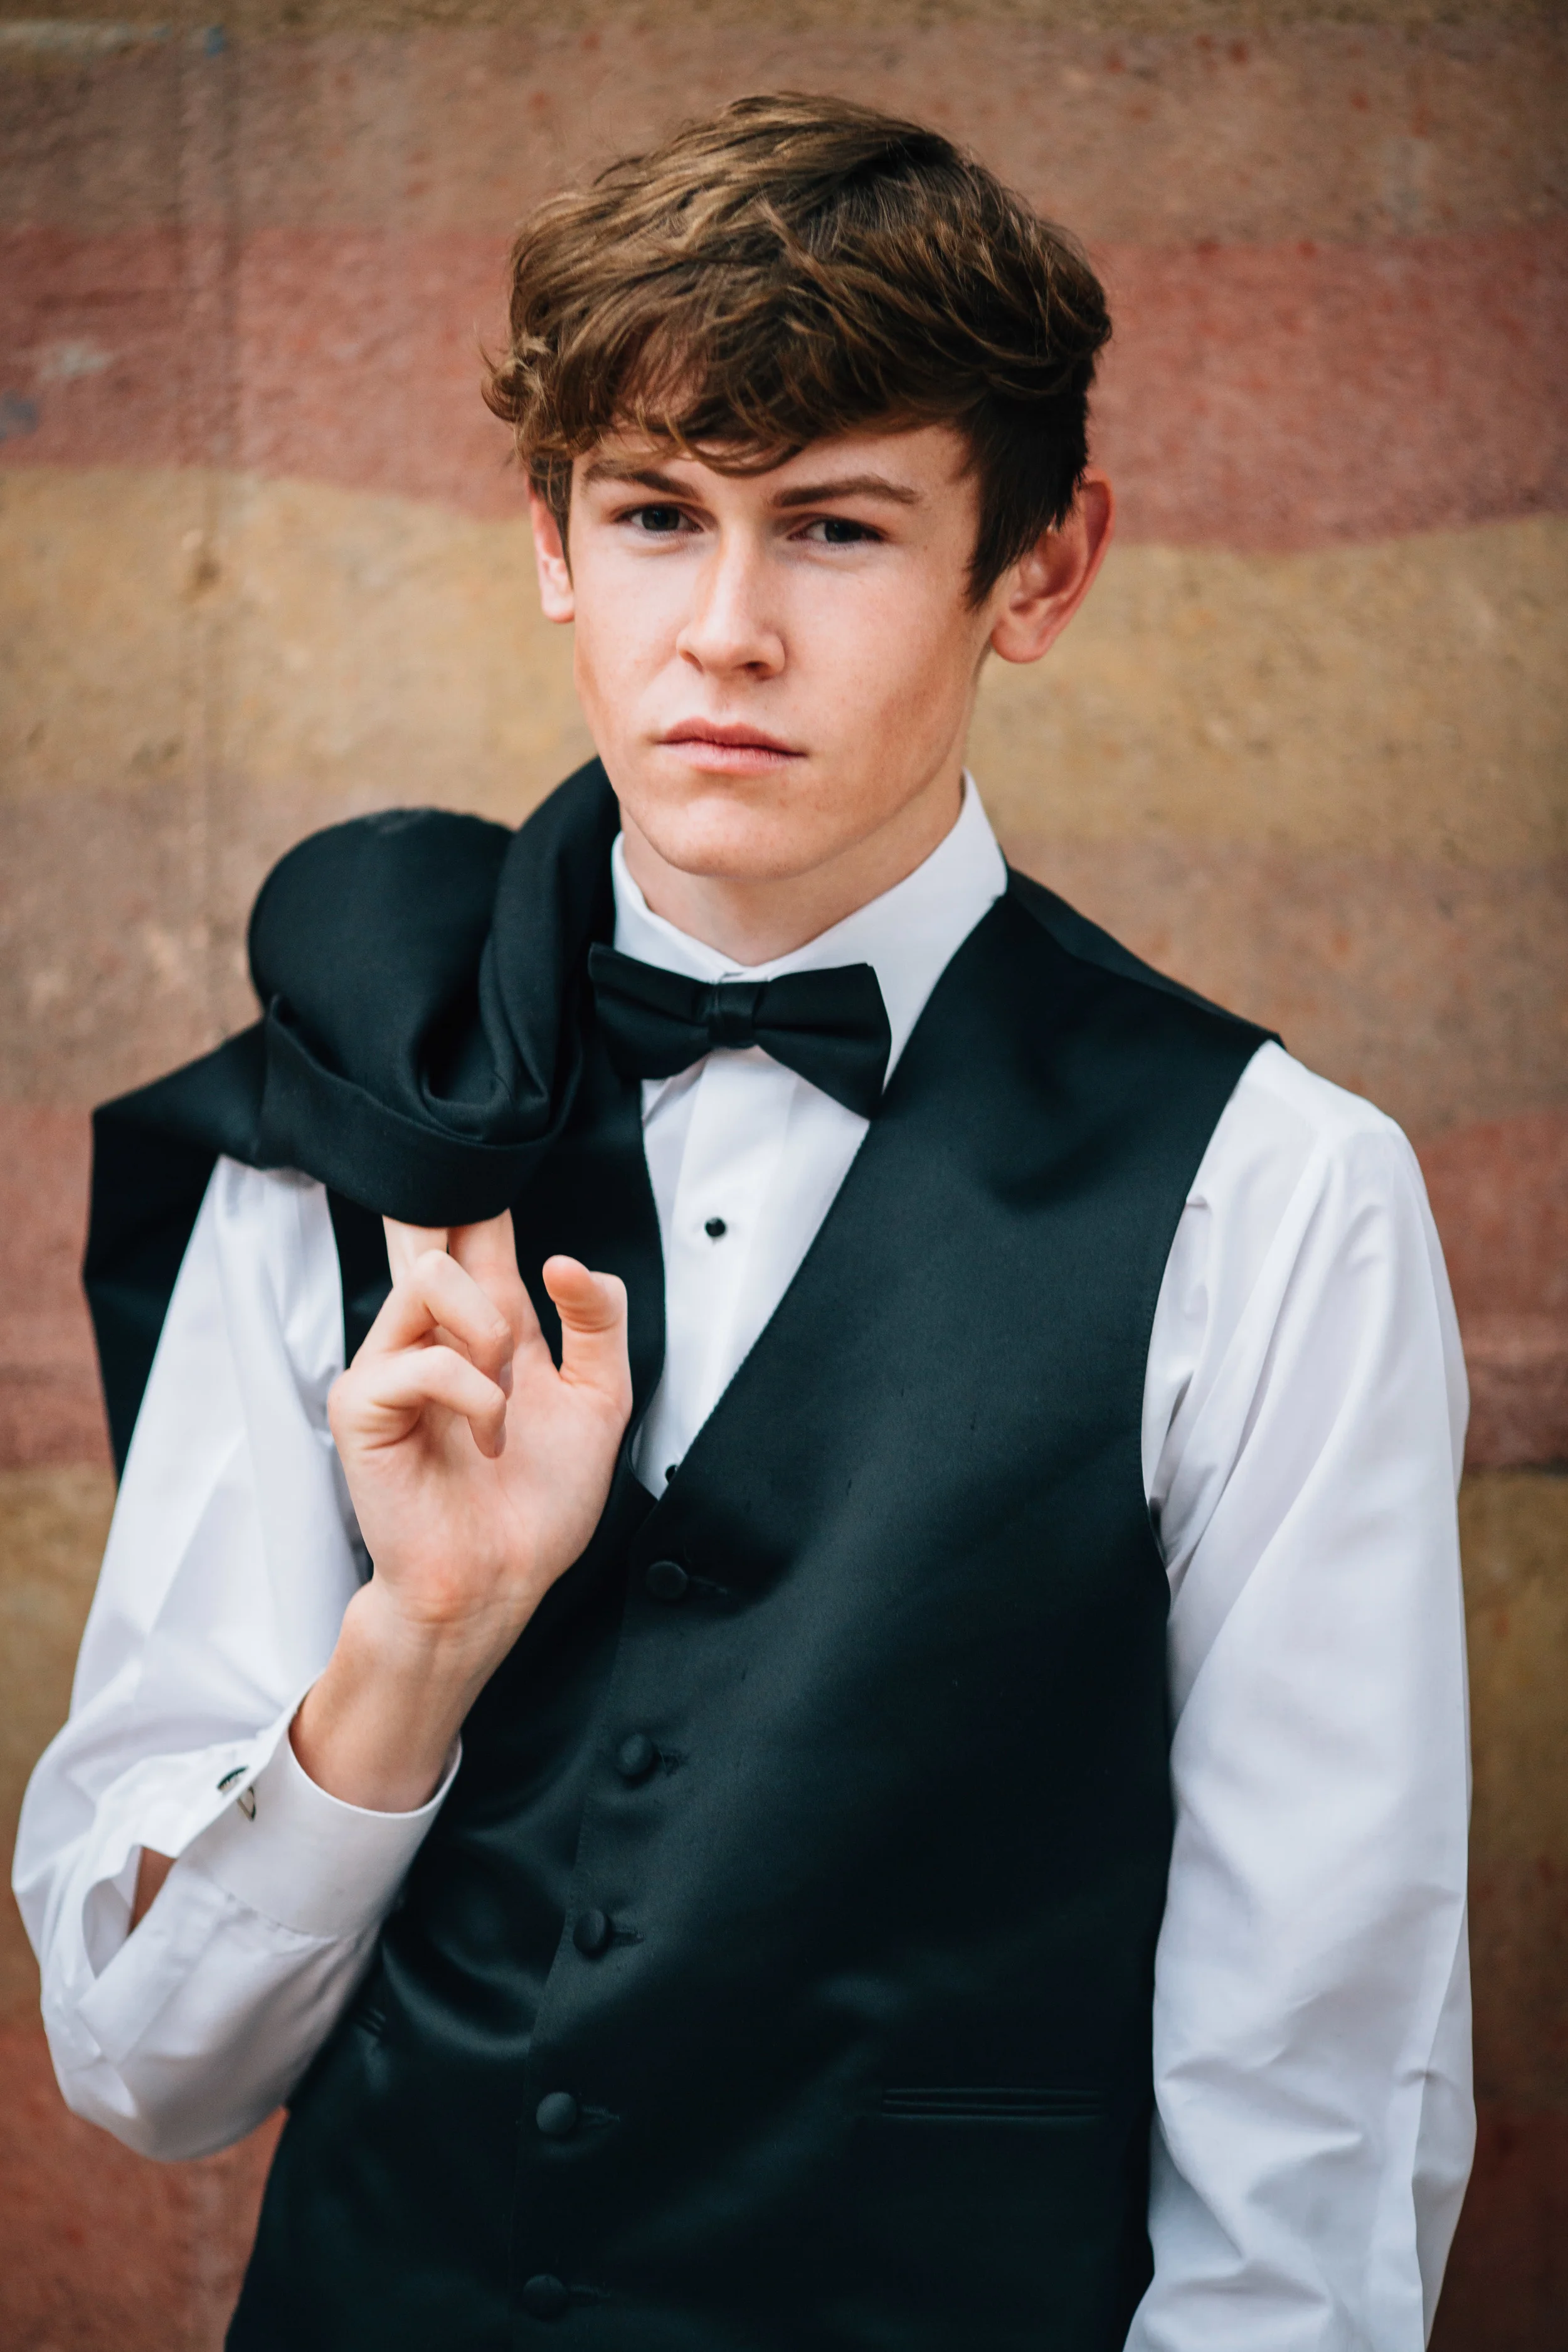
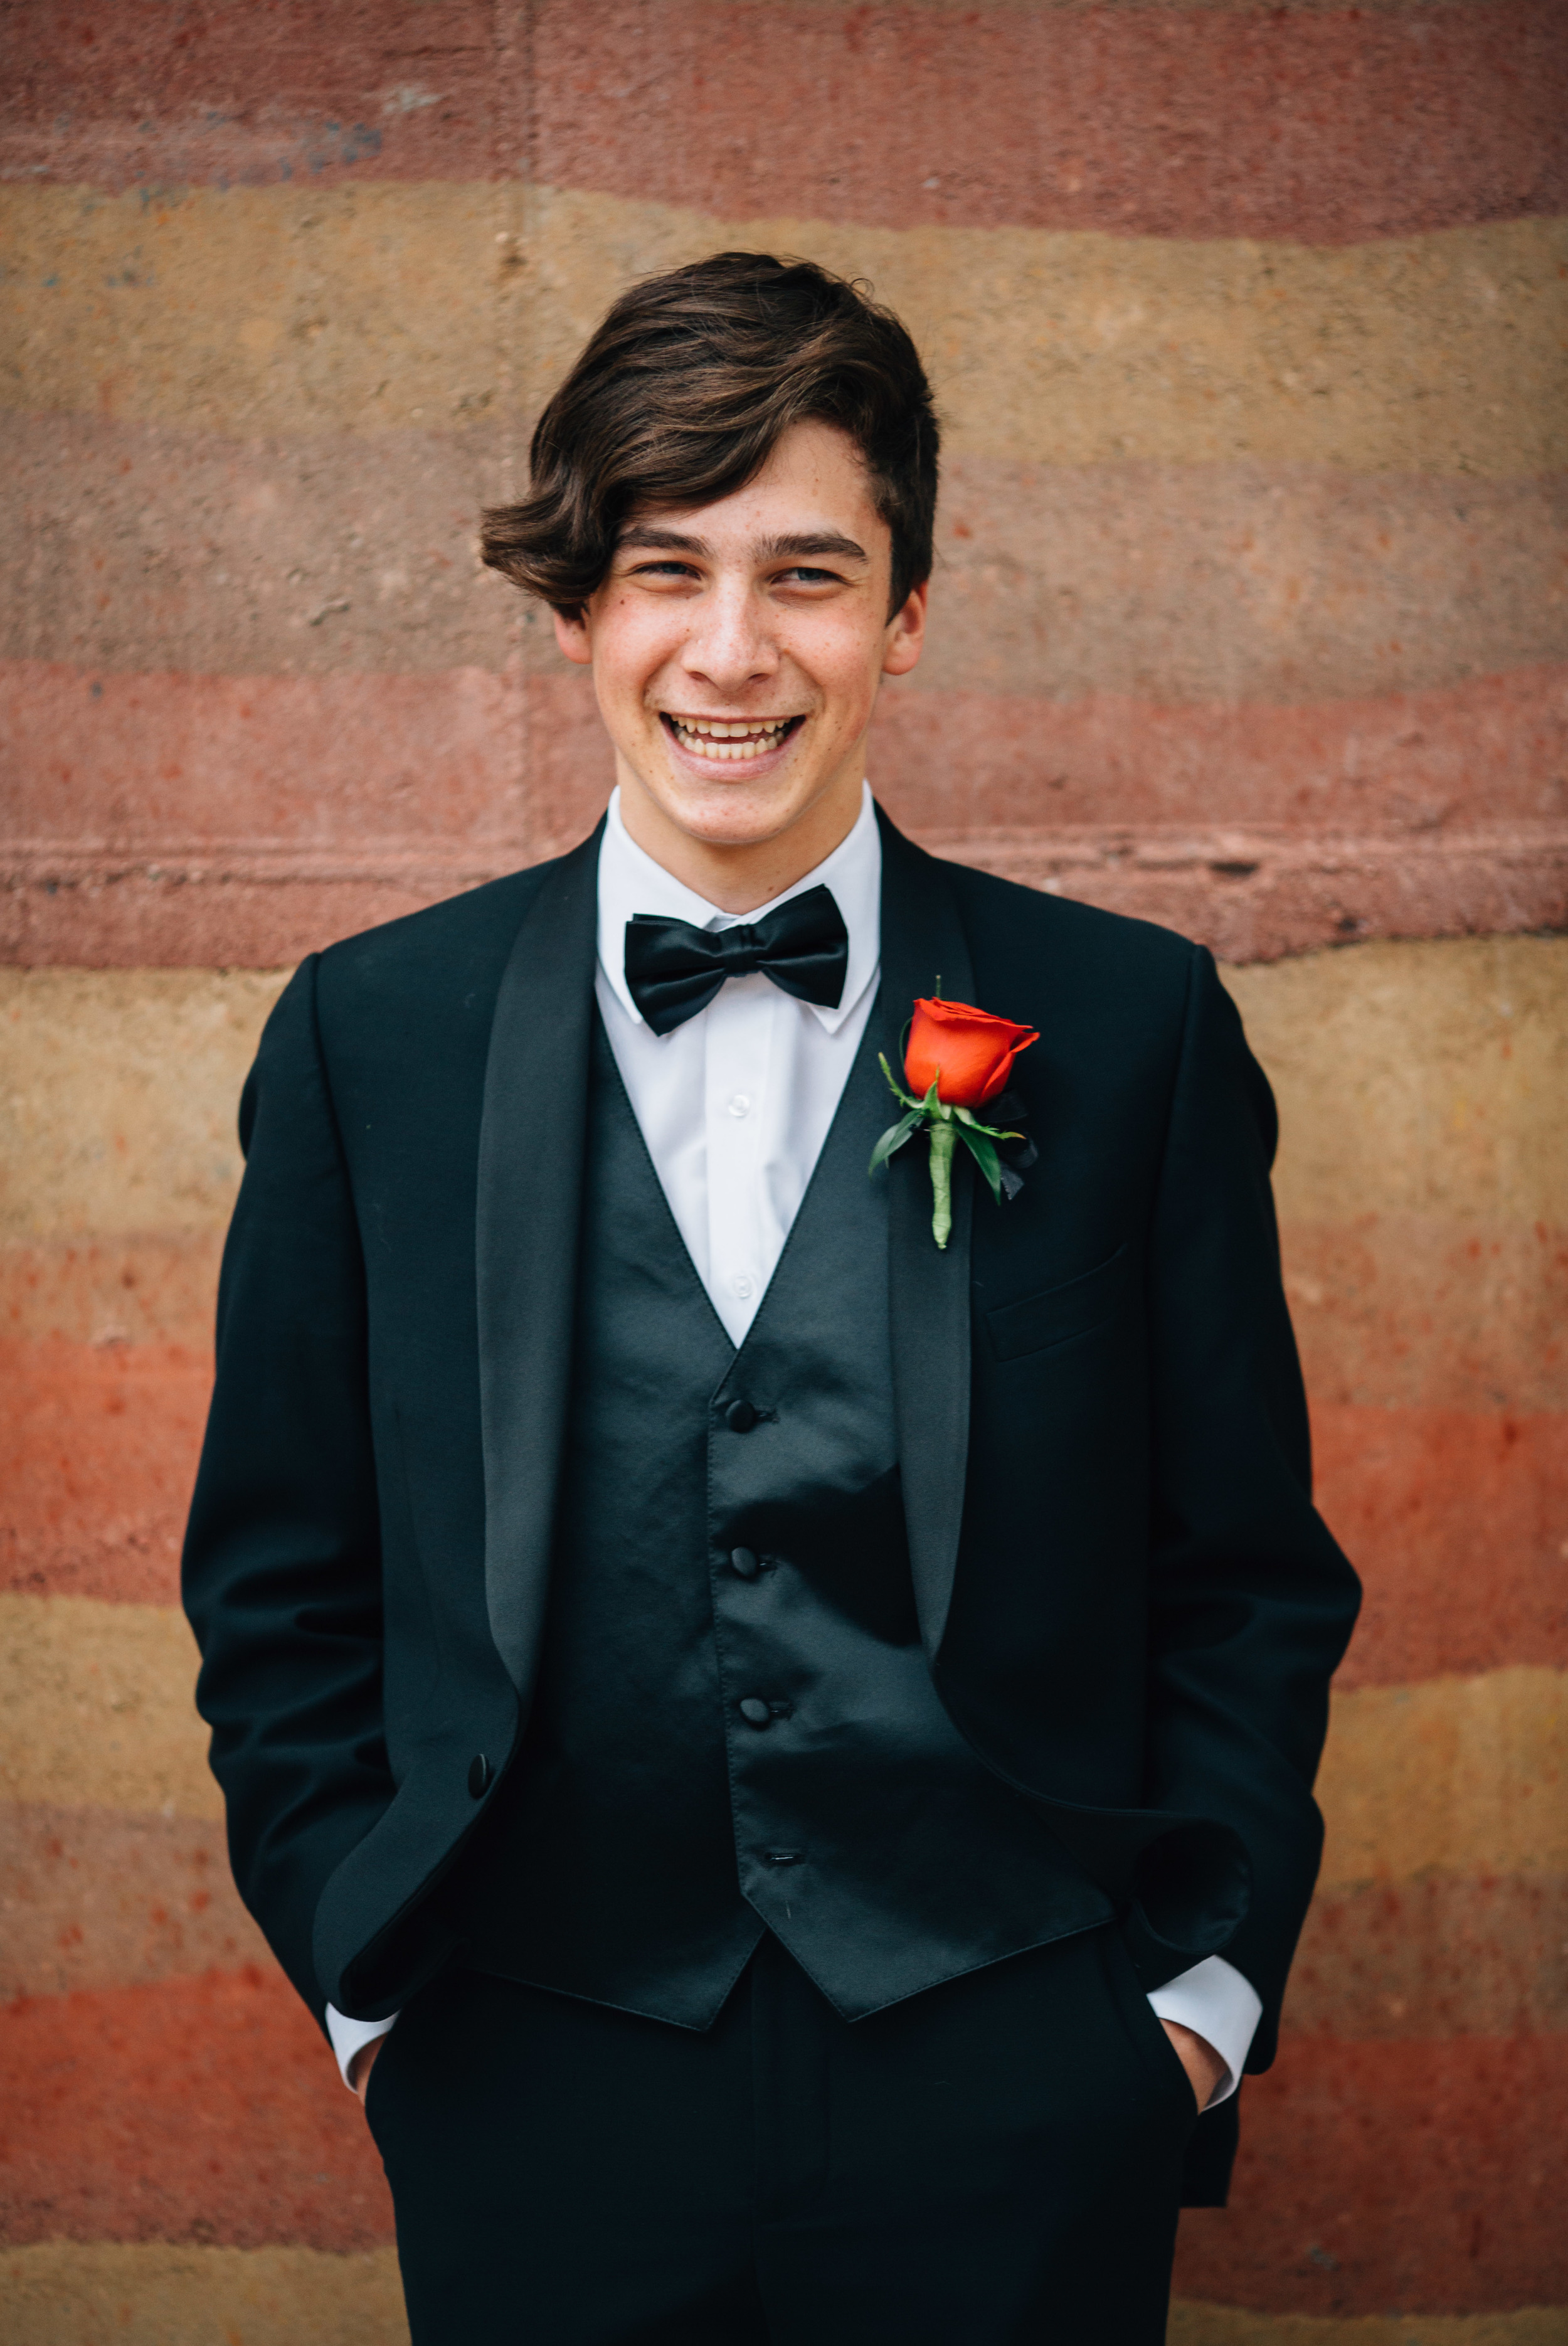
Prom Nights

Over the weekend a lot of high school juniors and seniors were attending the much anticipated prom night. Three of those individuals were Amanda, Travis and Hayden. Amanda's mom had us go out to the Westin Kierland Resort & Spa for a little photo shoot before they went to dance the night away. We were able to capture a lot of memories with Amanda, her boyfriend Travis, and her best friend Hayden.


They all got so dressed up, and looked amazing. That is always one of the best parts of events like prom. Getting dressed up is always fun. The photo shoot went really well and everyone had a great time. We captured a lot of real smiles and laughs which is always the ultimate goal, and it means a lot that we were able to provide a fun, comfortable environment for them when sometimes getting your picture taken isn't always that. They were all such great models though (check out the individual photos at the bottom), and we hope the rest of their night was just as fun.

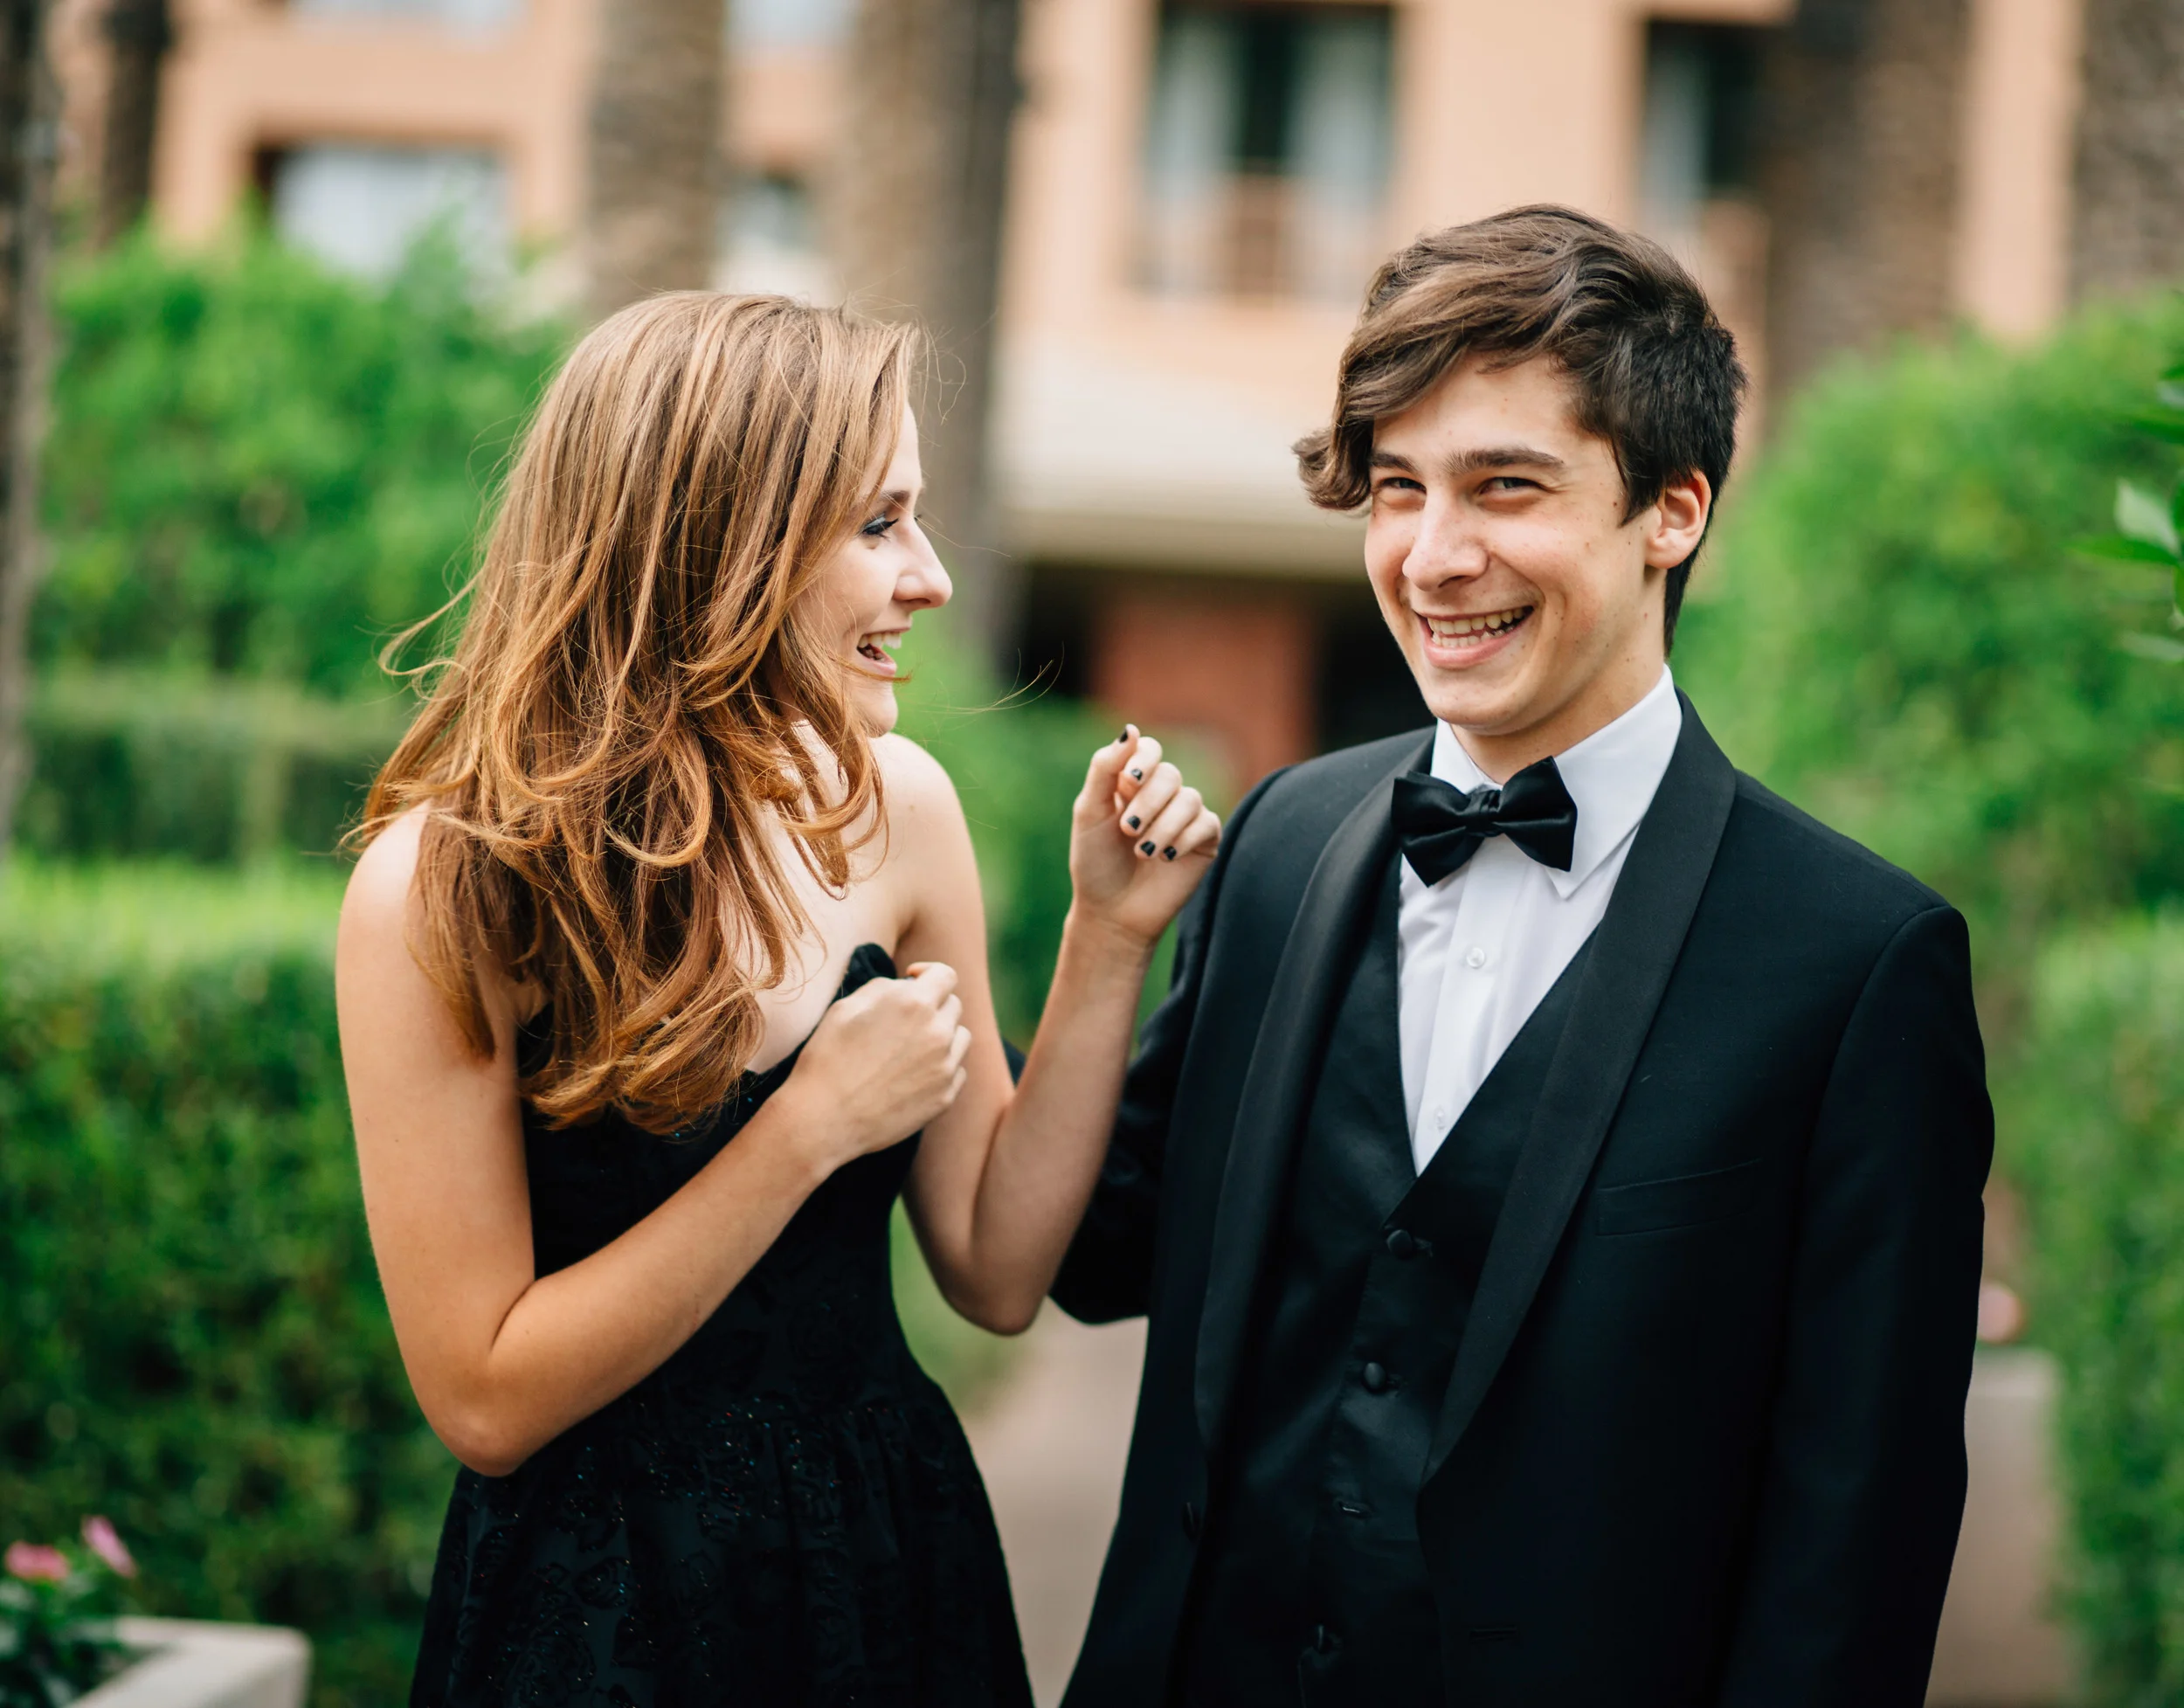
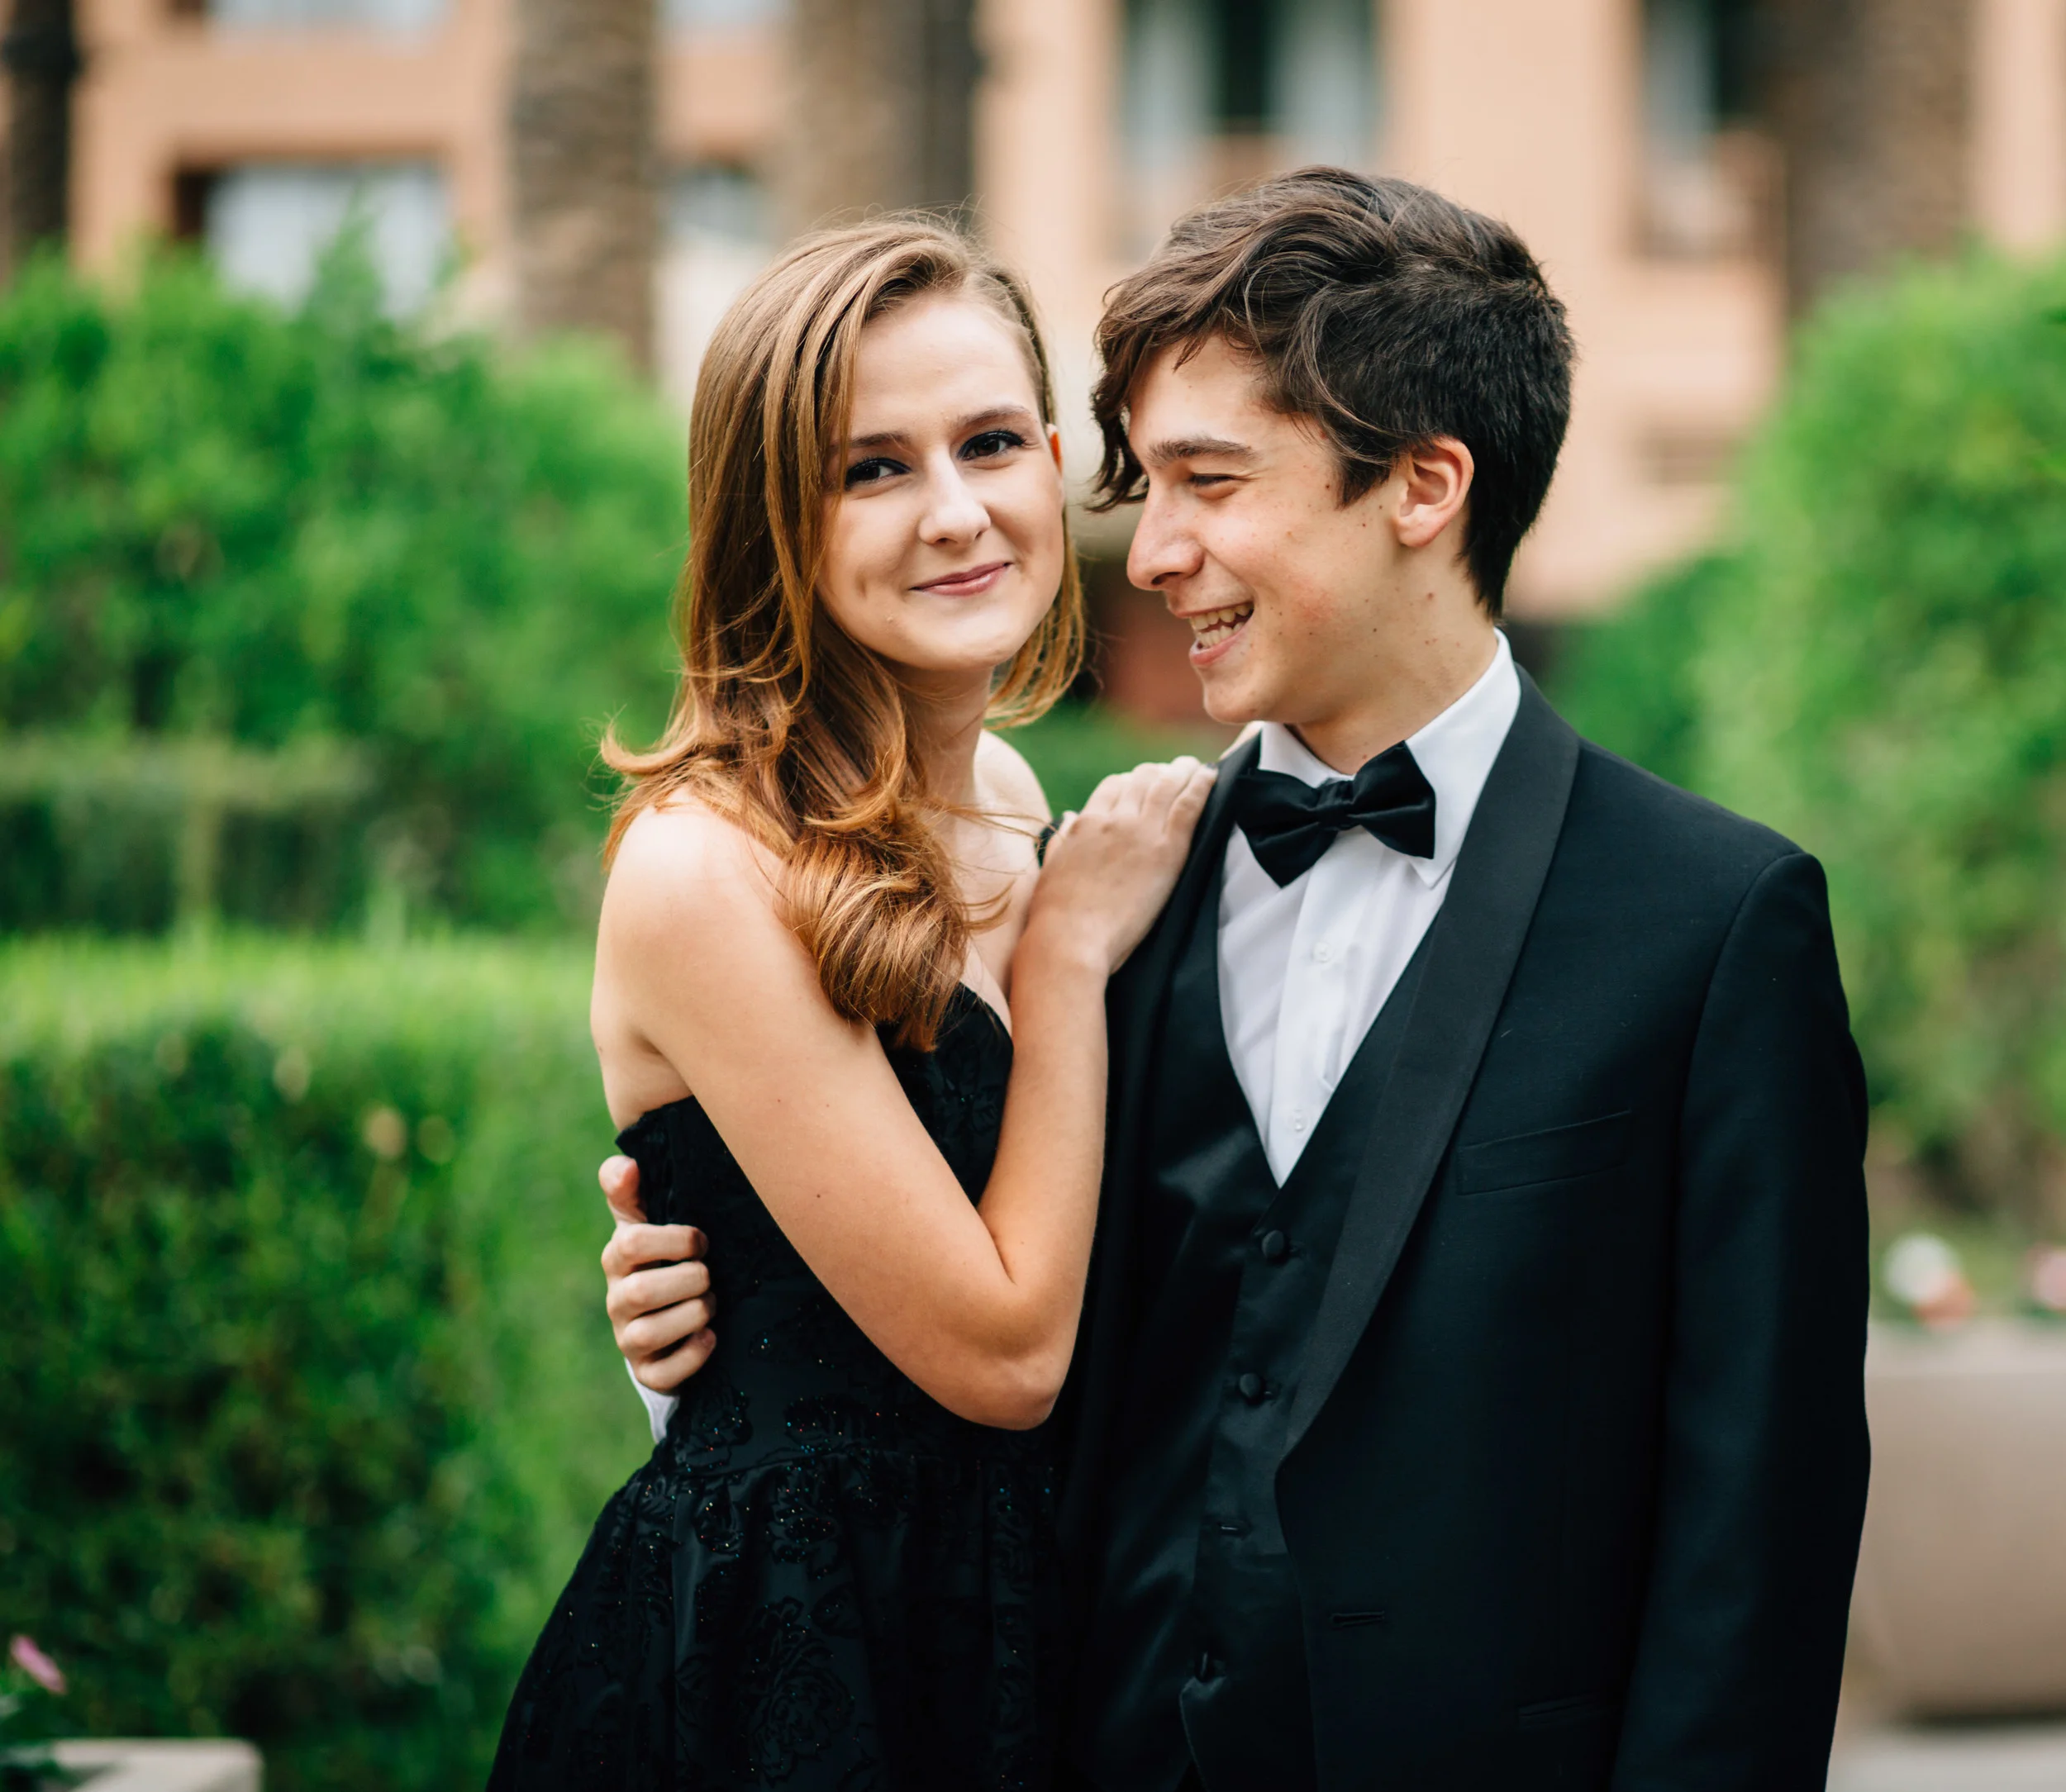
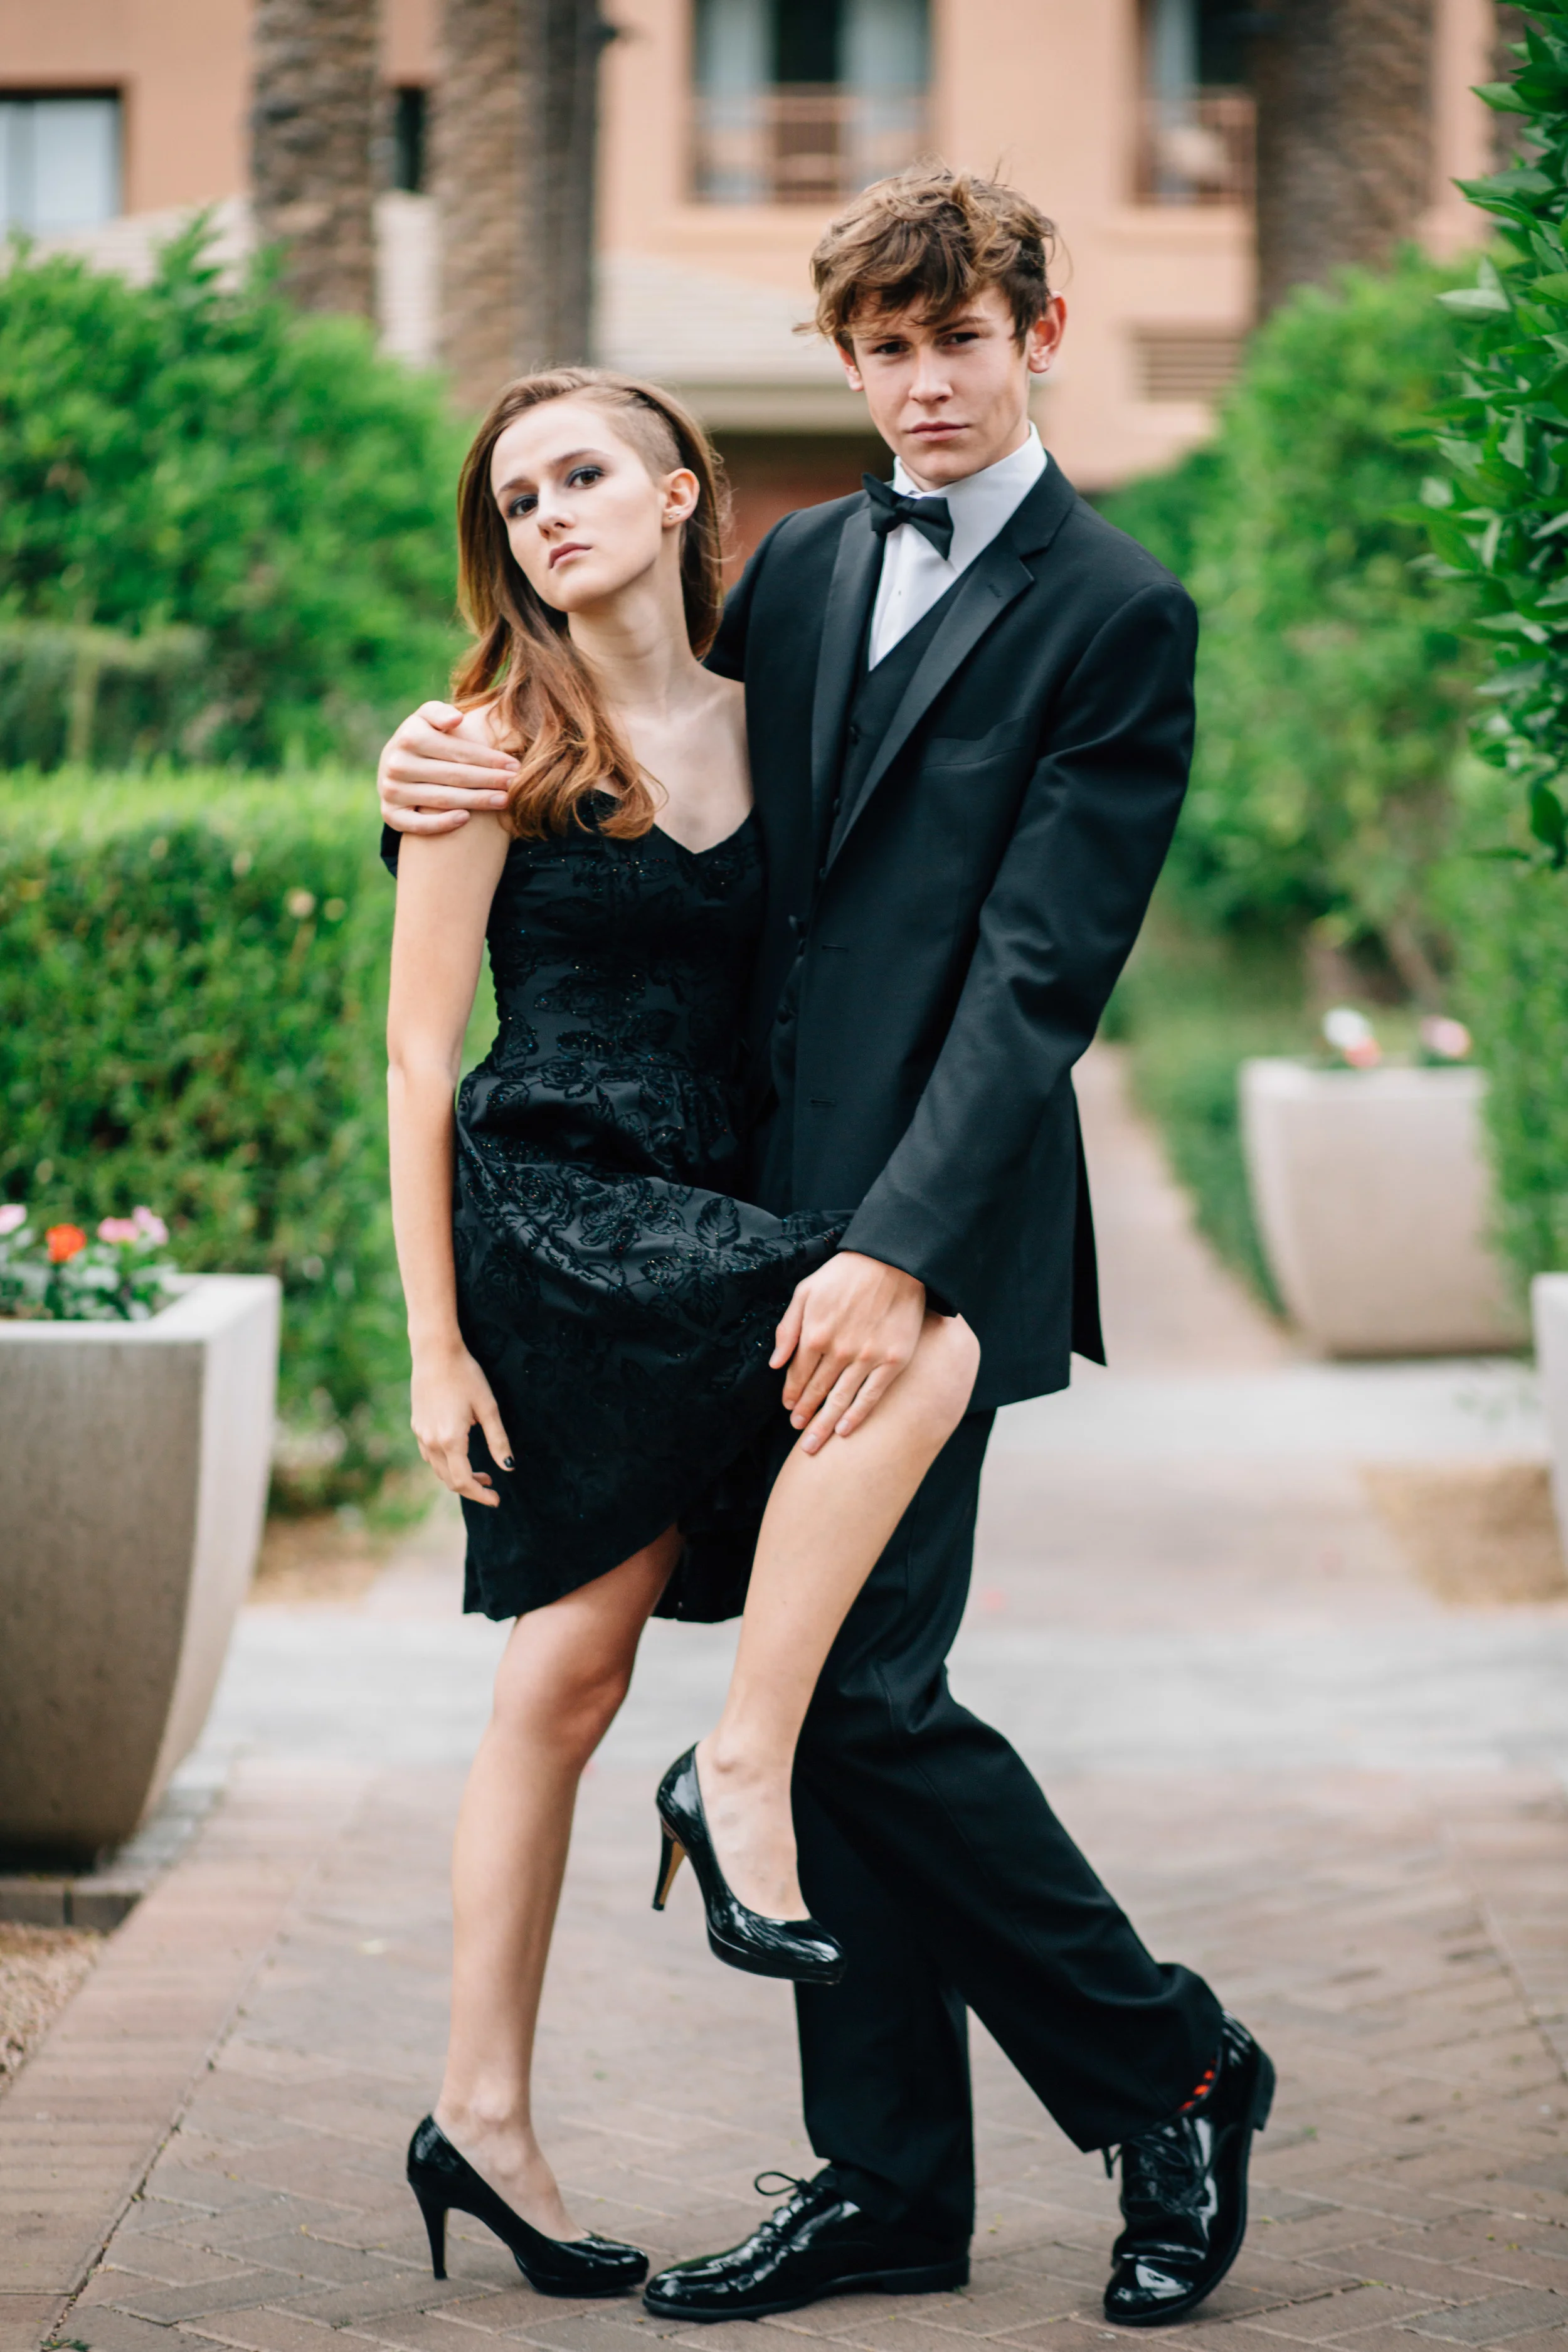
When it comes to moments like these the best way to capture them is through photos. Pictures like these will be pulled out time-and-time again, and will bring a smile to each face that sees them. Every moment is only experienced once, and when it's captured in a photo it can be remembered forever. We loved the opportunity to be able to take these pictures for them, because we know that's exactly what they will do.