
Mother's Day Gift Idea: DIY Canvas Prints
I wanted to create a new display on my wall for some of my automotive photos recently, but I didn’t want to frame them. I also planned on doing it with quite a few photos and didn't really want to spend the substantial amount of money that it would have cost to turn them all into canvases. I love framed prints; however, it just seemed too reserved for the amount of energy and emotion I felt like some of the photos portrayed. That’s when I came across this idea online. It's not exactly the same as a canvas print or gallery wrap, but for a quick and fun little project that gets your art on the walls it does wonders.
We think that this is an awesome gift, and with Mother’s Day right around the corner we thought that it would be a great time to show you how we do it. Altogether it probably takes 30 to 45 minutes of actual work depending on how quickly you can paint. There’s a bit of drying time in-between too, but you can take that time to write your mom a lovely note telling her how much you love her. If you don’t have time for that, you can always aim a blow dryer at the Mod Podge or paint and speed up any of the drying processes.
Without further ado, let’s get into it!
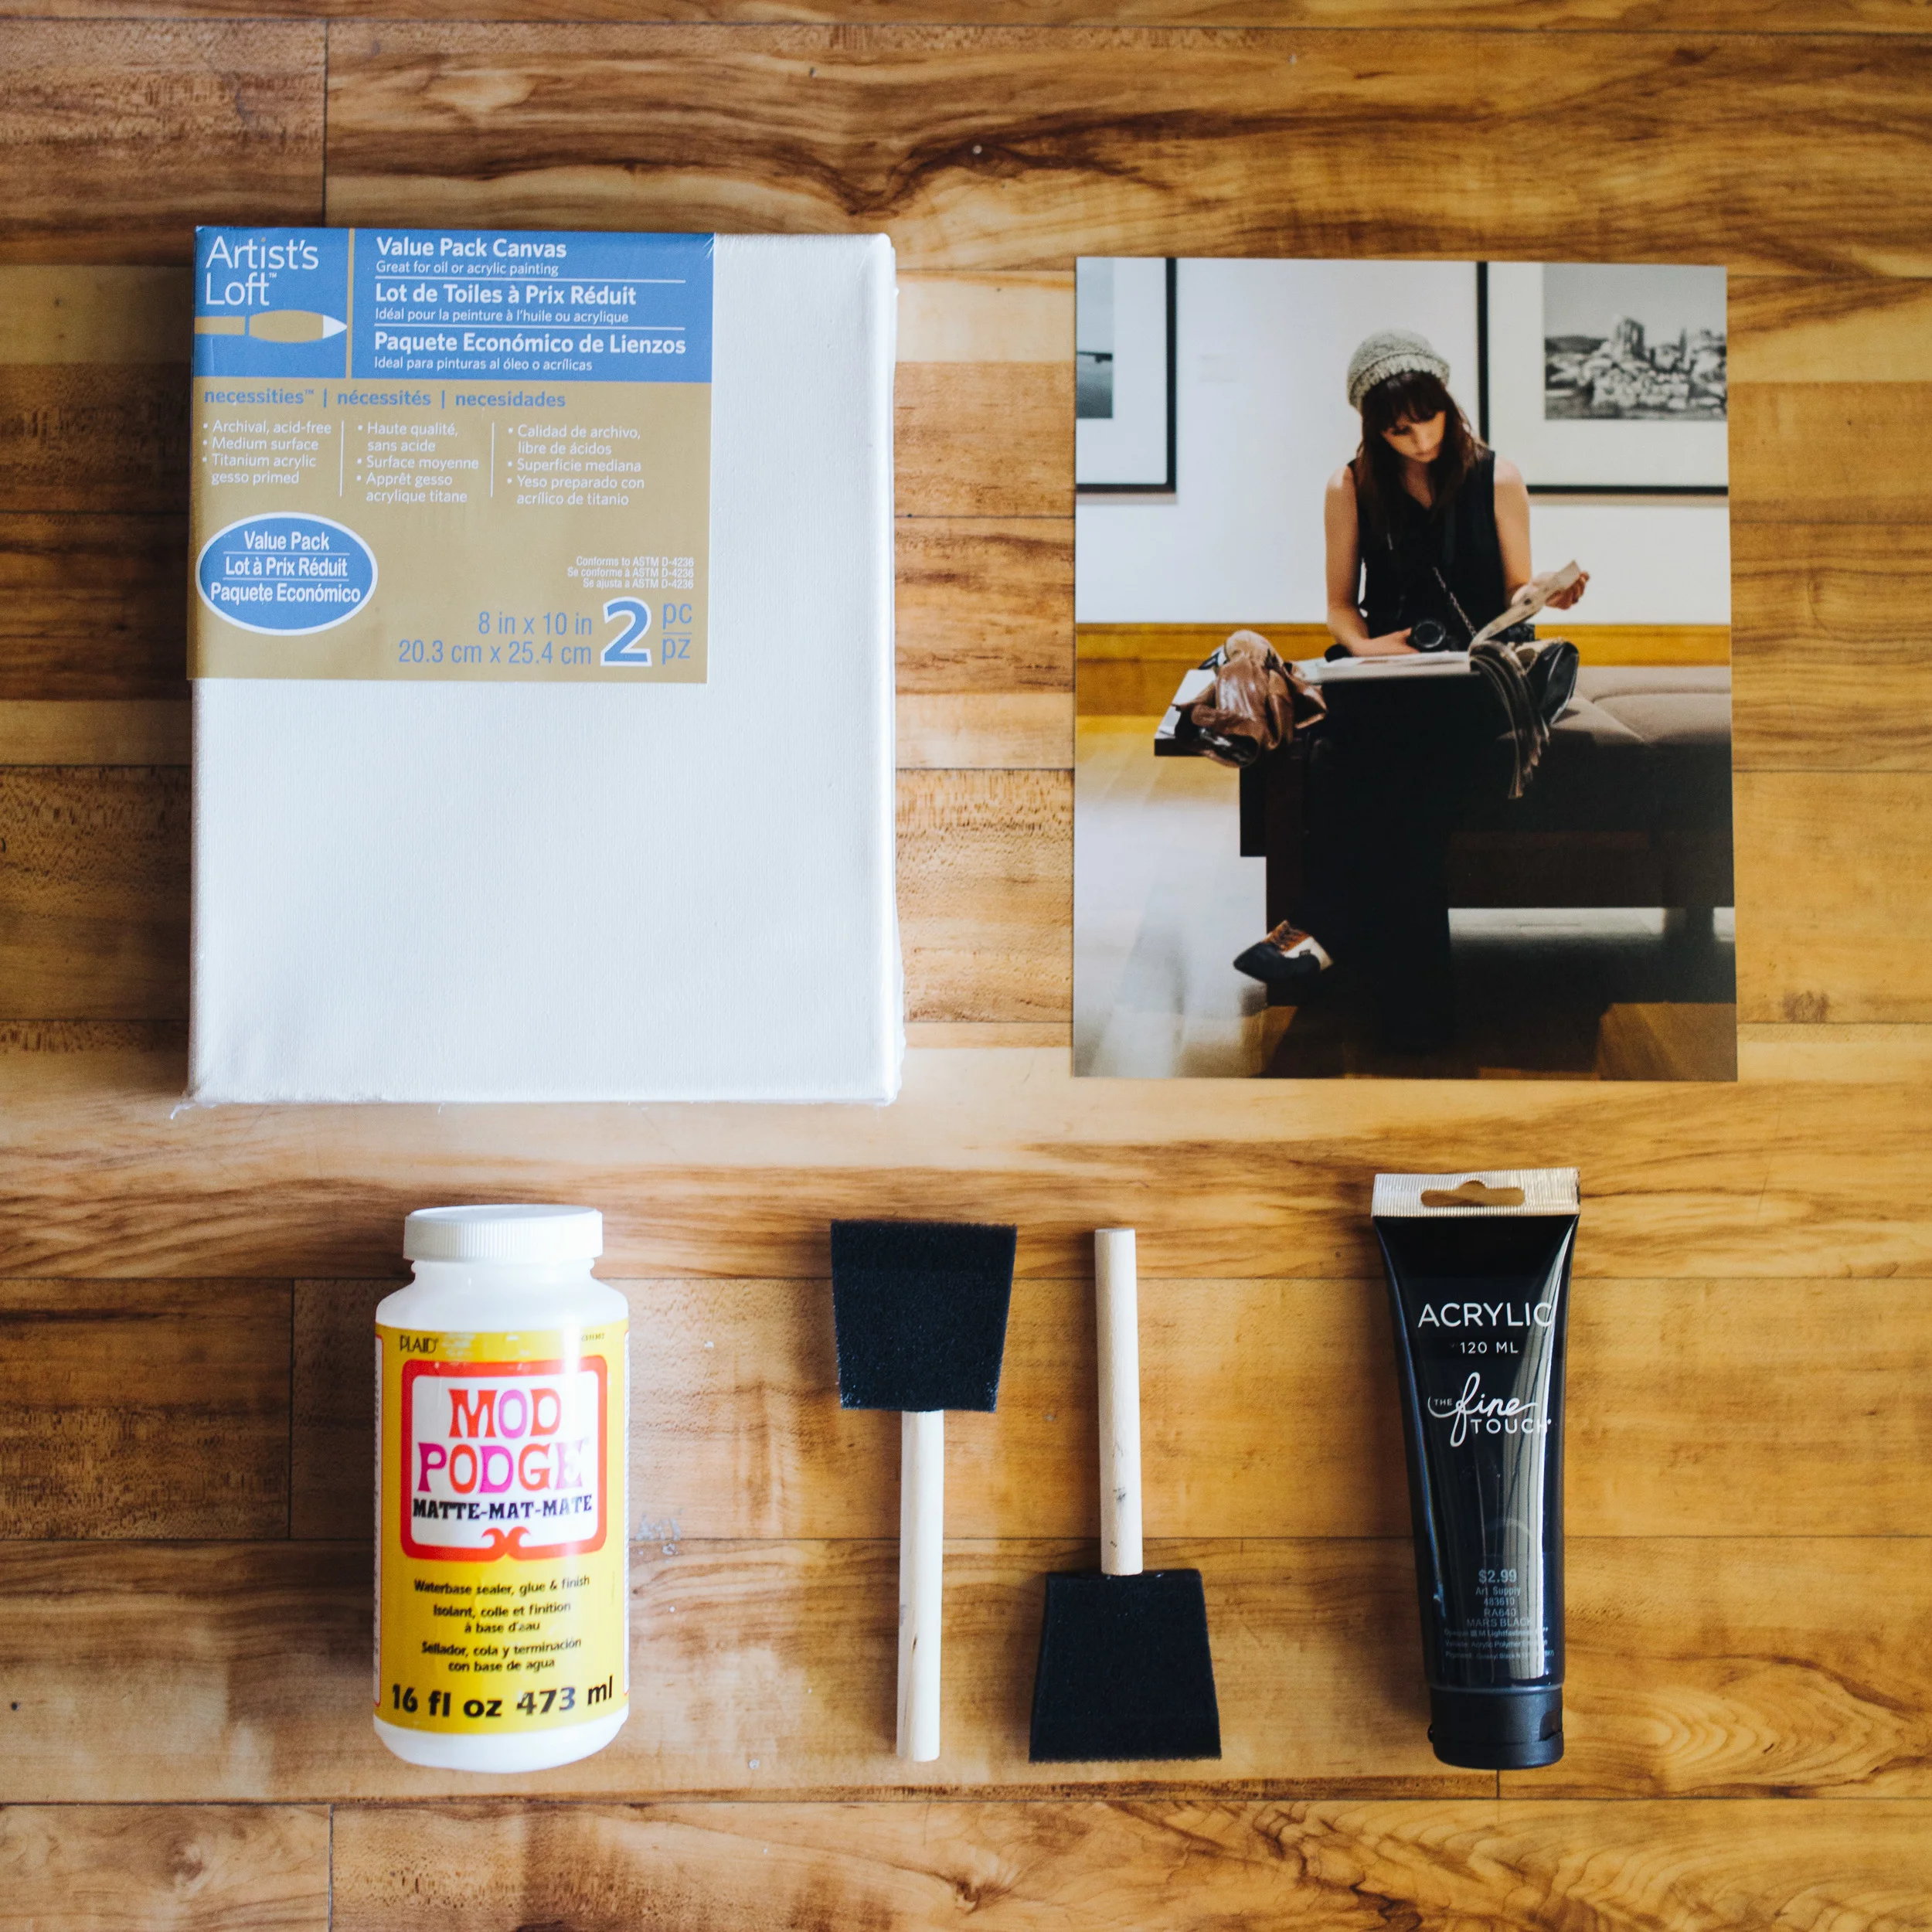
The materials that you’ll need are pretty simple:
· Two 8x10 canvases (You can use whatever size you’d like. It just needs to match the size of the print.)
· One photo print
· Matte Mod Podge
· A couple of foam brushes
· A small tube of acrylic paint
· Optional: Painter’s Tape
The first step involves laying down a thin layer of the Mod Podge on the canvas with one of the foam brushes. It doesn’t need to be incredibly thick here as you’re just using it to attach your photo to the canvas.

Then you’ll want to carefully lay the photo onto the top of the canvas and press it down. You need to make sure that the photo is glued down tight and won’t peel up before the next step. Now it’s time for one of those drying moments.


Now that your print is glued down on that canvas it’s time to lay down some more Mod Podge. This time it’s going right on top of the photo. I know what you’re thinking: here’s this lovely photo that I took, and I’m going to pour glue on top of it?! Stop, look at me, and take my hand. It will be okay. For this step you’ll want a little more Mod Podge poured on than in the previous step. Again, spread it around with a foam brush until it looks something like it does in the photos.


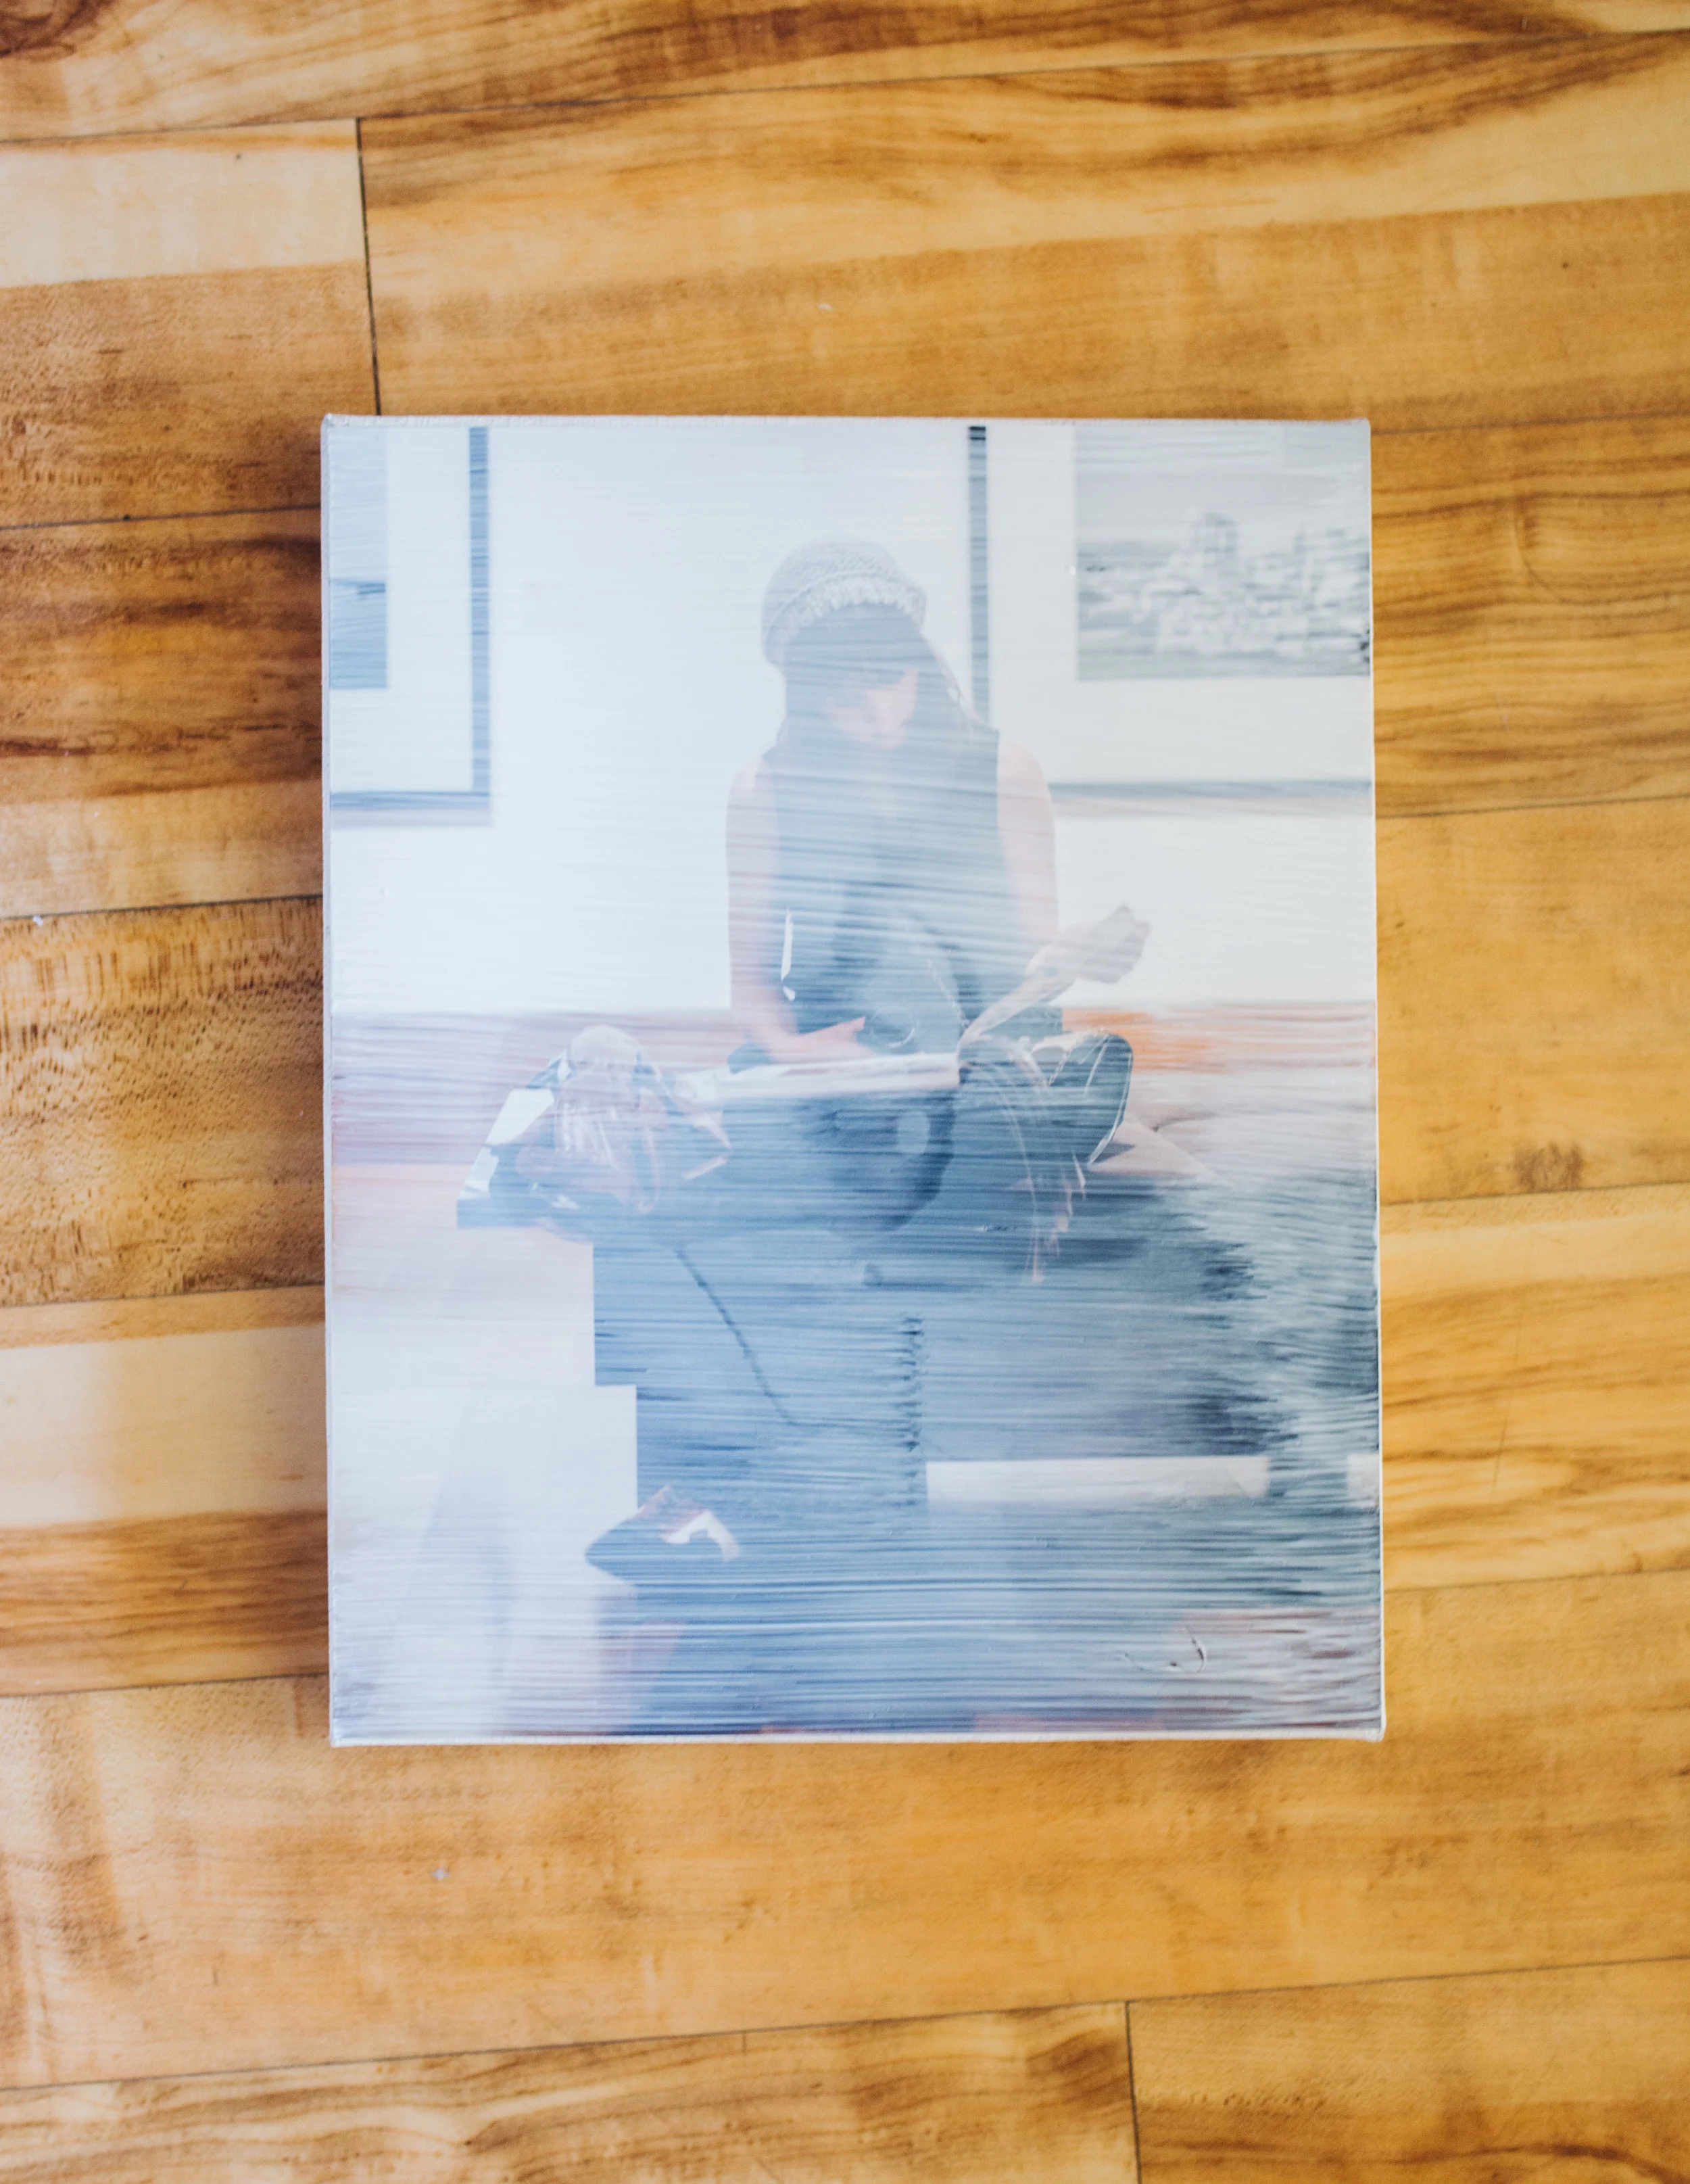
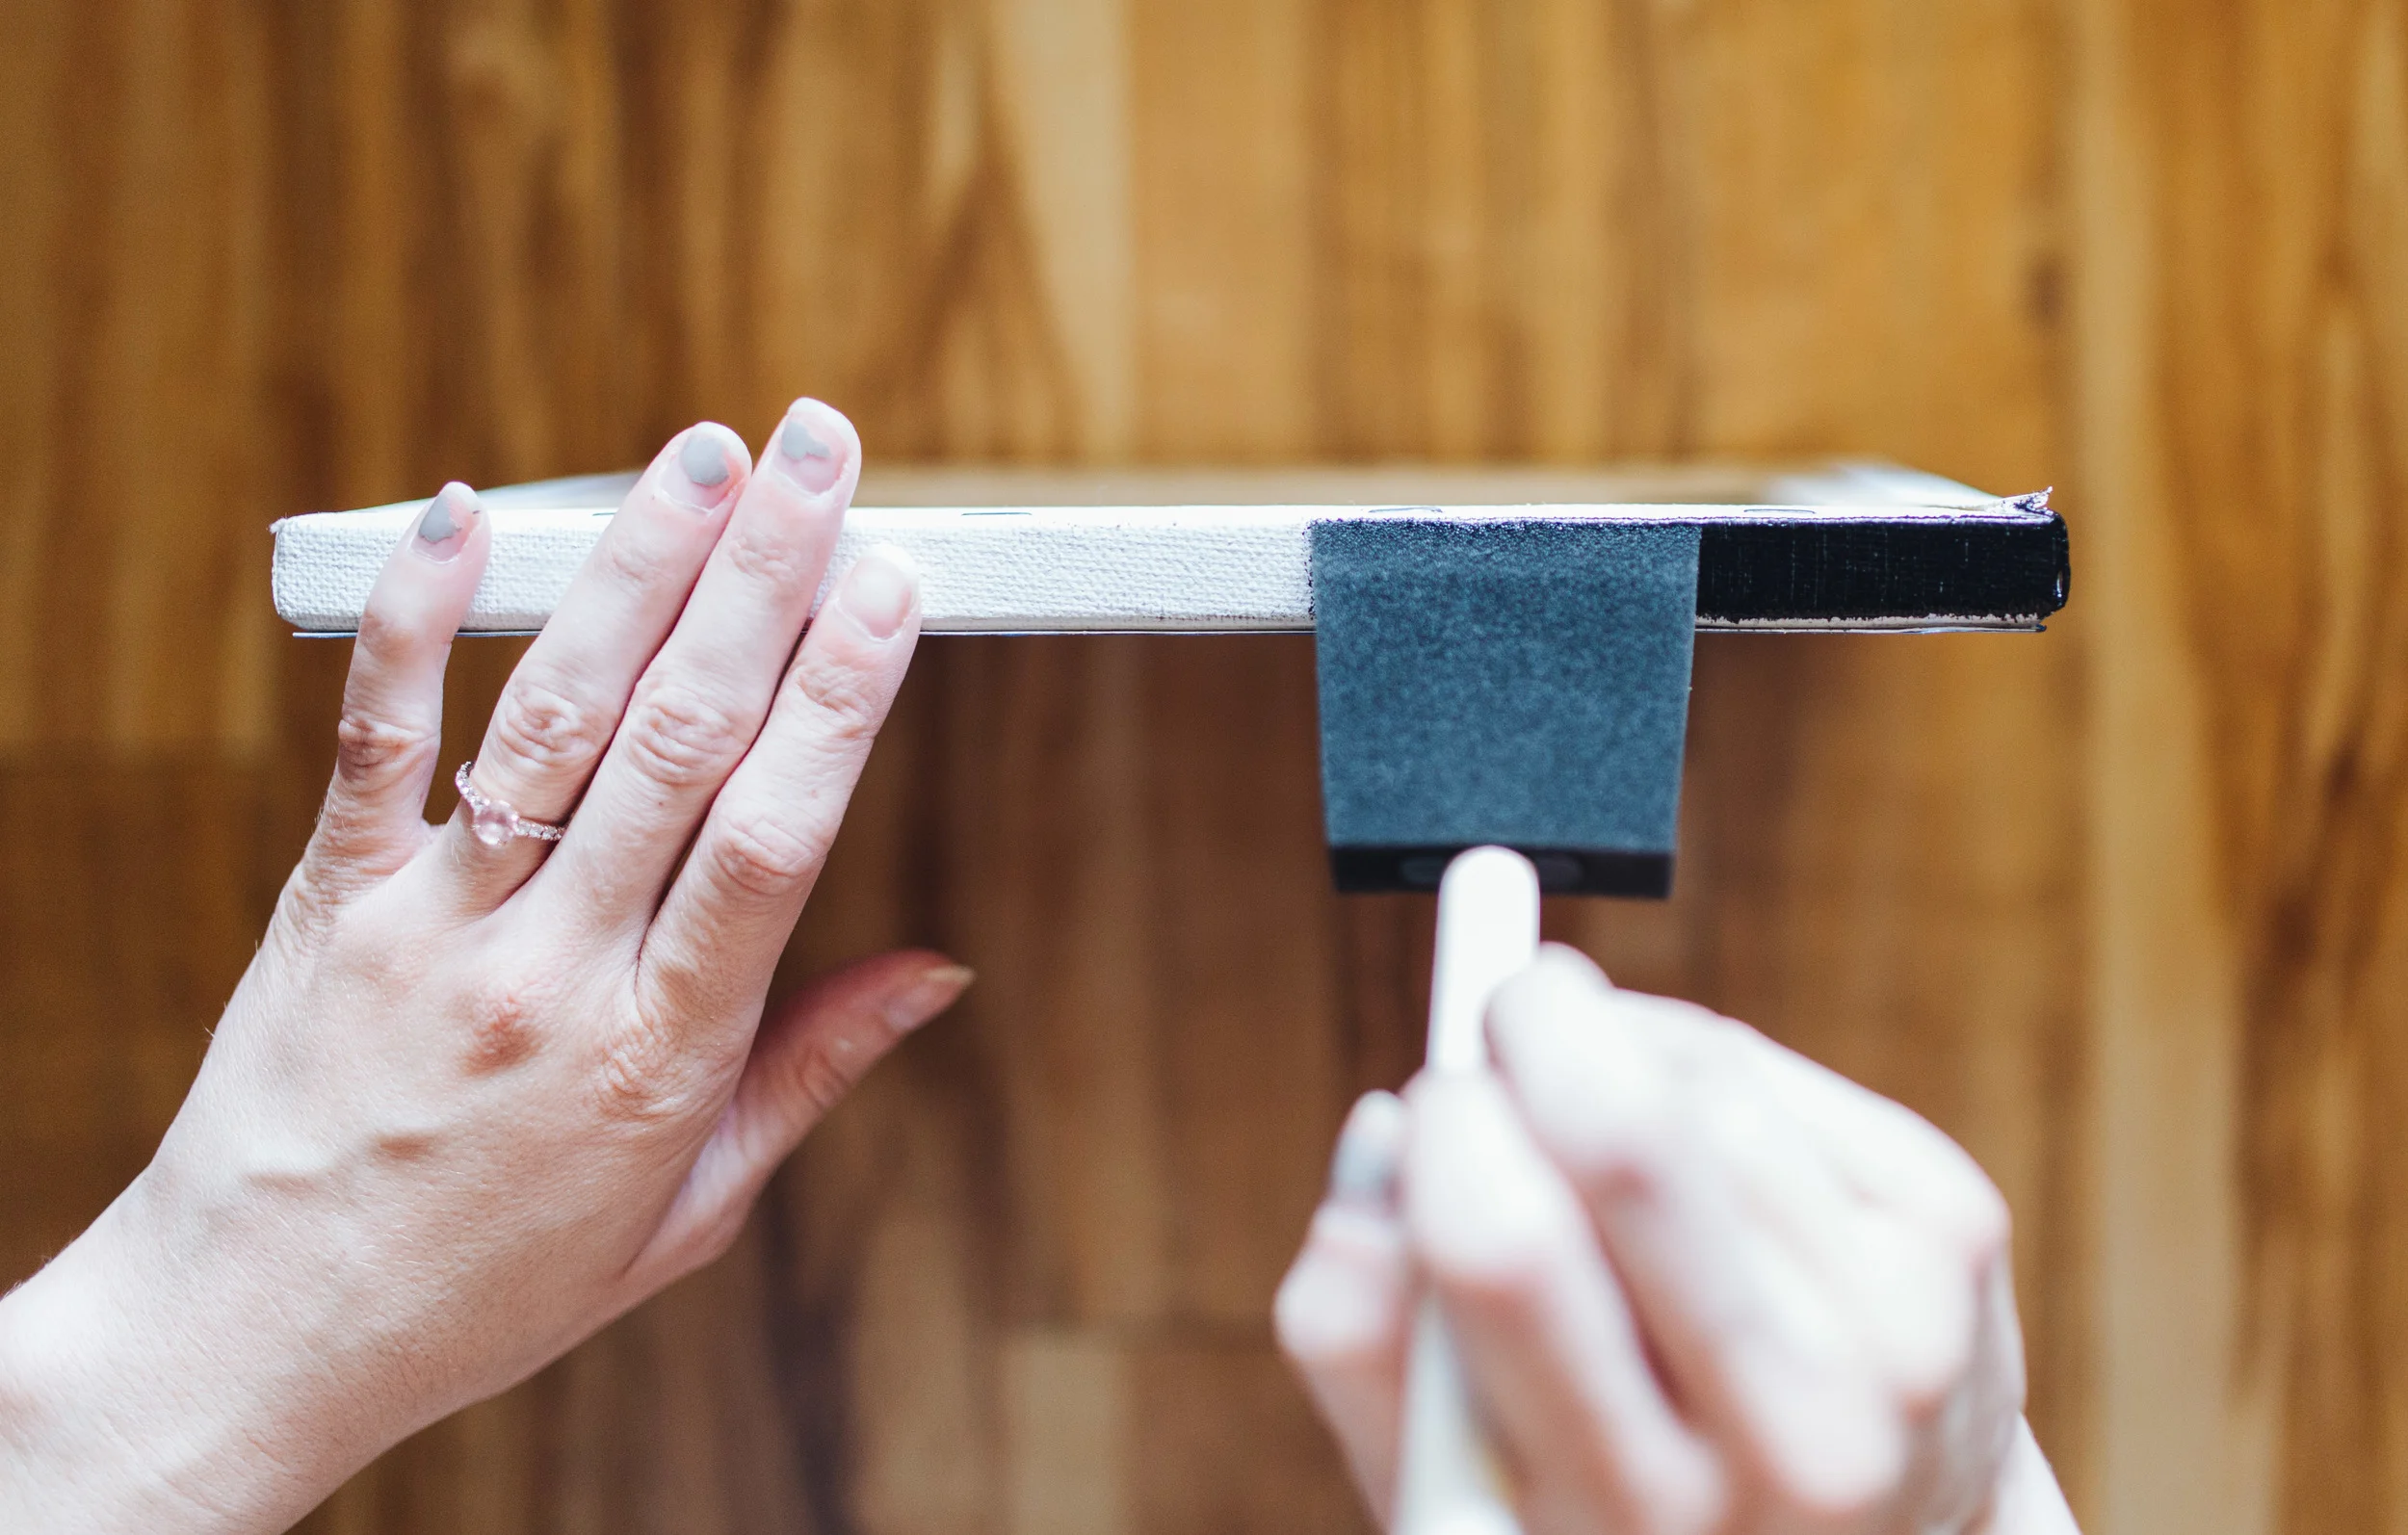
This is where that other canvas comes in handy, and it’s what makes this project a little different than just a photo glued onto a canvas. The purpose of this step is to transfer the texture from the canvas into the Mod Podge that you’ve put on top of your photo. In order to do this, you just need to flip the canvas and press it right on top of your canvas with the print glued to it. Make sure to press these two canvases together pretty tight. We usually run our hands along the back and the sides as hard as we can in order to make sure that it was pressed together everywhere.


You can carefully peel the two canvases apart now and see what you’ve done. There’s a good chance that you may have a section on the canvas with the print where the texture did not transfer. In that case, you can take your blank canvas, target those spots, and re-press them in order to fix it.
Voila! Now you have a really gross looking, spotty white photo! Wait, that’s not what we signed up for. Your mom is going to look at the canvas, look at you, and then look back at the canvas, then she’s probably going to give you a big hug anyway because she loves you no matter what. Remember that section about looking at me? It will all be okay? That all applies to this section as well. If you’ve already written your mom that brilliant note then take a minute and have some iced coffee because this is another one of those drying moments. Again, you can speed it up with a blow dryer if that strikes your fancy too, but once it starts to dry it will begin to clear.

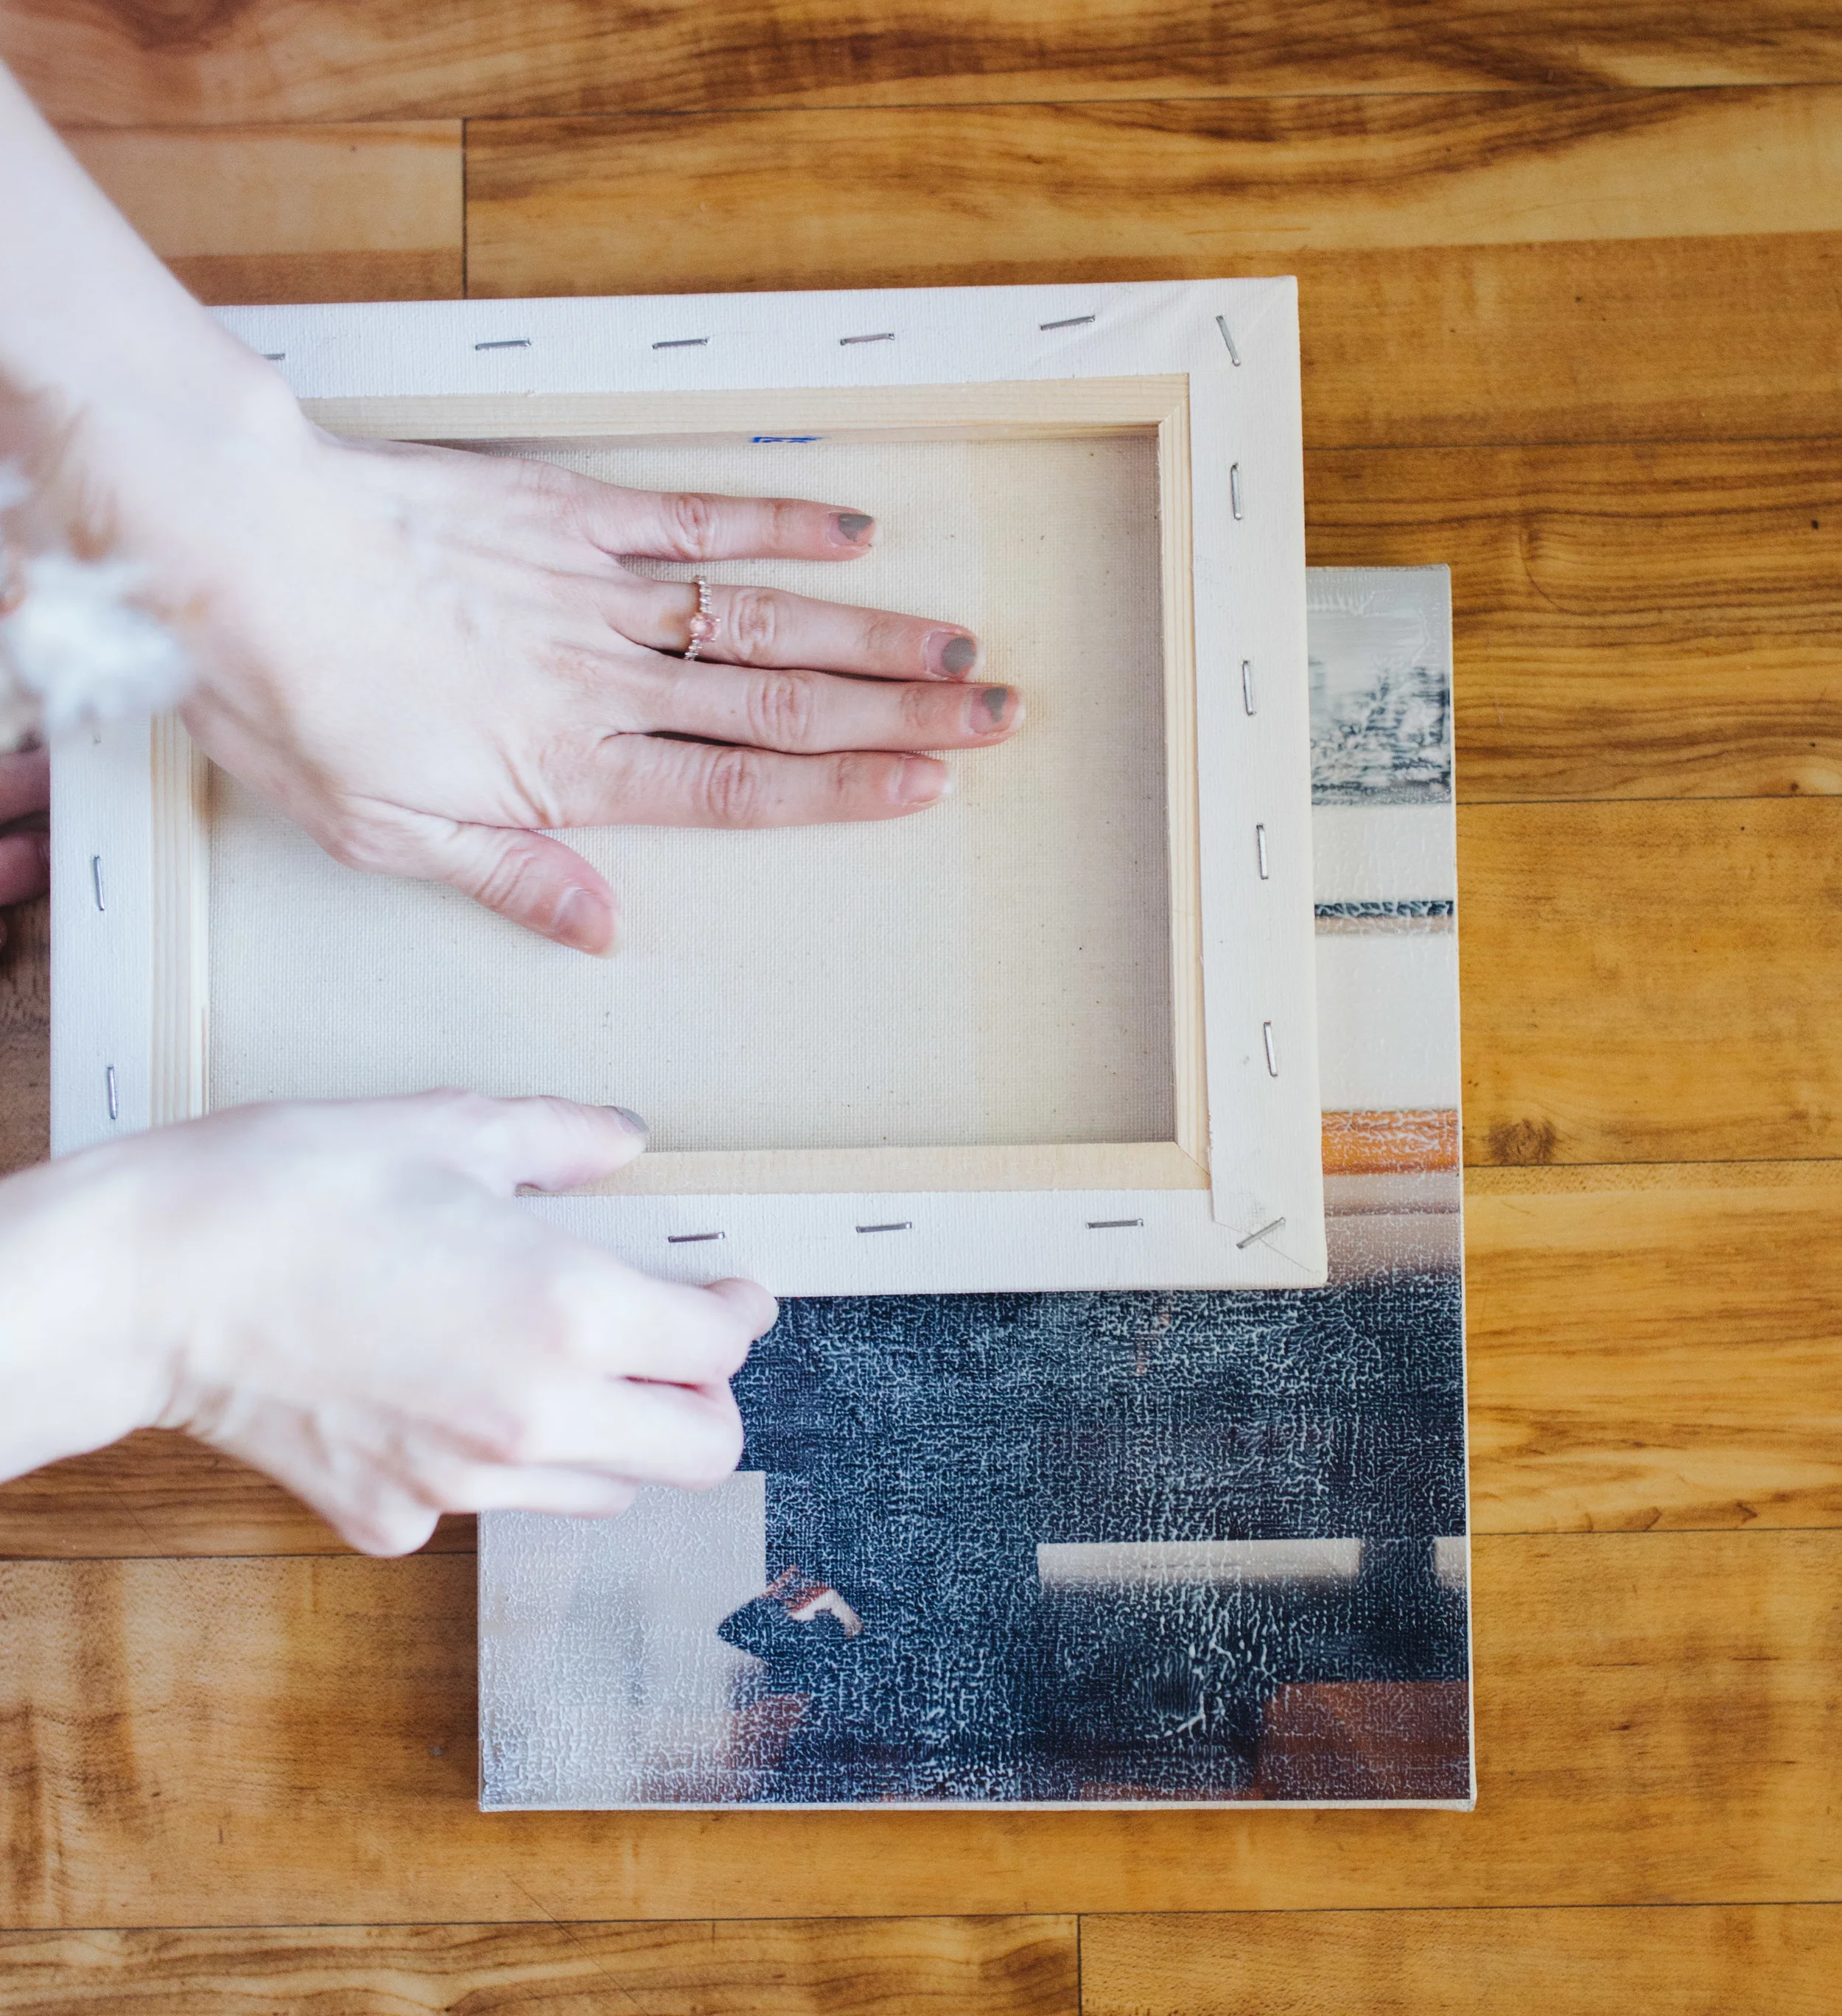
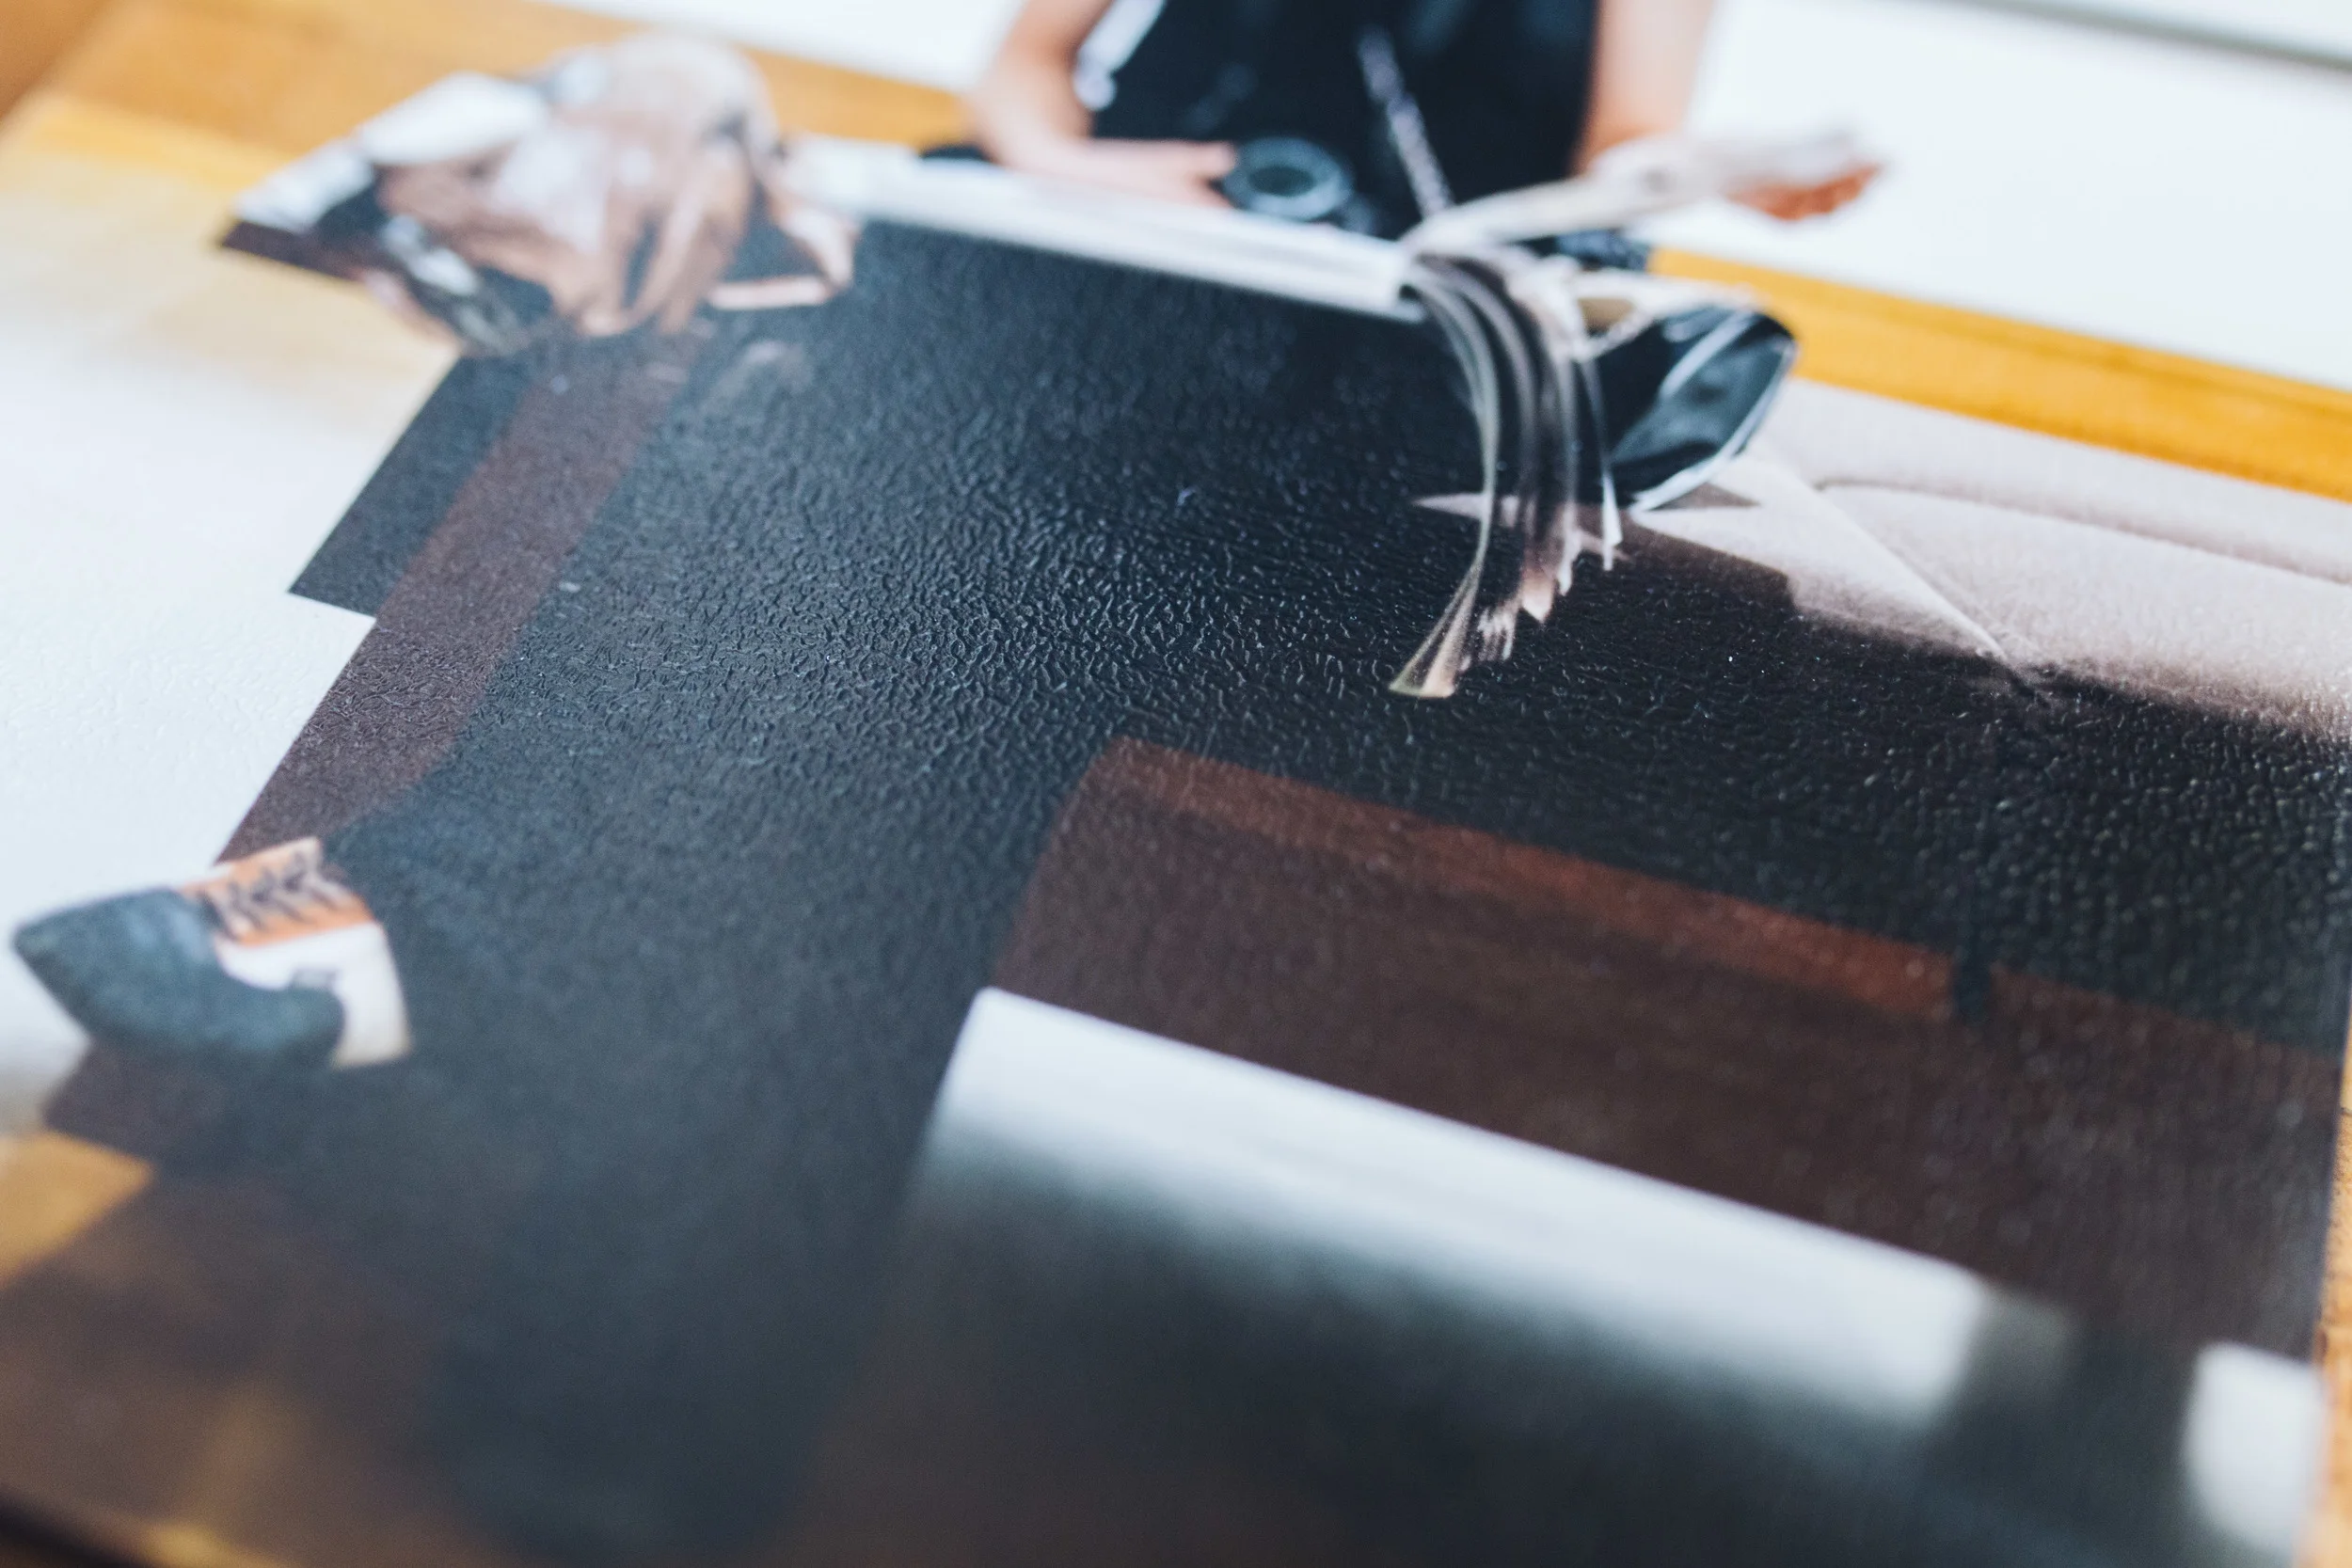
Here's a close-up of that texture you just built into it!
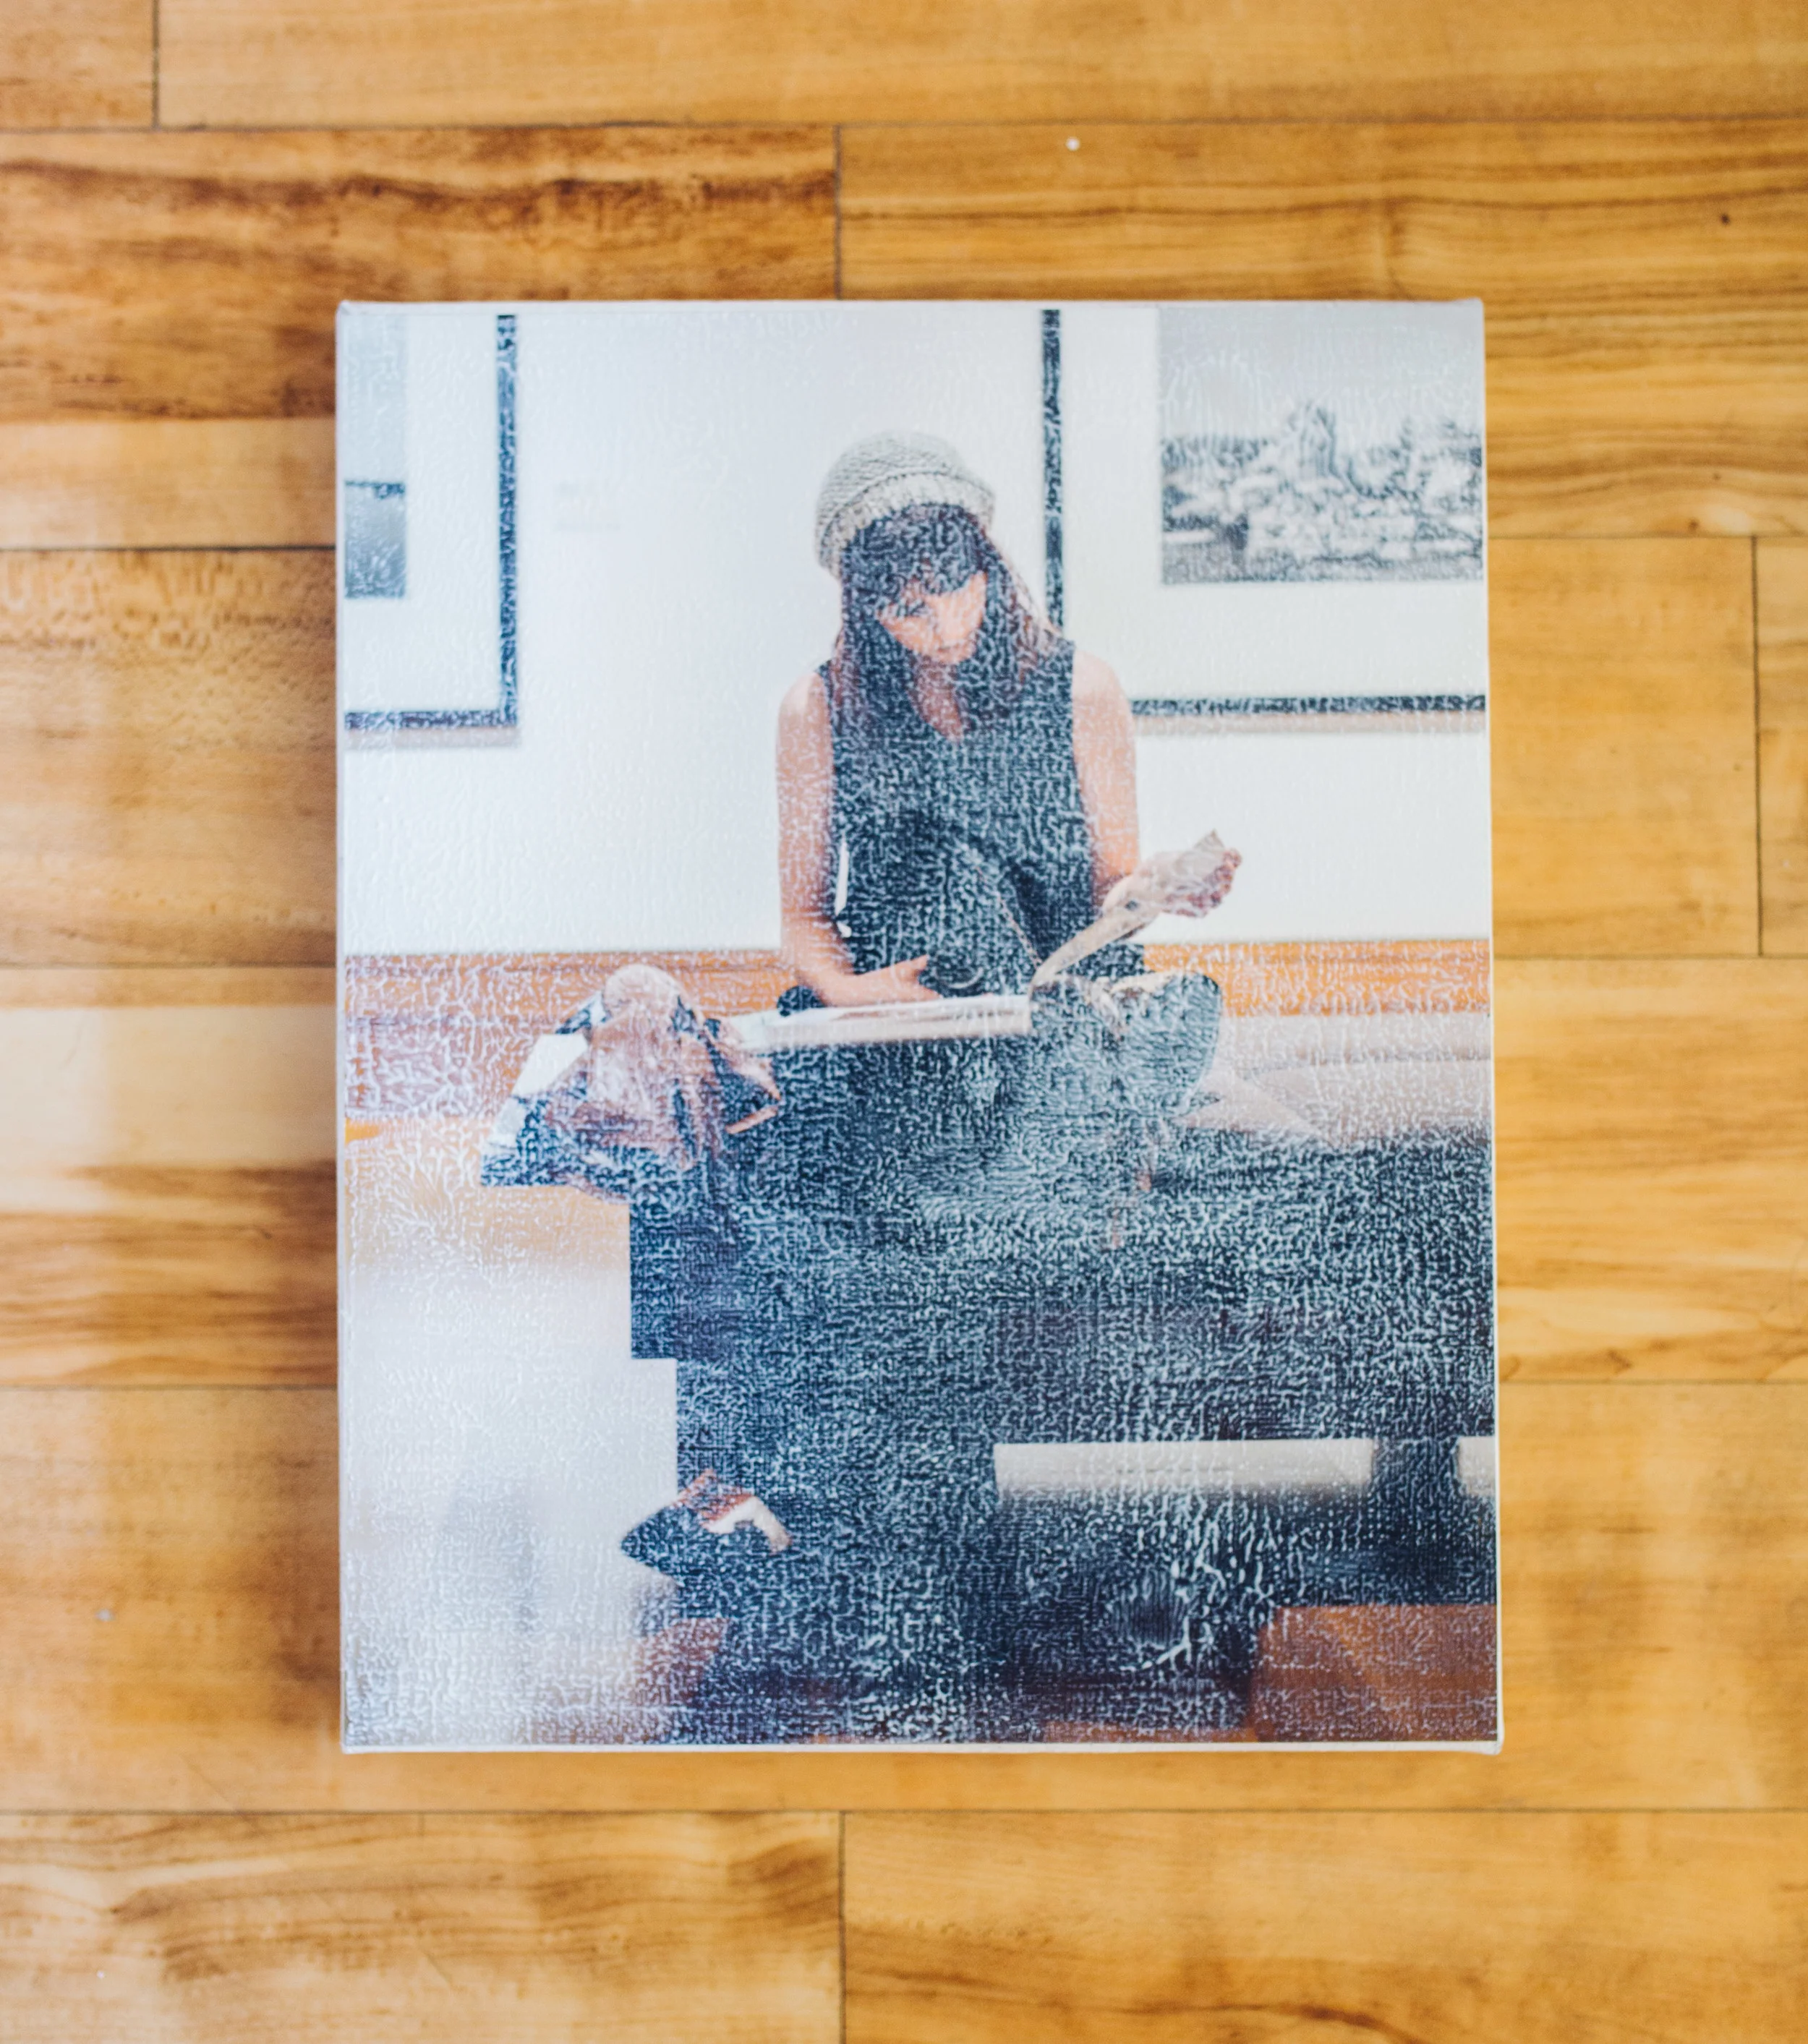
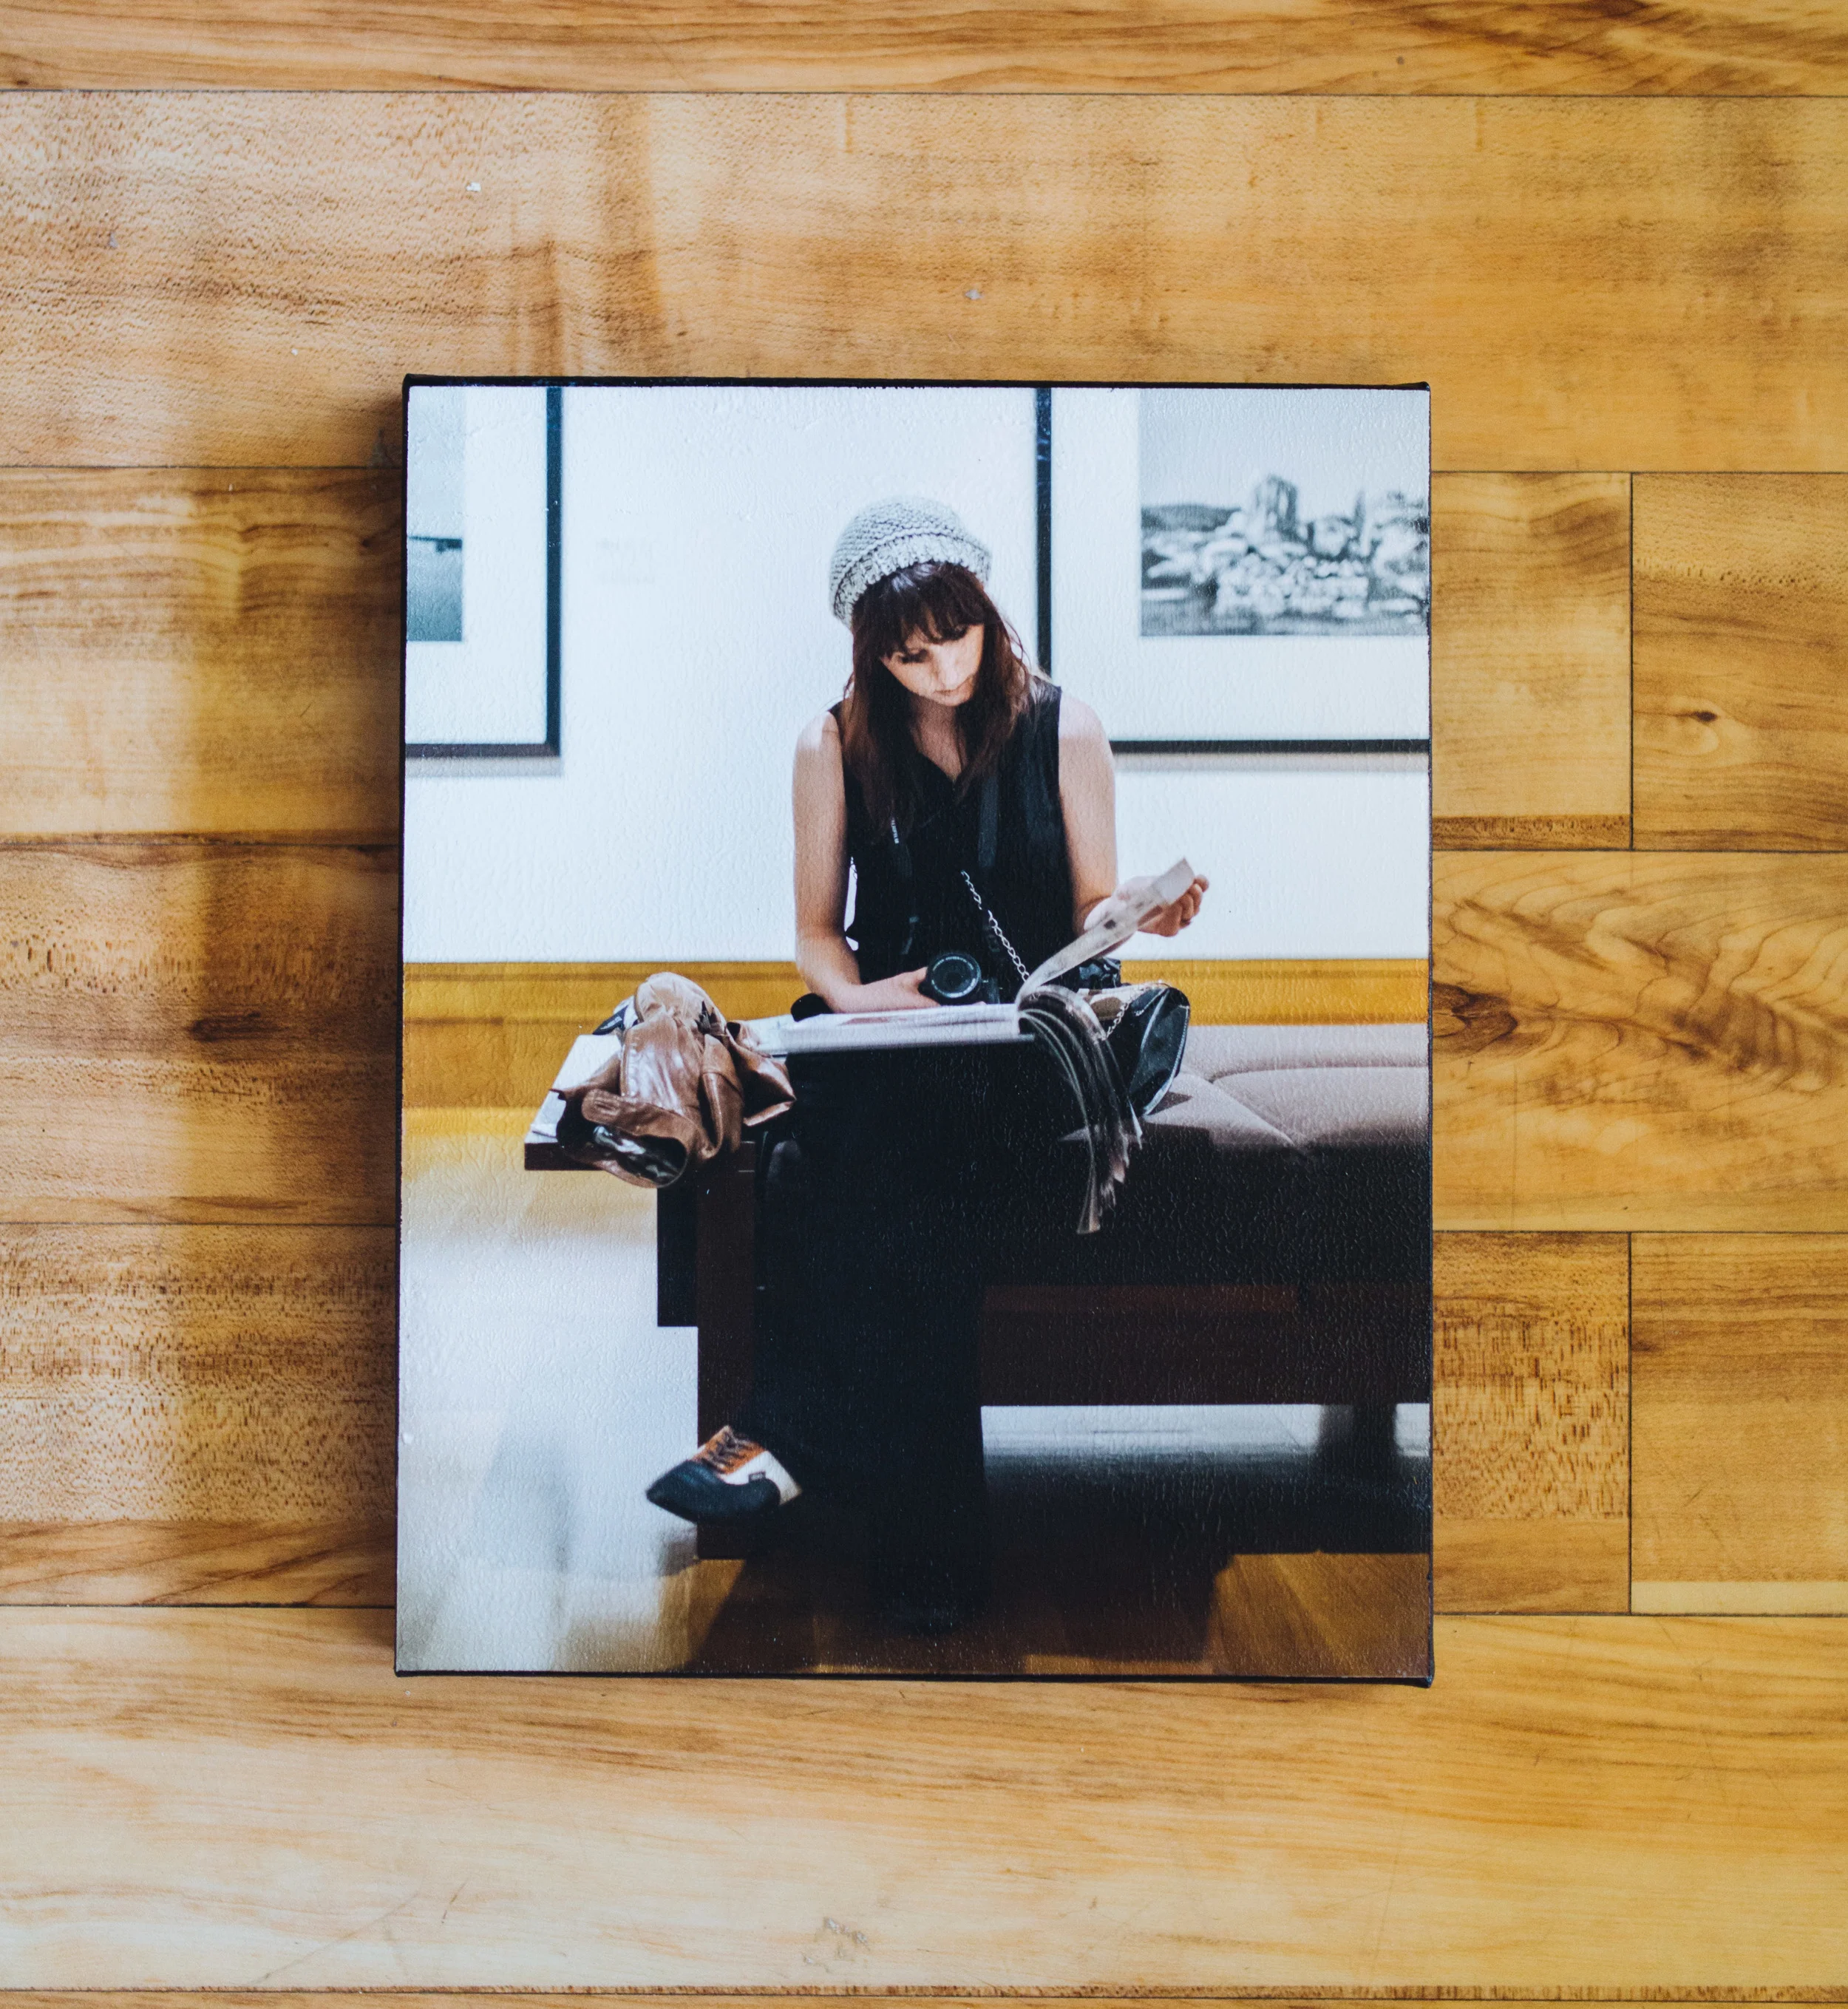
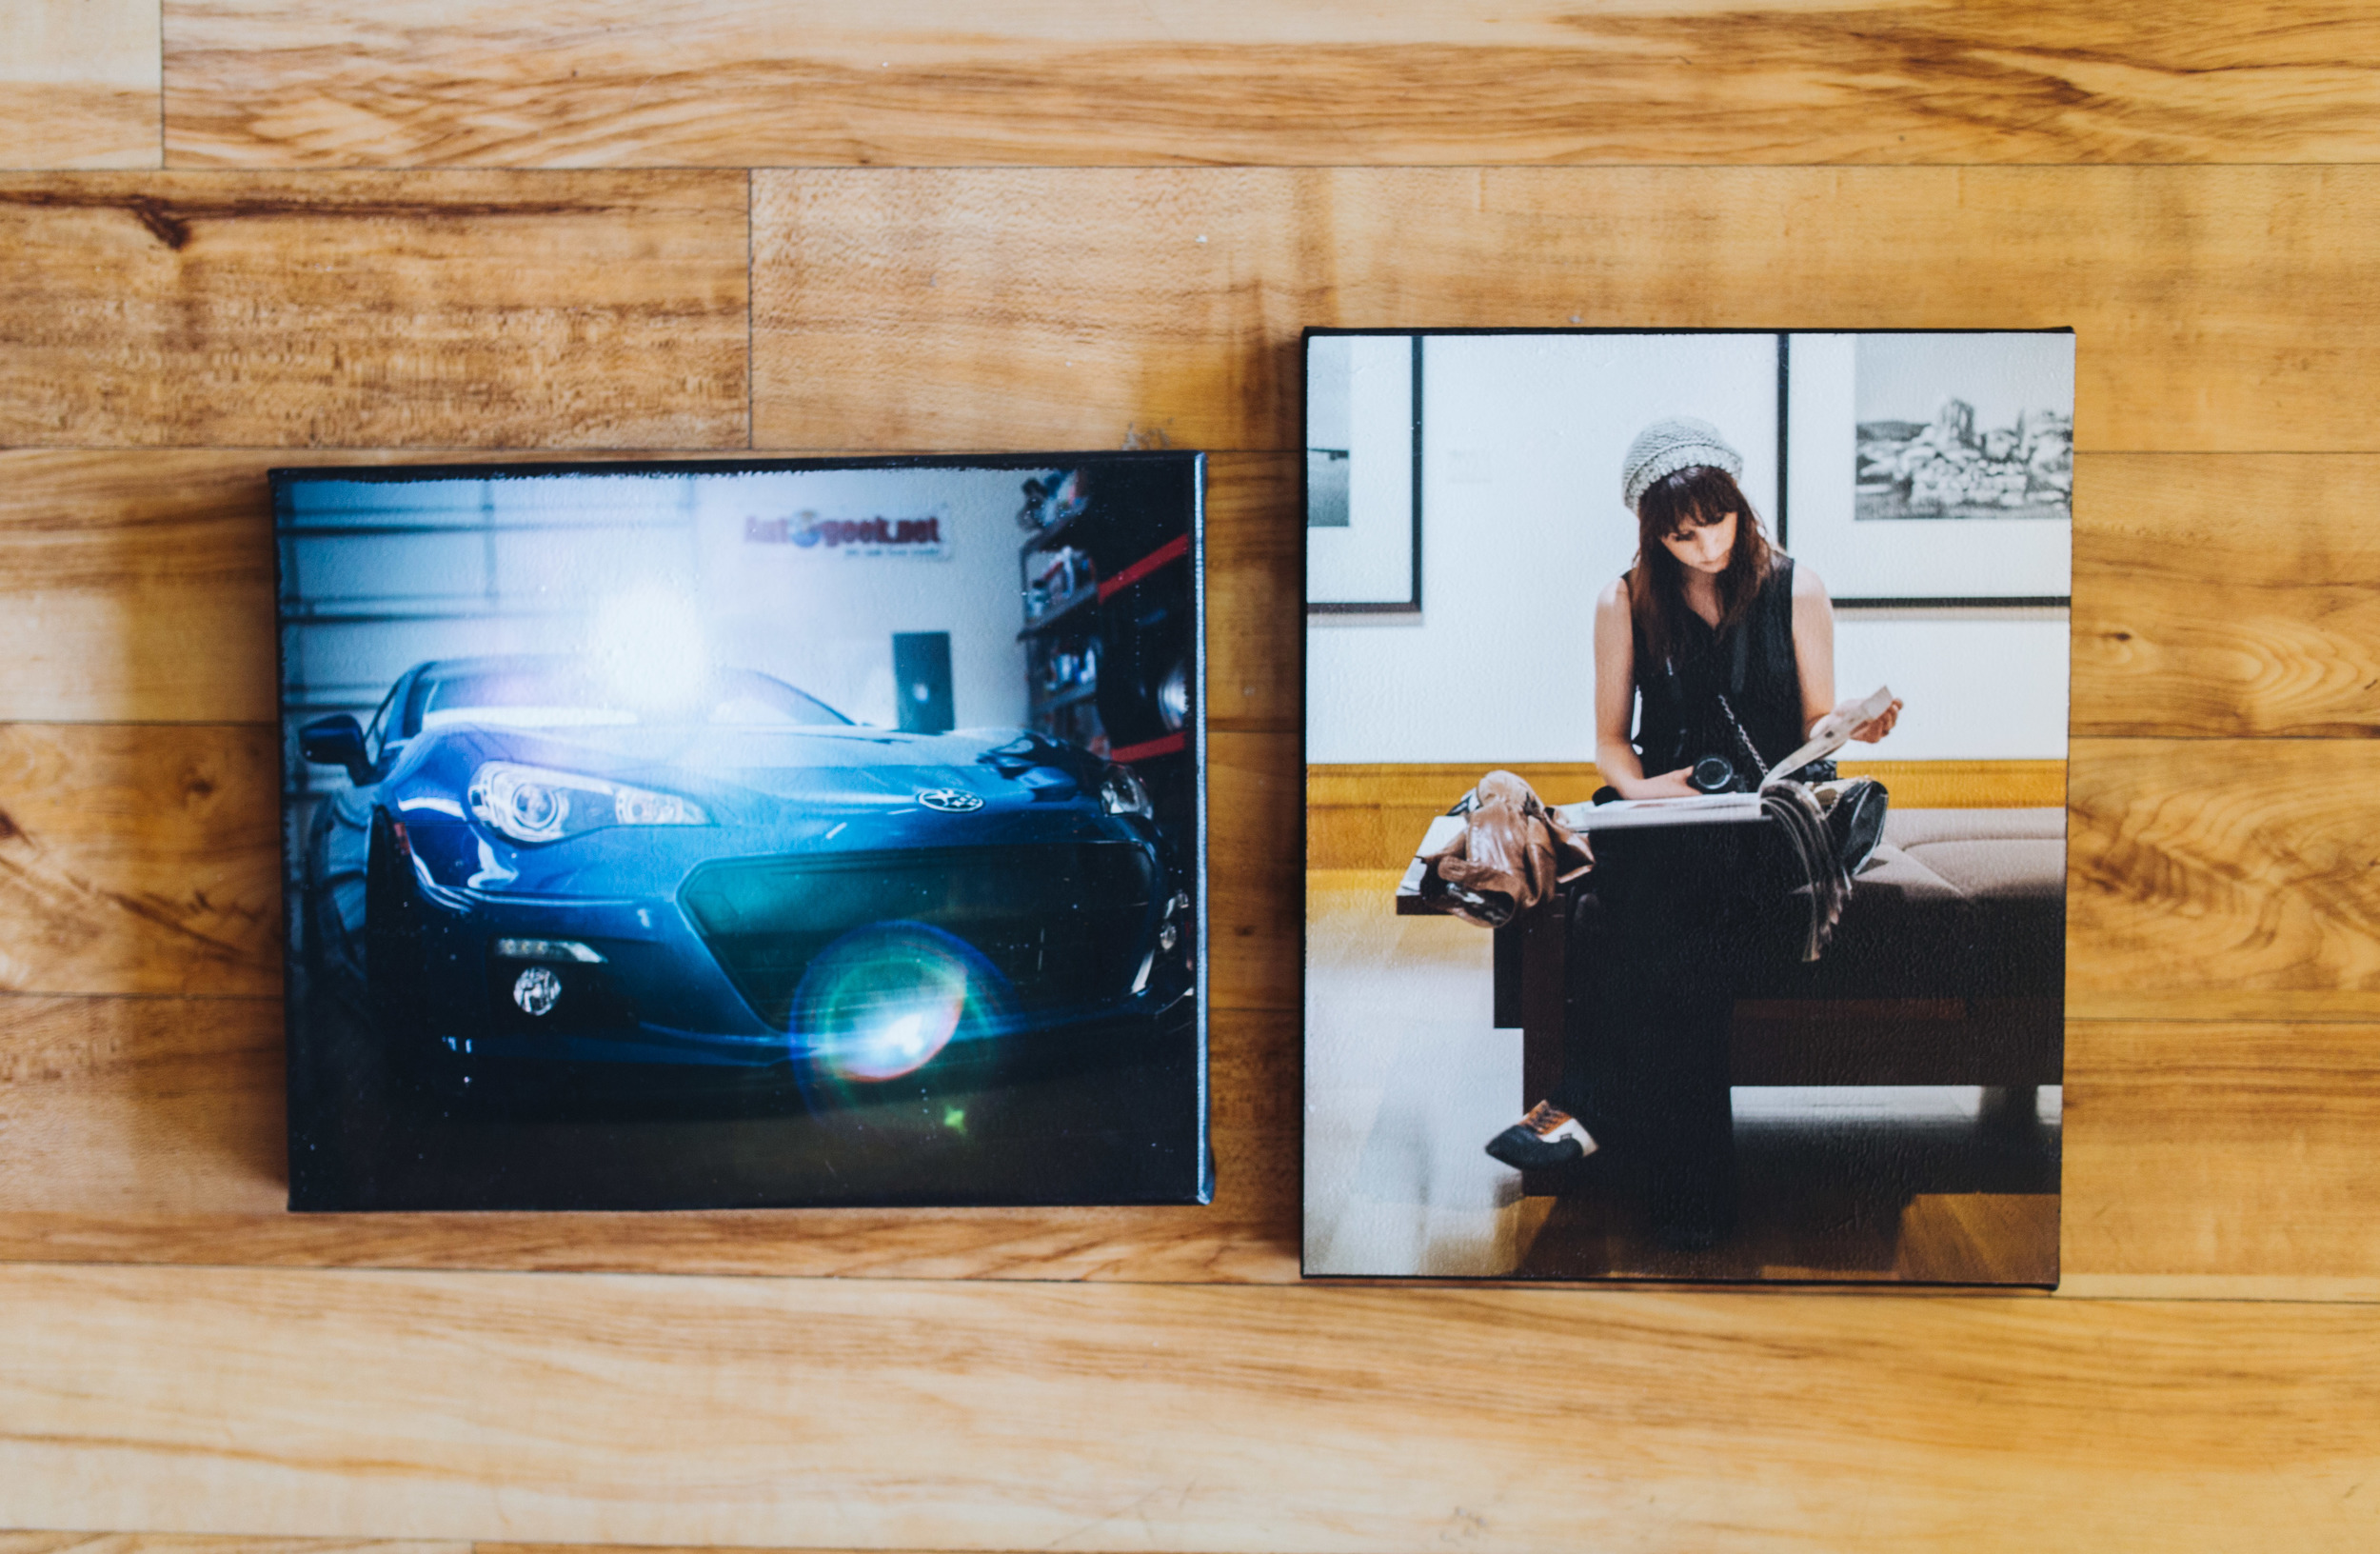
Now that it’s all dry it should be looking pretty sweet! If you’re happy with it at this point then you can call it a day and pull out the wrapping paper. There’s another step we like to take after this point though, and that is painting around the edges. I like using black paint because it works for most photos, but you can feel free to use whatever color you think would complement the photo. On this photo we taped off the edges with the blue painter’s tape so that we could get straight, clean lines. This isn't a step you have to take. We have an example below of one we had done without it. Once that is all taped down you can use your other foam brush and some of your acrylic paint and start working your way around the edges. When you’re done with that it’s time to let it dry.
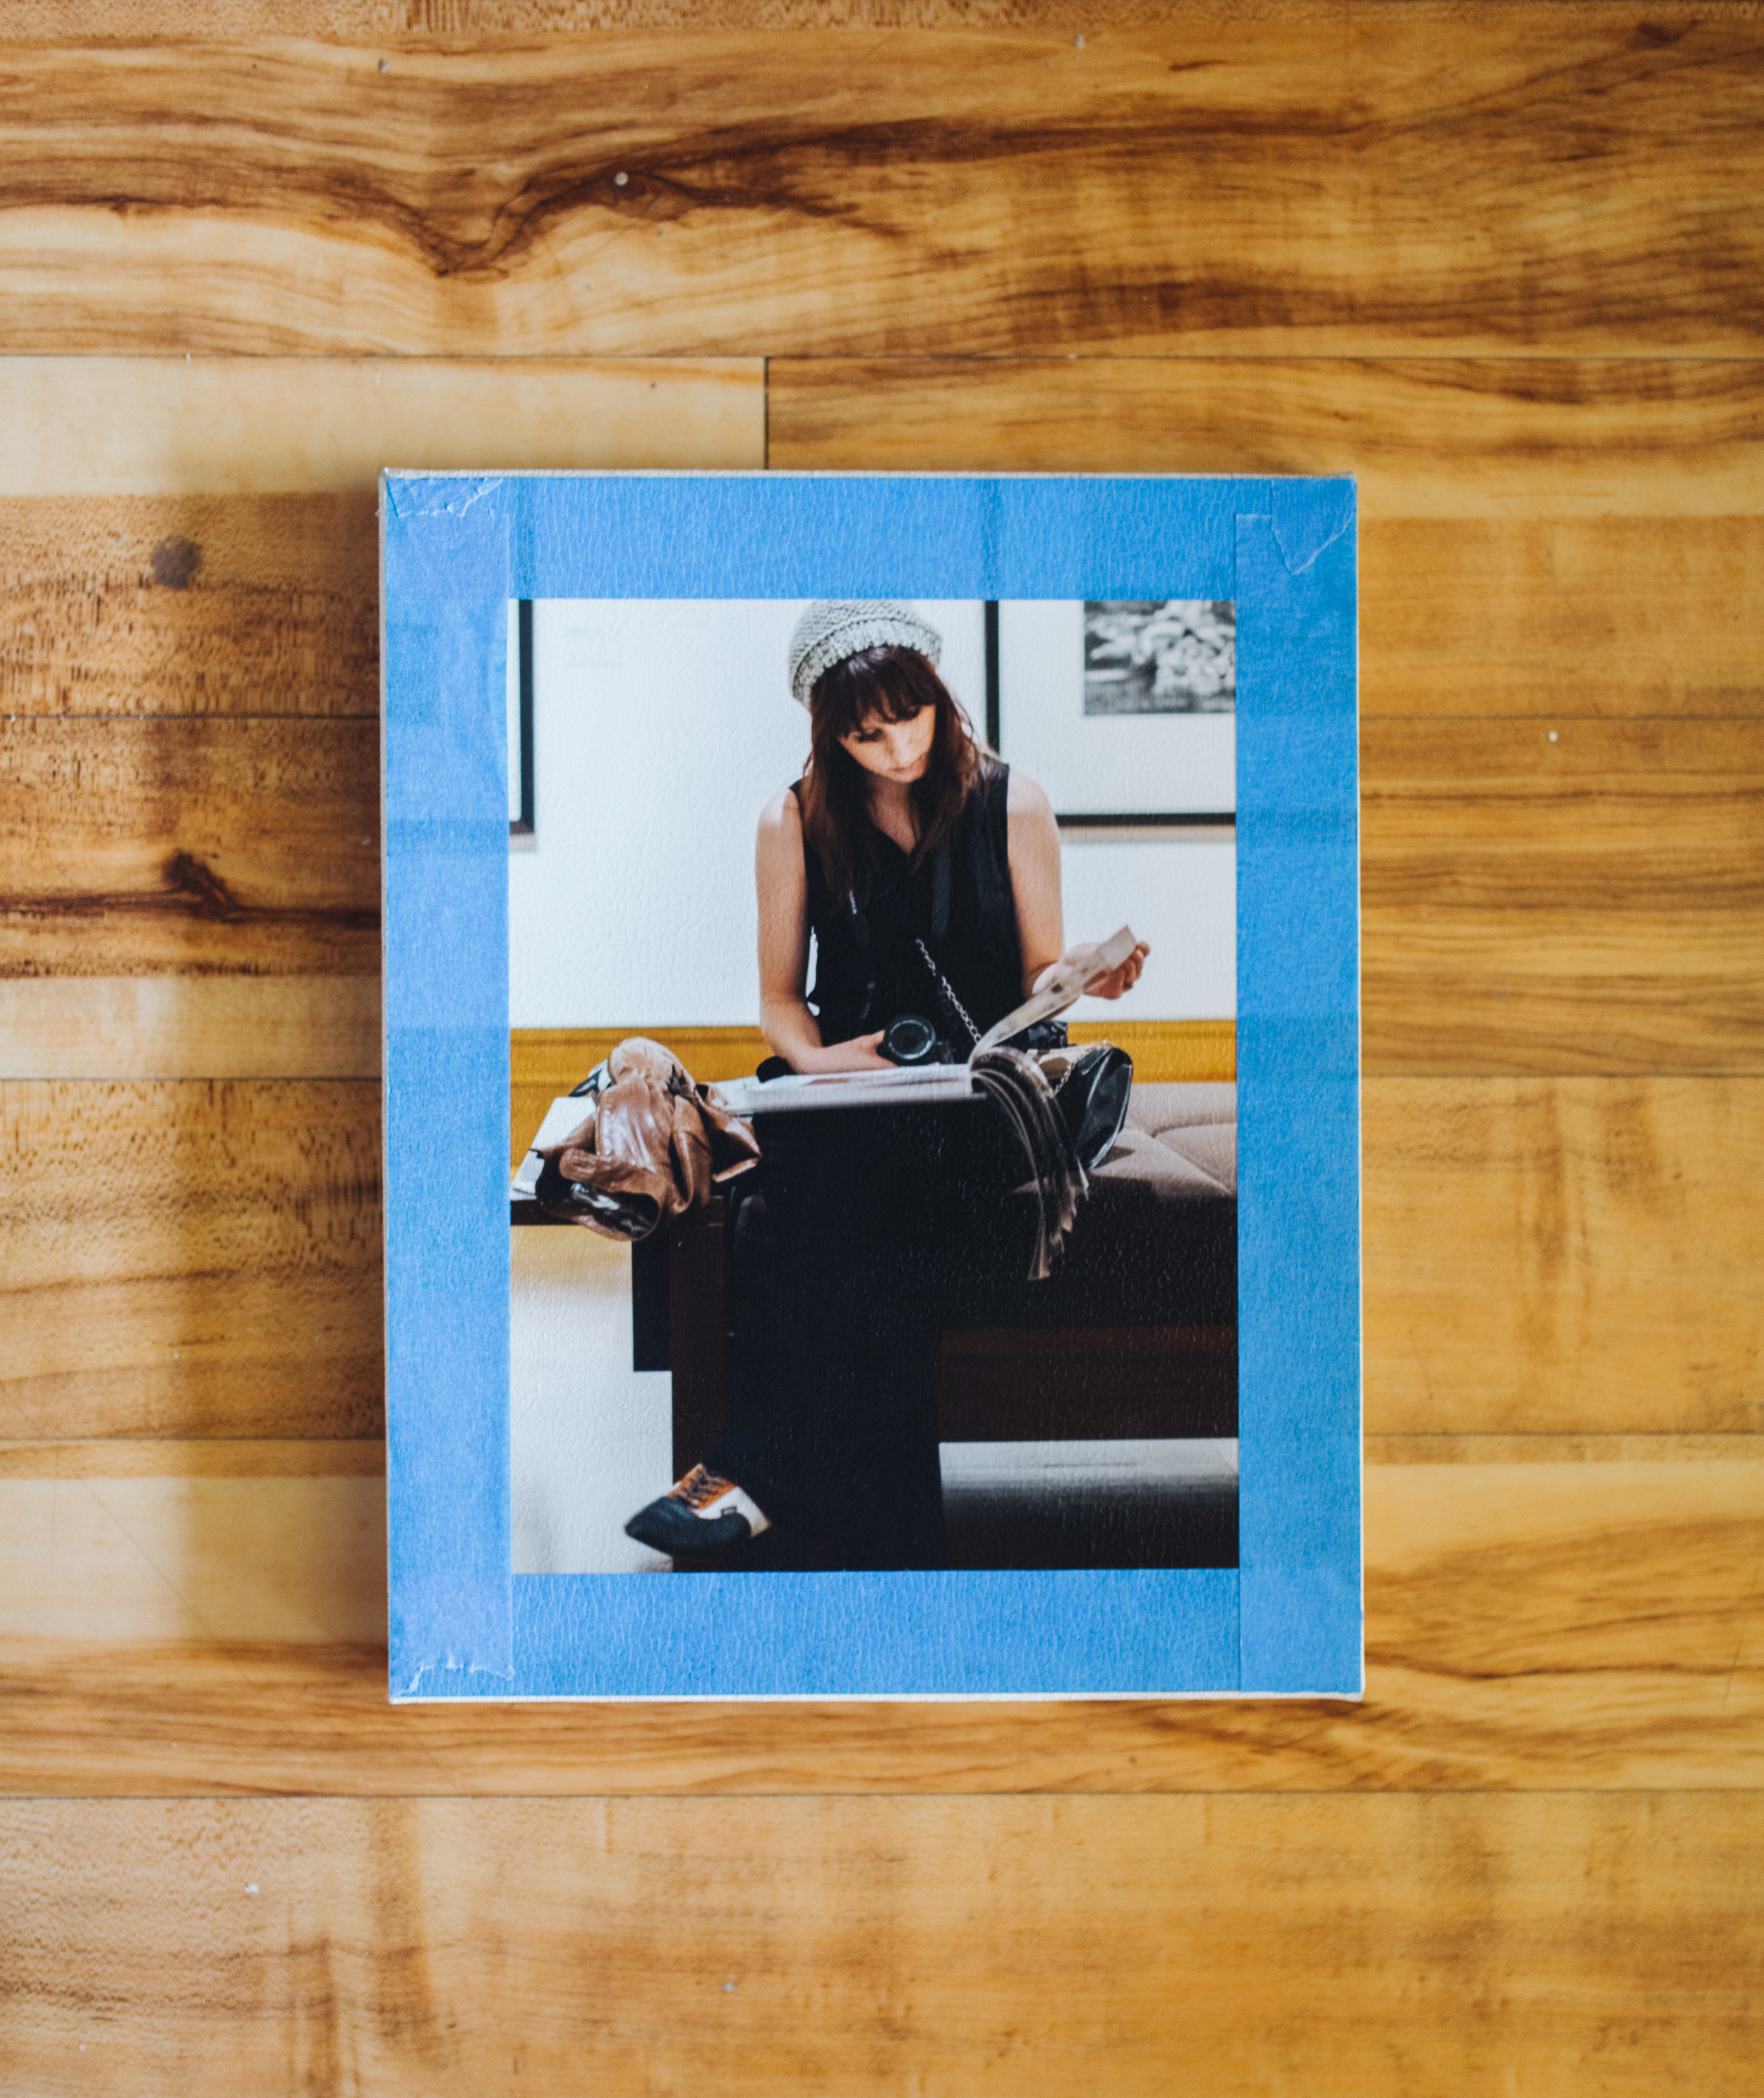
Here's that example without the painter's tape. We just use one of the foam brushes to touch up the edges. This has more of a rugged look to it. It’s really up to you on how you’d like the final product to appear.

Once it’s completely dry you can remove that painter’s tape if you used it. That’s it. You’re all done!
These are fun to hang up on the wall with a little nail, or you can prop them up against something on a shelf. Best of all, your mom will love it, and you will continue to be their favorite son or daughter.